Dealer Choice User Manual
| Copyright © Invenzzia Group 2008-2009 |
| Available under the terms of license: GNU Free Documentation License 1.2 |
| Generated: 04.01.2013 |
Table of Contents
- 1. Preface
- 2. Login Window
- 3. Main Window
- 4. Customers
- 5. Vendors
- 6. A & D
- 7. Proposals
- 8. System
- 9. Accounting
- 10. Reports
- 11. Help & Communications
- 12. Electronic Order Interfaces
- Table of Contents
1. Preface - 2. Login Window
Next »
1. Preface
This is the DealerChoice Help manual. The Chapter names are links to sections of the document.
Click on any of the links to go to that section of the help document.
- Table of Contents
2. Login Window - 1. Preface
« Previous - 3. Main Window
Next »
2. Login Window
The Login Window
From your computer desktop, open Windows Internet Explorer and browse to the URL defined during system setup. You will see the Login Window. Before you can access your system, you must enter a valid username and password.
Usernames are not case sensitive and can be entered with any combination of upper and lowercase letters. Passwords are case sensitive. You must type your password exactly as it was entered into the database by your System Administrator. Case sensitive means that an uppercase letter is different from a lowercase letter.
The passwords "Password" and "password" are not the same.
Press the 'Enter' key or click on the 'GO' button and your login information will be verified. If the username and password entered are valid (exist in the User database) you will see the Main Window. If not, you will see an error message noting that the information you entered is invalid. You must enter your username and password again or check with your System Administrator to verify your login credentials.
Login_Window.JPG
The Database selection box allows you to choose which of your databases you want to log into. Use the database selection box to select which database you want to log into. Once you select a database, this selection will be preserved for you until you change it again during the login process.
Each site consists of two databases, a production database and a test database.
The test database is the database that you used during your training (pre-live) period. This database remains available after you go live. This database is intended for you to use to train new employees or to use as a practice area. The test database is denoted by 'TEST' at the end of the database name. Your live database is your site name.
In the example above, the user will be logged into the test database called "staging-dev26_test".
Upon the entry of valid login information you will be presented with the 'Main' window.
- Table of Contents
3. Main Window - 2. Login Window
« Previous - 4. Customers
Next »
3. Main Window
The Main window displays the menu navigation options that you have access to. You can navigate to all options that your permissions settings allow (see 'Permissions').
If a menu item appears in the menu bar then you have 'View' access to this menu item. You may click on any available option to begin your work.
After clicking on a main menu item, you may see a submenu appear. If a submenu item displays with a right arrow, there is another set of menu options under that item. Placing your mouse on a menu item that has a submenu will cause the submenu options to appear. You may click on any menu option to access that option.
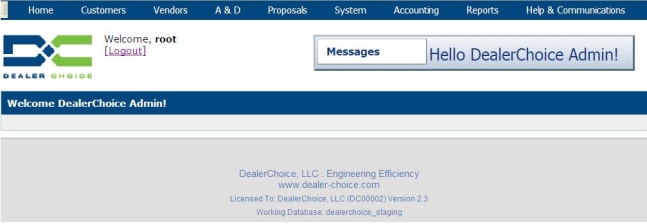
The Home menu option can be clicked on at any time. This option will clear your browser window and display the Main window. You may also click on the DealerChoice logo for the same effect.
DealerChoice allows you to send messages to all members of a Group. These messages are accessed by clicking on 'Messages' in the upper right side on the Main Window. To access the Message system, click on 'Messages' in the Main window and the Messages window will open. You can read, write, delete and reply to internal DealerChoice messages from here.
To the right of the DealerChoice logo is the [Logout] link. To properly logout, click on 'Logout' under the 'Welcome' greeting and the system will log you off.
Do not use the 'X' in the top right hand corner of your browser. This will close your browser but leave your session open so that it appears to DealerChoice that you are still logged in.
DealerChoice will automatically close (logout) any sessions that are left open for an extended period of time. This time out period can be set by System Administrators in System Configuration. The time out feature is a global setting in System Configuration. This setting does not have an individual user time out feature.
Upon logging out properly, your browser will return to the Login window. You may then close your browser.
- Table of Contents
4. Customers - 3. Main Window
« Previous - 4.1. Customer List
Next »
4. Customers
To access your Customer List click on the Customers menu option in the main menu bar at the top of the screen. There are three menu items under Customers; Customer List, Receive Payments and Customer Credits. Under Customer List there are two options; Create a New Customer and Search for a Customer.
The Receive Payments option is only available to users that have permission to receive customer payments (See System Settings & Configuration - Users - Permissions).
CustImage1.jpg
- 4. Customers
4.1. Customer List - 4. Customers
« Previous - 4.1.1. Create New Customer
Next »
4.1. Customer List
The Customer List displays the customers saved in your customer database. To access the Customer List, click on Customers, Customer List.
CustomerList_1.JPG
There are several icons available in the Customer List window.
CustomerList_Icons.JPG
| Customer List Icons | Description |
|---|---|
| Create a new customer | Click on this to create a new customer entry |
| Search for a customer | Click on this to search your customer database |
| Receive a customer payments | Click on this to receive a customer payment |
| Export customer list to a spreadsheet | Click on this to export your customer database to a spreadsheet |
Each Column title in the customer list is underlined. Any column title in any DealerChoice list that is underlined may be clicked on to sort the list by that column.
You do not have to run additional sort options to change the way your list is displayed. If you click on the Customer Name column title,
your list will automatically be displayed in ascending order. Click the Customer Name column title again and your list will be displayed
in descending order.
Below is an example of the customer list displayed in Customer Name descending order.
CustomerList_Descending.JPG
- 4.1. Customer List
4.1.1. Create New Customer - 4.1. Customer List
« Previous - 4.1.2. Customer Search
Next »
4.1.1. Create New Customer
To create a new customer, you can select Create a new customer from the menu option or you can click on the icon to create a new customer from the Customer List.
Menu option:
New_cust_menu_option.JPG
Icon option:
New_cust_icon_option.JPG
Both options will display the Create A New Customer window.
Edit_new_cust.JPG
When creating a new customer entry, you will only see 4 tabs (General Info, Payment Info, Contact Info and Location Info). There are 2 more tabs (Discounting and Customer Stats) that will appear after the customer entry has been saved to the database.
General Info tab
The General Info tab stores the billing address information for your customers. Required fields are noted by the asterisk following the field name. After changing any customer information always click on the 'Update Customer' button to save your changes. The example above is an example of creating a new customer.
The save button is named 'Add Customer' when creating a customer record. It will appear as 'Update Customer' on an existing record.
The only required fields are the Customer Name, City, State and Country, as noted by the asterisks, to create a customer entry.
| Field Name | Field Description |
|---|---|
| Customer Name: * | Enter the customer name |
| [Add Second Name] | You may enter a second name for your customer. When searching on the second name, the search results field will display the primary customer name under which the second name was found. |
| Street: | Enter the customers primary billing address |
| City: * | Enter the customers City name |
| State: * | Select the customers State name |
| Zip: | Enter the customers ZIP or Postal code |
| Country: * | Select the customers country name |
| Phone: | Enter the customers phone number |
| Fax: | Enter the customers fax number |
| Customer No: | You may assign a customer number. If an existing customer number is entered here a warning will alert you that the number entered is in use. |
| Customer Notes: | You may enter any text you want concerning this customer. The information entered in the Customer Notes field will not appear on any customer facing documents. |
Although the Customer Name is the only required field to create a customer database entry, as much information as is available should be entered in the General Info tab.
If you have all the customer information that you are going to enter be sure to click on the 'Add Customer' button to save your changes.
Payment Info Tab
Cust_payment_info.JPG
The Payment Info tab contains information regarding the payment information for this customer.
There are no required fields on the Payment Info tab.
| Field Name | Field Description |
|---|---|
| DUNS Number: | Enter the customers Dun & Bradstreet number |
| Customer Account Number: | You may assign an account number to your customer |
| Required Deposit Percentage: | Enter the amount of deposit that you require from this customer to process with cutting purchase orders. There is a System Configuration field that allows you to set the default customer deposit required. If this field is populated, that value will be presented in this field when you are creating new customers. |
| GSA Account: | This flag allows to you define this customer as a GSA customer. If this flag is set, then US tax rules will not be invoked and only discounts that are defined as GSA discounts will be allowed to be used for this customers proposals |
| Customer PO Required: | If this flag is set, then the Customer PO field in the Project info tab on Proposals is expected to be filled in. If it is not, the user will get a warning during proposal finalization that the customer po is required. |
| Customer Payment Terms: | The number of days that this customers invoices are due. This will affect the Due Date field that is printed on customer invoices. |
| Customer Credit Limit: | Enter the maximum amount that you are extending to this customer. Existing purchase orders and outstanding invoices are used to validate the customer remaining credit. If this limit is reached then users will get a warning when trying to create purchase orders that exceed the available credit. |
| Late Invoice Reminder: | If this field is checked, a late invoice reminder will be sent to your customer if the original invoice was emailed or faxed from DealerChoice. |
| Apply Finance Charges: | If this field is checked, finance charges will be applied to outstanding invoices. |
| Tax Exemption Number: | Enter your customers tax exempt id number. Sales tax will not be applied if a tax exemption id number is on file. |
The example above shows a new customer entry being created. The save button is titled "Add Customer" until the record has been saved. The save button will be titled "Update Customer" on existing records. You can save your new entry by clicking on the "Add Customer" button from the General or Payment tab.
Contact Info Tab
Cust_contact_info.JPG
The Contacts tab contains all your contact information for this customer. There are no required fields on the Contact Info tab and you can add as many customer contacts as you need. You can only enter a single contact name if you are creating a new customer. Once you save your customer record, you can add additional contacts. Customer contacts can be used as the contact name in proposals.
| Field Name | Field Description |
|---|---|
| Contact Name: | Enter the name of the contact person |
| Title: | Enter the contact's title |
| Phone: | Enter the contact's phone number |
| Phone 2: | Enter a second phone number for the contact |
| Mobile: | Enter the contact's mobile phone number |
| Fax: | Enter the contact's fax number |
| Email: | Enter the contact's email address |
When you are finished entering the contact information, You will have to go back to the General Info or the Payment Info tab to click on the Add Customer button (When adding a new customer).
If this is an existing customer, The Contact Info tab will have an Update Contact and a Delete Contact button as shown below.
Cust_contact_info_exist.JPG
Location Info Tab
Cust_location.JPG
The Location Info tab is for storing multiple or alternate addresses for this customer. You can only enter a single location if you are creating a new customer. Once you save your customer record, you can add additional locations. If your customer has more than one location (building or site) you can add these addresses here without creating a separate entry in your Customer database.
Address information stored as a Customer Location can be used in the following fields when creating or updating a Proposal: Customer (this is used as the billing address), Propose To, Install Location, and Ship To Location.
| Field | Field Description |
|---|---|
| Location Name: * | Enter a name for this location (South Building, Deliveries) |
| [Add Additional Name] | You can add a second name to this location and it can be searched on in the Customer Search window |
| Account No: * | If you assign account numbers to your customers, enter that number here for this location |
| Street: * | Enter the street address for this location |
| City: * | Enter the City name for this location |
| State: * | Select the State name for this location from the drop down selection box |
| Zip: * | Enter the ZIP or Postal code |
| Country: * | Select the Country for this location from the drop down selection box |
You can add as many Locations as you need to for each customer. For existing customers, click on the Add Location button in the bottom right of the Location Info window. If this is a new customer that you are entering into the database, you have to click on the General Info or Payment info tab and click on the Add Customer button to save your changes.
Discounting Tab
The Discounting tab will only appear for existing customers. You will not see this tab when you are creating a new customer entry. If discounts have been entered for this customer, they will be listed in the Discounting tab. To edit an existing discount, simply click on the discount in the list.
You can enter your customer specific discounts (price agreements) from the Discounting tab in the customer database or from the Discounting tab in the Vendor database. You can only create discounts for the customer you are editing via the Discounting tab in the Customer database. You can create a discount for any customer when you are working in the Vendor Discounting tab.
Creating discounts is a two step process. First you create the discount record by entering general discount information which will be displayed in the discount list. Once the record has been created, you can enter the specific details for this discount.
To create a customer discount record, click on the Discounting tab and click on the [Add New Discount] link.
Cust_discount_header.JPG
| Field | Field Description |
|---|---|
| Vendor: | Enter the vendor that the discount is for |
| Plus sign icon on Vendor | This is a link to create a new Vendor, only users with permission will see this icon |
| Discount Id: | Enter the discount id number, (SQ #, Price Agreement Number) |
| Discount Description: | Enter a description for this discount so it can be identified for selection in proposals |
| GSA check box | If this is GSA specific discount, check this box. If the GSA Account flag is set on the Payments tab in the Customer database, then only GSA flagged discounts will be available for selection in proposals to this customer |
| Effective Date: | Enter the date that this discount becomes active. Only active discounts can be selected in proposals |
| Expiration Date: | Enter the date that this discount becomes inactive. Inactive discounts cannot be used in proposals |
| Add Discount | Click the plus sign button to create the discount header. |
After entering the discount record information, click on the Add Discount plus sign icon to save your changes. This will create the discount record in the database. The discount information will will appear in the discount list as shown below.
Cust_discount_header_list.JPG
The second step is to assign the actual discounts on product lines. Once the discount record information (see above) has been entered and the Add Discount button has been clicked to save the discount information, your discount record will be saved and it will be displayed in the Discount list. Click on the discount record that you just created to enter the discount details and the following window will appear to allow you to select the product to be discounted.
Cust_discount_detail.JPG
| Link | Link Description |
|---|---|
| [Create New Product Discount] | Click on this link to start assigning discounts to product |
| Create a new product discount now | Click on this link to start assigning discounts to product |
Both of these links open the exact same input window as shown below
Cust_discount_detail2.JPG
| Field | Field Description |
|---|---|
| Discount applied to an entire product line | This type of discount will be applied to all items within the selected catalog(s). |
| Discount applied only on specific items | This type of discount will be applied on specific item numbers within a catalog. This discount can be different than the discount for the entire catalog. |
| Discount applied on items regardless of product line | This type of discount requires that the Discount Code to be entered. The Discount Code is in the specification tool export file. |
| Apply a product discount on: | Select the catalog, item number or discount code to enter a discount for. |
| Discounting method: | Non-Tiered or Multi-Level (discount by purchase volume). |
| Buy Discount: | The purchase discount - the dealers buy discount. |
| GP Margin: | You can enter the desired GP% to be applied on the cost of the product to generate the sell price. |
| OR % Discount Off list | Or, you can enter the percentage off list price to generate the sell price. |
| Custom freight terms: | If specific freight terms exist for this product, enter the terms here. |
| Are the freight terms quoted? | If the freight terms cannot be entered above, check the Quoted check box. This will flag a message to be displayed during proposal finalization that warns the user that the freight terms must be quoted from the vendor. |
| Add Product Discount | Click on the Plus sign icon to save your discount. |
There are three options to select the type of discount you are entering.
1) A discount to be applied to an entire product line.
2) A discount to be applied only to specific items within a product line (by item number)
3) A discount to be applied to items regardless of product line (discount codes)
1) A discount to be applied to an entire product line.
This option allows you to enter a discount that will be used to discount all the items within a specific catalog code Select the Product Line(s) from the 'Apply a discount on' selection box first. If multiple product lines have the same discount, you can select all of those product lines by holding down the CTRL(Control)key and clicking on multiple product lines.
Select the discounting method:
Non-Tiered Enter your purchase discount percentages here.
Multi-Level If this discount is based on purchase volume, select the Tiered Discount by List Price option. The tier window will open as shown below:
Cust_discount_tier.JPG
In the Tier 1: input frame, enter your lowest purchase discount level. If your first discount level is $100,000.00 enter that amount in the To: field. Enter your purchase discount in the Buy Discount input field. If the customers discount is a percentage off of list price, you can enter that percentage in the '% Off List:' input field. If your next discount level is $200,000.00, enter that in the Tier 2 To: input field with the discount that is in effect and so on until you have reached your highest discount level. Currently, only 6 levels of discounting are available.
Below shows an example of a 3 level discount.
Cust_discount_tier2.JPG
2) A discount to be applied only to specific items within a product line (by item number)
Cust_discount_item.JPG
This option allows you to apply discounts on specific item numbers. These are the base part numbers from the specification tool. When you select this option, you must select the product line that the items to be discounted exist in first.
In the 'Where the item numbers to be discounted are:' input box, enter individual part numbers, with each part number on a line. After entering a part number, press the enter key to go to the next line. After you have entered all the part numbers that have the same discount, select the discount method (non-tired or tiered) and enter your discounting. Of course, if there are specific freight rules that can be entered for these items, enter that information in the custom freight terms section.
3) A discount to be applied to items regardless of product line (discount codes)
Cust_discount_disc_codes.JPG
This option allows you to apply discounts by Discount Codes. Discount codes are defined by the vendor and can be different between items in a single catalog. The discount code is part of the specification file that is imported into DealerChoice. Upon import, DealerChoice looks for the discount code for each line item in the specification file. If a discount code is defined in DealerChoice that matches the discount code of the line item being imported, the discount is applied to that item in your proposal.
When this option is selected, you will see a 'Discount Code: *' input box. This is a required field.
The 'Discount Description:' field is optional and is used to describe the discount code.
Examples of Discount Codes and Discount Descriptions:
| Discount Code | Discount Description |
|---|---|
| PV | Avian Seating |
| BC | Beirise Collection |
For each product line, item number group or discount code discount that you enter, be sure to click on the Add Product Discount plus sign icon on the lower right of the window to save your changes.
After you click on the Add Product Discount plus sign icon, your window will update and you will see product with their associated discounts in the Product Discount Table.
Cust_discount_product_disc_table.JPG
If you have completed entering your discount, you can close the Edit Customer window.
To add to or edit an existing discount, click on the discount name in the Discount tab window. Expired discounts will be displayed with the expiration date highlighted in red, as shown below.
Cust_discount_edit.JPG
Then click on the 'view product discount table' link.
Cust_discount_view_product.JPG
Then click on the Product name that you wish to edit to open the details of the discounting.
Cust_discount_disc_table2.JPG
Customer Stats Tab
The Customer Stats tab will only appear for existing customers. You will not see this tab when you are creating a new customer entry.
The Customer Stats tab gives you a current standing of your customers.
Cust_stats_tab.JPG
Open Invoices
This frame displays the open invoices for this customer. The invoices in the list can be clicked on to open and view the invoice details.
Accounts Receivables
This frame displays aging statistics and deposits received from this customer.
Total Invoiced Sales
This frame displays statistics on the customer payment history.
- 4.1. Customer List
4.1.2. Customer Search - 4.1.1. Create New Customer
« Previous - 4.2. Customer Credits
Next »
4.1.2. Customer Search
Searching for a Customer
Click on the Search for a Customer and the Search window opens. Several search criteria fields display on the Customer Search form.
CustomerSearchWindow.JPG
If you have multiple currencies defined in your System Configuration, you will also see the Customer Currency selection option as shown below.
CustomerSearchWindowMultCurr.JPG
| Search Field | Description |
|---|---|
| Customer Name | Enter the first few characters of the customer name or Second Name (if used), if you entered a second customer name, the search will return the primary customer name, if found |
| Account Number | Enter the Customer account number |
| Customer Number | Enter the Customer number |
| Located In | Allows searching by State |
| Country | Allows searching by Country |
| Tax ID | Allows searching by Tax Exempt ID number |
| Credit Limit | Allows searching by Credit Limit dollar value |
| Customer Currency | Allows searching by currency type |
| Discount ID | Allows searching by defined discount id's |
| GSA | Allows searching for customers flagged as GSA |
| PO Required | Allows searching for customers flagged for PO Required |
| Sales Rep | Allows searching by Sales Rep name, finds all customers that this sales rep has created proposals for |
Enter as many of the search criteria fields as you like. The more information you enter the fewer matches you will find. Broader searches will return more results.
If no matches are found, a message saying no matches were found is displayed.
CustomerNoResults.JPG
The example below shows the search results from inputting 'tes' in the Customer Name search field.
CustomerNameSearch.JPG
As you type in the Customer Name field, any matching entries found in the Customer database will appear in a drop down selection box. If you see the entry you wish to search for, click on that entry and click on the Search button. If the drop down selection box does not display any matches then that customer name does not exist in your customer database.
To select a customer from the Search Results window, just click on that entry in the displayed list. This will open the Edit Customer window on the General Information tab.
- 4. Customers
4.2. Customer Credits - 4.1.2. Customer Search
« Previous - 4.2.1. Create Customer Credits
Next »
4.2. Customer Credits
Customer credits created from the Customers menu are credits that can be applied to any invoice for that specific customer. Customer Credits are applied to a customer invoice by opening the customer invoice (from the Receivables tab on Proposals) and applying the credit from the Receive Payments (once the invoice has been opened) tab.
These credits are considered "gift certificates", meaning that they can be applied to any customer invoice for any reason. These are not credits that you need to issue on a specific line item. See the section on the Proposal Receivables tab for applying credits on a specific line item.
Clicking the 'Customer Credits' menu item will display a list of all existing customer credits as shown below:
CustomerCreditsList.JPG
The Sort Options function allows you to filter the Customer Credits that are displayed in the main Customer Credits window. The Sort Options link is in the upper right hand side of the window under the Pagination controls.
| Sort Option field | Description |
|---|---|
| All Credits | This option will display all credits you have created |
| Credits with Open Balances | This option will only display credits with balances |
| Fully Applied Credits | This option will display credits that have been applied |
| Remember Preferences | Check this box to have DealerChoice remember the option you have selected |
The Customer Credits window has two icons, one for creating customer credits and one for searching for customer credits.
You can click on any credit that is displayed to view or edit the credit details.
- 4.2. Customer Credits
4.2.1. Create Customer Credits - 4.2. Customer Credits
« Previous - 4.2.2. Search Customer Credits
Next »
4.2.1. Create Customer Credits
Customer Credits can be accessed from the Customers menu in the main navigation bar.
CustomerCreditsMenu.JPG
Select your Customer credit option to Create or Search from the main menu or from the icons in the Customer Credits window.
The Customer Credits list displays all credits that you have created for your customers. The list can be sorted by clicking on any of the column headings that are underlined. The list can be sorted in ascending or descending order for any of the underlined column headings. The list also displays the remaining balance. If the balance is 0.00 then the credit has been used in full.
Customer credits created here do not include sales tax and are not linked to a specific proposal or invoice. Credits created here are considered "gift certificates" and can be used on any invoice for the customer that the credit was created for. To create a credit on a specific invoice (and to include sales tax) see the proposal Receivables tab section for details.
Credits are applied to customer invoices in the Receive Payment tab (Proposals - Receivables tab) after the invoice has been opened from the Receivables tab on your proposal. If a credit exists for a customer and you are in the Receive Payment tab of an invoice, you will see a link called [Apply Customer Credits] to the right of the Receipt Date: field.
To create a customer credit, click on the menu option or icon and the Create a New Customer Credit will open.
CustomerCreditsCreate.JPG
| Field | Description |
|---|---|
| Customer | Enter the customer name that you are creating the credit for, as you type, customer matches in your customer database will appear in a selection box below this field, you can click on the entry in the list to select that customer |
| Amount | Enter the amount of the credit, credit amounts cannot be negative |
| Proposal No (Optional) | The proposal number is optional and has no affect on this credit, it can be applied to any invoice for this customer. This may be the proposal number that the credit was generated from. |
| Reference | Enter a reference number that you devise. This reference number is a way for you to track the credit |
| Date | The date that you are creating the credit |
| Notes | Use this input field to enter any information you need to document this credit |
| Correction Code | Correction codes are used to define the G/L account to log the credit transactions. The account entered here, typically a General Sales account, will be debited when the credit is created. When the credit is applied to an invoice, A/R will be debited. See creating Correction Codes below |
| Save & Close | Click on the Save & Close button to save your credit. |
After your credit has been created, you have to apply it to an invoice to issue the credit to a customer, see Receivables for details.
CustomerCreditsCorrectionCode.JPG
You can create Correction Codes from the Customer Credit create window by selecting -- Create/Edit Correction Codes option in the drop down selection box in the Credit Distribution section. The Create Correction Codes is also available under System Configuration - Company & System Settings - System Settings. The Customer Credits option is only available to users with access to Customer Credits via permissions settings (See System Configuration for details).
After clicking on the -- Create/Edit Correction Codes option, the Edit List: Customer Correction Codes window will open.
CustomerCreditsEditCorrectionCode.JPG
Click on the [add new code] to create a new Correction Code.
CustomerCreditsEditCorrectionCodeAdd.JPG
| Field | Description |
|---|---|
| Description | Enter a description for this correction code, such as Customer Returns, or Returned - Damage to identify the credit reason. |
| Active? | This check box is set to Active (checked) by default. To make a Correction code inactive, un-select the Active flag. |
| Correction Code | Enter a code that describes the credit. This can be an alpha-numeric code. You cannot use the same code twice. |
| Income/Expense Account | Select the account from your G/L that will be used for logging the credit transactions. |
| Save | Click on the Save button to save your codes. |
An example of a correction code is shown below.
CustomerCreditsEditCorrectionCodeAddExample.JPG
After your create Customer Correction codes, they can be edited from the Edit List: Customer Correction Codes window by simply clicking on the code you wish to edit.
- 4.2. Customer Credits
4.2.2. Search Customer Credits - 4.2.1. Create Customer Credits
« Previous - 4.3. Receive Customer Payments
Next »
4.2.2. Search Customer Credits
The Customer Credits search window can be accessed from the main navigation window under Customers or from the Customer Credits window using the Search icon. The Customer Credits search window appears below.
CustomerCreditsSearch.JPG
| Search Field | Description |
|---|---|
| Credit Number | Enter the credit number to search for |
| Invoice Number | Enter the invoice number that the credit was created for |
| Credit Date | Enter a date for which the credit was created on |
| Customer | Enter the customer name that the credit was created for |
| Applied/Unapplied | Select to search for applied on unapplied credits select Fully Applied, Partially Applied or Not Applied |
| Save Search? | Allows you to save your search criteria for future searches. |
When the Save Search check box is checked, you will be prompted to enter a name for your search criteria. Enter a name for your search. Click on the Search button to perform the search, your search criteria will be saved for you.
CustomerCreditsSavedSearch.JPG
The next time you enter the Customer Credits Search window, a selection box will appear to the right of the Save Search check box allowing you to select the name of the search criteria you had previously saved. After selecting your search criteria, click on the Go button to the right of the saved search name to run your saved search.
CustCreditsSavedSearch2.JPG
If you want to delete the saved search, select the saved search name then click on the X icon to the right of Go button and the saved search will be deleted. There is no limit to the number of saved searches you can create.
- 4. Customers
4.3. Receive Customer Payments - 4.2.2. Search Customer Credits
« Previous - 5. Vendors
Next »
4.3. Receive Customer Payments
There are two ways to receive customer payments.
Customer Payments can be received by using the Receive Payments menu option under Customers in the main navigation menu and payments can be received on the actual invoice by using the Receivables tab in Proposals and clicking on the invoice then selecting the Payment Tab. Receiving payments on invoices in the Proposal is covered under Proposals. Users must have the appropriate permission settings to receive payments through Proposals.
To enter customer payments click on Receive Payments under Customers in the main navigation window.
CustomerReceivePayments.JPG
| Field Name | Description |
|---|---|
| Customer | Enter the customer name |
| Date Received: | Enter the date that the payment was received |
| Receipt Amount | Enter the amount of the payment |
| Payment Method | Select the payment type, Check, Cash or Credit Card |
| Check/Reference No | Enter the check number or reference number of the payment method |
| Account | Select the account to save the payment to (if you have multiple accounts defined |
| Save & Close | Click to save and close the Receive Customer Payments window |
Enter the first few characters of the customers name, select the appropriate customer from the list of matches that are displayed.
Once a customer has been selected the Receive Payments window will update to display all the outstanding invoices for this customer.
Enter the payment information (Date Received, Amount, Payment Method and reference number) then you can select the invoice or invoices to apply the payment to.
You can select multiple invoices and the payment will be distributed to pay the selected invoices until the Amount entered has been exhausted. You cannot select invoices that total more than the amount received.
CustomerReceivePaymentsInvoices.JPG
After you select an invoice to apply the payment to, the window will update showing any remaining amount of the payment. You also have options to save the remainder as an un-applied deposit or to create a refund to the customer.
CustomerReceivePaymentsDetail.JPG
Once you have selected the invoices to apply the payment to, click on the Save & Close button. Your customer invoices will be updated with the payments.
If you have multiple cash accounts defined, you will see the Account: prompt below the Save & Close button. This allows you to select the account that the payment transaction will be saved to.
After saving the payments, your Cash Receipts report will display the receipt and the invoice amount (Proposals - Receivable tab) will be updated with the payment amount received.
- Table of Contents
5. Vendors - 4.3. Receive Customer Payments
« Previous - 5.1. Vendor List
Next »
5. Vendors
To View, Create or Edit your Vendors, click on Vendors in the main navigation bar. You can also enter Vendor Payables from the Vendors menu through the Receive & Pay Bills menu option.
Only users with the appropriate permission settings will have access to the Receive & Pay Bills menu option.
VendorsMenu.JPG
- 5. Vendors
5.1. Vendor List - 5. Vendors
« Previous - 5.1.1. Create a new Vendor
Next »
5.1. Vendor List
There are 2 sub-menu's available under the Vendors menu,'Vendor List' and 'Receive & Pay Bills'. Under the Vendor List menu there are two menu items: 'Create a New Vendor' and 'Search for a Vendor'.
To display the Vendor List, click on the Vendor List menu option and a window will open displaying all the vendors in your database.
VendorsList.JPG
The Vendor List displays all the vendors in your Vendors database. On the top left, you have icons to Create a New Vendor (permission required), Search Vendors and to export your Vendors List to a spreadsheet.
On the top right, you have your pagination controls to page through your vendor database. You can click on a page number to advance directly to that page, or you can click on the left "<" and right ">" arrows to scroll page by page.
The column titles in the Vendor List are underlined. This means that they are active links. By clicking on any of the underlined column titles, your vendor list will be sorted by the column. The first time you click a column title, the list will be sorted in ascending order (the default) the second time you click on the same column title, the list will be sorted in descending order.
The Vendor list also displays the Vendor Account number field, Location, and Accounts Receivable status per your aging defaults.
To view or edit your vendor details, click on any vendor name in the list to open the vendor details.
- 5.1. Vendor List
5.1.1. Create a new Vendor - 5.1. Vendor List
« Previous - 5.1.2. Search Vendors
Next »
5.1.1. Create a new Vendor
There are two ways to create a vendor database entry. The first method is from the main navigation menu under Vendors, Vendor List Create a New Vendor.
VendorsCreateMenu.JPG
The second option is from the Vendors List window by clicking on the Create a New Vendor icon.
VendorsCreateIcon.JPG
Both options will open the Create a New Vendor window.
VendorsCreateWindow.JPG
When creating a new vendor, the Create a new Vendor window will open displaying 4 tabs, General, Payments, Contacts and Locations. Once the Vendor entry is saved to the database the Products, Discounts and Stats tabs will be displayed.
General Tab
Required fields are noted by an asterisk following the input field name. These fields must be completed before you can save your vendor entry into the database.
| Field Name | Description |
|---|---|
| Vendor Name * | Enter the name of the Vendor to be created. As you type any matches found in the database will appear below the Vendor Name input box to help you avoid duplication of Vendors. |
| Active Check box | By default the active flag is checked, meaning the vendor is available for use. If you uncheck this box, then vendor will not be available for selection in reports or proposals. |
| Street * | Enter the primary street address. This is the default billing/remit to address |
| City * | Enter the City for the vendors location |
| State * | Enter the State or Province for the vendors location |
| Zip * | Enter the ZIPCODE or Postal Code for the vendors location |
| Country * | Enter the Country for the vendors location |
| Phone | Enter the vendors phone number |
| Fax | Enter the vendors fax number |
| Vendor No | If you have used vendor numbers in a previous system, you can enter those vendors numbers here |
| Vendor Account No | This field holds YOUR account number with the vendor. It will be included on purchase orders to this vendor |
| Electronic Order Email | Enter the default order email address for this vendor. This address can be changed at purchase order creation |
| Electronic Order Fax | Enter the default order fax number for this vendor. This address can be changed at purchase order creation |
| Default Order Method | Select your default order method, either by email or by fax |
| Vendor Notes | You can enter any information that you want in this input box. This can be any information you want pertaining to this vendor. This information does not appear on any outgoing documents, it is for internal use only. |
After entering your vendor information, click on the Add Vendor button and your entry will be saved into the database.
Payments Tab
VendorPaymentsTab.JPG
| Field | Description |
|---|---|
| Required Deposit Percentage | If this vendor requires a deposit payment before processing orders, you can enter the deposit percentage required here. When purchase orders are created for this vendor, the deposit payable will be created and placed in your Payables window so the deposit check can be generated. Only use this field if the deposit is required for all orders for this vendor |
| Early Payment Terms | If this vendor offers an early payment discount, enter the terms here. When invoices are entered for this vendor, the early payment terms are checked and the due date of the invoice will be flagged with an asterisk (and if you hold your mouse over the due date - an early discount message will be displayed) to alert you that a discount can be taken if the invoice is paid early. The early payment discount will be calculated and deducted from the payment automatically when the invoice is flagged for payment |
| Vendor's Payment Terms | Enter the payment terms you have with this vendor. This will be used to warn you of payments coming due for this vendor in the View and Pay Bills window. |
| Tax ID Number | Enter the vendor's Tax ID number here (1099 Vendors) |
| 1099 Vendor | If you need to issue 1099 forms to vendor's (or employees) check this box. This vendor will be included in the 1099 report for reporting purposes |
| Default Currency | Enter the default currency that you will pay this vendor in. Only applicable if you have multiple currencies defined in your System Configuration |
| Group Invoices Into Single Check | If this box is checked, multiple invoice payments for this vendor will be grouped to be paid on a single check. Up to 22 invoices can be paid per check. If more than 22 invoices are being paid, an additional check will automatically be created to pay the remaining invoices. The limit is set at 22 invoices per check because only 22 printable lines exist on the check voucher stub. If more than 22 invoices were listed, the print would run into the check print area. This also helps you conserve check stock |
| Comment To Appear on POs | Text entered here will be printed on all purchase orders generated for this vendor |
| Small Order Fee | If the vendor charges a small order fee and the terms can be defined here, enter those terms here. If the terms cannot be entered here, check the Quoted box. Proposals containing products from this vendor will be checked to see if this vendor charge is to be applied during the proposal finalization process. If the charge is to be applied, you will get a message alert in the proposal finalization window displaying the calculated charge. You have the option of allowing the charge to be applied to the proposal or to reject the line from being applied to your proposal. You also have the ability to add a GP% to the charge to sell the charge to your customer. |
| Quoted? | If the Quoted box is checked, you will get an alert message during the proposal finalization process that the vendor fee must be verified with the vendor. You can then call the vendor to discuss the details of your proposal to see if the fee is to be applied or not. |
| Freight Terms | If the vendor's freight terms can be defined here, enter those terms here. See Small Order above for proposal finalization processing |
| Quoted | See Quoted description above |
| Fuel Surcharge | If the vendor's Fuel Surcharge terms can be defined here, enter those terms here. See Small Order above for proposal finalization processing |
| Quoted | See Quoted description above |
| Call Before Delivery Charge | If the vendor's Call Before Delivery terms can be defined here, enter those terms here. See Small Order above for proposal finalization processing |
| Billing Remittance Information | These fields allow you to enter a remittance address for this vendor if it is different from the address entered on the General Tab. This address will be printed on checks generated to this vendor |
Contacts Tab
VendorContactsTab.JPG
| Field | Description |
|---|---|
| Contact Name | Enter the name of your contact with this vendor |
| Title | Enter the contacts Title |
| Phone | Enter contacts phone number |
| Phone 2 | Additional phone number input field |
| Mobile | Contacts cell phone |
| Fax | Contacts fax number |
| Contacts email address |
The Contacts tab allows you to enter the contact information for the people or departments that you work with at this vendor. This allows you quick access to phone numbers and email addresses.
You can enter as many Contacts per vendor as you want. There are no required fields on the Contacts info window so you can enter as many or as few fields as you like.
After entering a contact be sure to click on the Add Contact plus sign icon to save your entry.
Locations Tab
VendorLocationsTab.JPG
| Field | Description |
|---|---|
| Location Name * | The short name of the location, (i.e. COM Location, Shipping Dept) |
| Account No | If you have a specific account number with this vendor location you enter that number here |
| Street * | Location street address |
| City * | Enter the locations City |
| State * | Enter the locations State |
| Zip * | Enter the locations ZIPCODE or Postal Code |
| Country * | Enter the COuntry for this location |
Required fields are noted by an asterisk following the input field name. These fields must be completed before you can save your entry into the database.
The Locations tab allows you to enter multiple addresses for the same vendor. If the vendor requires the shipment of COM to a different address than what appears in the General tab, you can add that address under the Location Tab. Vendor Locations can also be used as Ship To location in proposals and purchase orders.
You can enter as many Locations per vendor as you want. There are required fields on the Locations info window. You must complete the required fields before you will be allowed to save a location entry.
Vendor Locations can be used as Ship To locations in proposals and purchase orders
After entering a location be sure to click on the Add Location plus sign icon to save your entry.
Products Tab
VendorProductsTab.JPG
The Products tab is used to define products offered by the vendor. Products are typically identified by the Catalog Code that is used in electronic specification catalogs for that product line. You do not have to enter a catalog code to define a vendor product. Entering vendor products allows you to specify the characteristics of how that product is handled in DealerChoice. When vendor Products are defined, they can be used to create discounts (Standard discounts or Customer discounts) and this information will be obtained and used upon selecting the Product for a proposal line item or during the import of a specification file to create the proposal line items. The taxable information for each Product is stored here as well as the income and expense account for tracking dollars associated with each Product.
| Field | Description |
|---|---|
| Product Name or Description | Enter the Product name or description. Typically this is the catalog name |
| Active? | Select whether or not this product is active. If the Product is active it can be used in proposals, if it is not active the Product cannot be selected as a product in proposals |
| Catalog Code | Enter the electronic catalog code exactly as it appears in the specification catalog. This is typically a 3 character code. These codes are defined by the vendor. These codes are used when a specification file is imported into a proposal to identify the vendor, Product and any of the rules defined in the database to be applied to this Product |
| Cut Separate Purchase Order? | If you want this Product to always be placed on its own purchase order, check this box. No other product will be placed on the purchase order with this product. |
| Electronic Order Email | Enter the default electronic email order address. This address can be changed at purchase order creation time |
| Electronic Order Fax | Enter the default electronic fax order address. This address can be changed at purchase order creation time |
| Default Order Method | Select the default order method (email or fax). The order method can be changed at purchase order creation time |
| Freight Terms | If there are specific freight terms for this product that can be defined here, enter those terms. If not, check the Quoted box |
| Quoted | When the Quoted check box is checked, a message will be displayed during the proposal finalization process warning users that the freight terms must be confirmed by the vendor. This helps avoid missing freight charges that should be applied to proposals |
| Income Account * | Select the income account (Sales) that is to be used to track the sales dollars of this Product |
| Expense Account * | Select the expense account (COGS) that is to be used to track the cost dollars of this Product |
| Taxable? | Check this box if the product is taxable. When checked, you will be presented with all the tax entities defined in your tax table (System Configuration) and you must select the entities that you are responsible for collecting sales tax on for this product |
Required fields are noted by an asterisk following the input field name. These fields must be completed before you can save your entry into the database.
After entering a vendor Product, click on the Add Product plus sign icon to save your changes. You also have the option of returning to the product list, or to return to Add Another Product input window. The option selection box is just below the Add Product icon.
Discount Tab
Vendor discounts are entered into the database via the Discounts tab. Discounts defined for vendor Products can be applied to proposal line items automatically during specification file import into proposals or manually on the Item Details tab in Proposals.
In the Vendor Discounts tab, you can create vendor standard discounts or customer specific discounts. In the Customer Discounts tab, you can only enter customer specific discounts (discounts for that customer only). A Standard discount is a discount offered by the vendor that can be used for any customer purchasing that vendors products. A Customer discount can only be used by that customer.
Standard Discount
VendorDiscStandardTab.JPG
See Customer Discounts for details on entering discount information. The only difference between entering a discount in the Vendors Discount tab is that you get the option to create a vendor standard discount. Typically, discounts are entered in the Vendor Discount tab because you can enter both vendor discounts and customer discounts here. The input fields are exactly the same in the Customer Discount tab and Vendor Discount tab and they update the exact same database.
Customer Discount
VendorDiscCustomerTab.JPG
See Customer Discounts for details on entering discount information. The only difference between entering a discount in the Vendors Discount tab is that you get the option to create a vendor standard discount. Typically, discounts are entered in the Vendor Discount tab because you can enter both vendor discounts and customer discounts here. The input fields are exactly the same in the Customer Discount tab and Vendor Discount tab and they update the exact same database.
Vendor Stats Tab
VendorStatsTab.JPG
| Field | Description |
|---|---|
| Open Bills | Lists any open invoices that you have with this vendor. You can click on any invoice that appears in this list and that invoice will open for review |
| Outstanding A/P | Displays a dollar amount of all open invoices you have with this vendor |
| Purchase Order Booking | Lists a snapshot of your Month To Date, Quarter To Date, Year To Date and total Purchase Order amounts you have for this vendor. |
- 5.1. Vendor List
5.1.2. Search Vendors - 5.1.1. Create a new Vendor
« Previous - 5.2. Receive and Pay Bills
Next »
5.1.2. Search Vendors
There are two ways to search the Vendor database. The first option is from the main navigation menu and the second is from the Search Vendors icon in the Vendors List window. Both options open the exact same search input window.
To search the vendor list from the main navigation menu, click on Vendors, Vendor List then select the Search for a Vendor option.
VendorSearchMenu.JPG
To search for a vendor with the Search Vendor icon, click on Vendor, Vendor List then click on the Search Vendors icon.
VendorSearchIcon.JPG
The Search Vendors window
VendorSearchWindow.JPG
| Field | Description |
|---|---|
| Vendor Name | Enter the name of the vendor. As you type, any existing vendor names that match the character string will be displayed in the drop down selection box below the Vendor Name field. If your vendor name appears you can click on the name in the list and click on the search button to access the vendor. If the drop down box with matches does not appear, then that entry does not exist in your database. |
| Account Number | If you use vendor account numbers in your vendor database, you can search by entering the number here |
| Vendor Number | If you use Vendor Numbers in your vendor database, you can search by entering the numbers here |
| Located In | Select the State or Province name to search the database. Any vendors having the selected State or Province in their address will be displayed. |
| Country | Select a Country from the selection list and any vendors having this Country will be displayed |
| Tax ID | Enter a tax id number and the vendor database will be searched on that id |
| Discount ID | Enter a discount id and the vendor database will be searched for that number |
| Customer Currency | If multiple currencies are defined, you can search for vendors that have that currency defined |
| Default Order Method | Select the default order method to search for and any vendors with your selection will be displayed |
| 1099 Vendor | This check box will display any vendors that have been flagged as 1099 vendors |
| Deposit Required? | This check box will display any vendors that have the Deposit Required flag set |
| Misc Vendor Fees | Selecting any of these items will search the vendor database for vendors that have miscellaneous vendor fee's defined |
After entering your search criteria, click on the Search button. If any matches are found, they will be displayed as shown below in the Vendor List
VendorSearchResults.JPG
- 5. Vendors
5.2. Receive and Pay Bills - 5.1.2. Search Vendors
« Previous - 5.2.1. New Vendor Bill
Next »
5.2. Receive and Pay Bills
The Receive & Pay Vendor bills option is available under the Vendors menu. There are 3 options available under Receive & Pay Vendor Bills and they are New Vendor Bill, Receive Vendor Credits and Create a Customer Refund.
ReceiveVendorBills.JPG
To view the list of entered vendor invoices click on Vendors - Receive & Pay Bills and the list will appear.
ReceiveVendorBillsList.JPG
The Vendor Invoices and Customer Refunds window column headings that are underlined can be used to sort the window data.
ReceiveVendorBillsColumns.JPG
| Field | Description |
|---|---|
| Vendor Check Box | When viewing unpaid payable, clicking this box will flag all payables for payment, clicking the box a second time will un-select the payables |
| Vendor | This column displays the vendor name the payable was entered for |
| PO No. | This field displays the purchase order number that was entered on the payable, this field is an active link to the purchase order, clicking on the purchase order number will open the purchase order without having to leave the Receive & Pay Bills window |
| Invoice No. | This field displays the vendor invoice number that was entered |
| Invoice Date | This is the invoice date from the vendor invoice |
| Due Date | This is the Due Date of the invoice |
| Amount | This is the amount of the invoice |
| Balance | This is the balance due remaining on the invoice |
In the Vendor Invoices window, there are up to 6 icons available.
ReceiveVendorBillsListIcons.JPG
Receive a new vendor bill
This option allows you to enter information from the paper vendor invoice. You are creating an entry in your Accounts Payables list. This will create an entry in your Vendor Invoices and Customer Refunds list. This is a list of payables that you will generate a check for. All entries made will stay in this list unless the entry is deleted. Of course, only unpaid entries may be deleted. To delete an invoice, click on the invoice and click on the Delete icon at the top of the window. If an invoice is paid in error, the check may be voided and the invoice can be adjusted if necessary and sent to the Pay Queue to be paid again. Once a check has been voided, that check number cannot be used again.
See the New Vendor Bill section of this document for details on entering a vendor bill (invoice).
The Flag Invoices for Payment icon no longer exists. All unpaid invoices appear with a selection box to the left of the invoice in the list. When you select an invoice for payment by clicking on this check box, the invoice is automatically flagged for payment.
Create a Customer Refund
If you need to generate a refund check to your customer, this option allows you to create the entry in your Payables list so you can generate a refund check.
See the Customer Refund section of this document for details for creating a customer refund.
Make Payments
This icon allows you to complete the check generation process. Clicking on this icon opens the Pay Invoices window and all of the invoices you have flagged for payment will appear in this list. Each entry in this list has a selection check box to its left.
ReceiveVendorBillsMakePayments.JPG
| Field | Description |
|---|---|
| Show All | Checking this option will display all unpaid vendor invoices, whether they have been flagged for payment or not |
| Show flagged | This option will show you only the invoices that have been flagged for payment |
| Due on or before | This option will prompt you for a date. Only invoices with a Due date on or before the date you enter will be displayed |
| Payment Account | Select the cash account that you are going to make the payments from, if you have multiple cash accounts that are flagged as an account that you will write checks from, it will appear as a selection option here |
| Ending Balance | This field indicates the Payments Account balance if you generate checks for the selected invoices |
| Posting Date | This is the date that the payments will be posted to in your general ledger. You can pre and post date your checks |
| Submit To Pay Queue | Clicking on the Submit To Pay Queue button will update your ledger with the selected payments |
Clicking on the Submit To Pay Queue button will flag your invoices as paid even though the checks have not yet been printed.
You will see the rotating $100 bill when you have checks waiting to be printed as a reminder that you have submitted checks to the Pay Queue but have not yet printed them. Don't forget to print your checks.
Manual Vendor Discounts
ReceiveVendorBillsManualDiscounts.JPG
Vendor discounts can be entered manually if necessary. If the vendor offers an early payment discount, the discount terms should be entered in the vendor database so the discount can be applied automatically.
To manually enter a discount, place your mouse in the Discounts column on the invoice line in the Pay Invoices window. You will see the discount input field appear allowing you to enter the dollar amount of the discount to be applied to the invoice.
After entering the discount amount, the Amt to Pay value will update reflecting the applied discount.
If your vendors offer early payment discounts and you can enter the terms in the Vendor database (Payments tab - Early Payment Discount input field) the discounts will be calculated for you and will appear in the Discounts column automatically, if the discount terms are satisfied.
Vendor Deposits and Credits
If a deposit has been paid on a purchase order the deposit amount paid will appear in the Deposits column on the invoice line. Deposits paid towards a purchase order cannot be altered because the deposit check has already been generated.
When entering an invoice where a deposit has been paid be sure to enter the invoice for the full amount of the invoice before the deposit has been applied. The deposit amount paid will be deducted from the invoice amount when you pay the invoice.
Any vendor credits that have been entered will be automatically applied to payments to that vendor and if applied, will appear in the Credits column. If you wish to pay the invoice in full, without using any of the credits, simply remove the dollar amount from the Credits field.
Check No.
| Field | Description |
|---|---|
| To be Printed | If the check is to be printed on check stock, leave this option selected. The check number on your check stock must match the check numbers being printed. |
| Handwritten | If the check was handwritten select this option. The check will not be printed but your general ledger accounts will be updated as if the check was printed. The check number entered will appear in your check register as a check that has been generated as well. |
Checks waiting to be printed
Once you have submitted invoices to the Pay Queue, you will see the rotating $100 bill icon, which serves as a reminder that you have checks waiting to be printed. If you see the rotating $100 bill then you know that checks are ready to be printed. Once all the checks in the Pay Bills window have been printed, the rotating $100 bill will no longer be visible.
ReceiveVendorBillsMakePaymentsCkNo.JPG
Select your starting check number that matches your check stock.
ReceiveVendorBillsPrintChecks.JPG
| Field | Description |
|---|---|
| [change] | This icon to the right of the account allows you to change the cash account that the selected checks will be paid from |
| [uncheck all] | This icon will unselect invoices. Any invoices unselected will not be paid in this check run |
| Selection box to left of check number | This check box allows you to (un)select which invoices you are going to pay in this check run. The invoice will remain flagged for payment. |
| Remove invoice from Pay Queue icon | This icon - to the right of the amount to pay field will remove the invoice from the pay queue, invoices removed from the pay queue must be flagged for payment again to be paid |
| Preview Checks | This button will open the Preview Checks window showing you a PDF view of the checks to be generated. From this window, you click on the printer icon to send the checks to your printer |
Reprint Checks
This icon allows you to reprint an existing check. To reprint a check, click on this icon and enter the check number or numbers separated by a comma and these check images will be reprinted. This option is to reprint a previously printed check.
Checks can also be reprinted from the Check Register under Accounting - Check Register.
Reprint Checks Window
This option is only to be used to print an existing check on check stock containing the original check number. Checks can be printed on plain white paper if desired.
ReceiveVendorBillsReprintChecks.JPG
Enter the check number(s) of the checks you want to reprint and click on the Reprint Checks button.
The Preview Checks window will open.
ReceiveVendorBillsPreviewChks.JPG
Click on the printer icon to send your checks to the printer connected to your computer or to a computer on your network.
You can only send checks to printers defined on your company network or to printers installed on your computer.
Search Payables
This icon allows you to search the invoices you have entered.
ReceiveVendorBillsSearchPayables.JPG
| Field | Description |
|---|---|
| Invoice Number | Enter the invoice number on the invoice you received from the vendor. Entering the first few characters or digits of the vendor invoice number will display any vendor invoices that match what you have entered increasing the chance of finding the invoice |
| Invoice Due Date | Enter a date range (From date and To date), invoices with an Invoice Due date within this range will be displayed |
| Paid/Unpaid | Search by Paid invoices or Unpaid invoices |
| DealerChoice PO Number | Enter the purchase order number, invoices that we entered with this purchase order number will be displayed |
| Search By Vendor | Enter the vendor name and invoices from that vendor will be displayed, you can enter multiple vendor names. |
| Search | Click on the Search button to start the search process |
| Save Search | Click on the Save Search check box to save the search criteria entered, saved searches can be reused without having to re-enter search criteria (See below for details on using saved searches) |
Save Search
Entering the search criteria
ReceiveVendorBillsSearchPayablesSave.JPG
After you have entered your search criteria and if this is a search that you want to re-use, click on the Save Search check box. You will be prompted to enter a name for your search. In the example above, the search criteria entered is for Allseating invoices with an Unpaid status. The search is being saved as 'Open Allseating Invoices'. Now that you have your search criteria entered and you have elected to save your search criteria, click on the Search Button, your search will be performed and your search criteria will be saved.
Reusing the saved search
ReceiveVendorBillsSearchPayablesSaveUse.JPG
After saving your search criteria, you can now run the same search again by selecting the name of the search that has been saved. You can save multiple search criteria by using different saved search names. Click on the drop down selection arrow to display the names of all your saved searches, select the search name you want to run and click on the Go button. The search criteria saved under that search name will be performed.
You also have the option of deleting a saved search. After selecting the saved search name, instead of clicking on the Go button, click on the 'X' icon and your search will be removed from the list.
Pagination Controls
The pagination controls allow you click on a page number to display, or you can use the left '<' and right '>' arrows to scroll through the pages of your invoices.
Sort Options
The Sort Options control is found on the right side of the window under the Pagination controls. Click on the 'Sort Options' link to see the options.
ReceiveVendorBillsSortOptions.JPG
| Field | Description |
|---|---|
| All Payables | This option will display the entire list of payables entered |
| Only Paid Payables | This option will display only payables that have been paid |
| Only Flagged Payables | This option will display payables that have been flagged for payment |
| Only Unpaid Payables | This option will display unpaid payables, including flagged payables |
| Show All Types | This option will display bills, credits, refunds and deposits |
| Only Show Bills | This option will display invoices only per the option selected in the 'Show' field |
| Only Show Credits | This option will display credits only per the option selected in the 'Show' field |
| Only Show Refunds | This option will display refunds only per the option selected in the 'Show' field |
| Only Show Deposits | This option will display deposits only per the option selected in the 'Show' field |
| From Date | Filters the list to display by the Due date entered on the bill, credit, refund or deposit, start date |
| To Date | Filters the list to display by the Due date entered on the bill, credit, refund or deposit, end date |
| Users list | This option allows you to search the list by the person that entered the payable |
| Remember Preferences | Checking this box will preserve your Sort Options. These settings will be used to display your payables list until you change the settings. This option is preserved by user, it is not a global setting, if this box is left unchecked, the particular sort will be preserved until you leave the Receive & Pay Bills window |
| Go | Click on the Go button after you have made your Sort Option selections to perform the Sort |
- 5.2. Receive and Pay Bills
5.2.1. New Vendor Bill - 5.2. Receive and Pay Bills
« Previous - 5.2.2. A/P Line Mapping
Next »
5.2.1. New Vendor Bill
There are 2 ways to enter a new vendor invoice:
1) Click the Vendors - Receive & Pay Bills - New Vendor Bill menu option 2) Click on the Vendors - Receive & Pay Bills menu option and then click on the 'Receive a new vendor invoice' icon.
Both options open the same input window.
ReceiveVendorBillsNew.JPG
| Field | Description |
|---|---|
| Vendor | Enter the vendor name from the invoice. As you type, any matches found in your database will appear in a drop down selection box, select the vendor name from the list. If the vendor name is not in the list, you must enter the vendor into the Vendors database first |
| Type | There are 3 options to choose from; Bill - a vendor invoice, Deposit - to create a vendor deposit payable, Credit - to enter a vendor credit to be used towards the payment of a vendor invoice |
| PO No | Start typing the purchase order number and matches to purchase orders for the selected vendor will appear in a drop down selection box. Select the appropriate PO number from the list |
| Hold Payment | If this box is checked, this invoice payment will be placed on Hold. You cannot pay a vendor invoice if it is on Hold, if the payable is placed on Hold, the Vendor name will appear in the list in red letters |
| Invoice Amount | Enter the amount of the invoice. This amount should match your purchase order amount. If the amount you you enter here does not match the amount of the purchase order, you will get a warning message when you try to save the invoice. |
| Invoice No | Enter the invoice number from the vendor invoice |
| Invoice Date | Enter the invoice date from the invoice |
| Date of Receipt | Enter the date your received the invoice |
| Due Date | Enter the Due Date from the invoice |
| Notes | Use this field to enter any notes you deem necessary concerning this invoice |
| Account Distribution | Enter your expense accounts to track your expenses, either type the account number or name or click on the drop down selection arrow to select the account from the list |
| [add more lines] | If you need to enter more accounts, click on this link and additional expense account lines will be presented |
| Save and ... | Use this to specify the action taken when you click on the Save button |
| Save and Close | This option will save your payable and close the payable entry window |
| Save and Add New | This option will save your current entry and open the payable input again so you can enter another payable |
| Save and Add New Same Vendor | This option will save your current entry and open the input window again with the Vendor field populated with the vendor you used on the last payable. |
Total Expenses
When entering invoices that were generated by a purchase order, you MUST use your Work In Progress (WIP) account as the first distribution account.
When payables are entered using the WIP account as the primary distribution account, the WIP account is debited for the invoice amount. When you create your customer invoice that contains the product on the associated purchase order, your WIP account is credited. This is how your WIP account is updated.
When entering invoices generated from a purchase order you must enter the purchase order number in the PO No. field to link the vendor invoice to the purchase order. Do not enter the associated proposal number in the Proposal input field when you have entered a purchase order number in the PO No. field. This will cause the costs to be charged twice against this proposal.
When entering invoices that have not been purchased on a purchase order, leave the Po No. field empty. In the Total Expenses section, enter the appropriate account distribution and include the proposal number in the Proposal input field to associate the costs with the proposal.
For example, if you incurred overnight shipping fees for sending documents or parts/tools to a customer or installation company, which were not purchased on a purchase order, you will enter the account that you have setup on your general ledger for overnight shipping fees (or whatever that account may be called) include the proposal number the extra charges were incurred on. This will add the costs to the proposal and will be used in the calculation of the overall Gross Profit on the proposal.
- 5.2. Receive and Pay Bills
5.2.2. A/P Line Mapping - 5.2.1. New Vendor Bill
« Previous - 5.2.3. Receive Vendor Credits
Next »
5.2.2. A/P Line Mapping
The A/P Line mapping function allows you to select individual line items on a vendor invoice that you wish to pay for at a specific time. If you prefer to only make payment on specific line items on a vendor invoice, you can use the line mapping feature to select those line items to be paid. Typically, only line items that have been received are selected for payment and the payment for the remaining items is made after the additional line items have been received.
A/P Line mapping is optional. You do not have to select each line item on a vendor invoice to pay the vendor invoice. If line item mapping in not used, then the entire amount of the vendor invoice will be paid.
There is a control setting in System Configuration (Company & System Settings tab - System Settings tab) called 'Require items to be received in order to map on A/P line item?' that can be set to Yes or No. If this control is set to No, then any line item on the purchase order can be selected for payment. If this control is set to Yes, then the line items must have a 'Received Date' entered via the entry of Acknowledgement data. If the line item does not have a received date entered and this control is set to Yes, then the line item cannot be selected for payment via the A/P line item mapping function.
After selecting a vendor name and the purchase order number to enter an invoice for, the Create a New Vendor Invoice window will display two links to the right of the PO No. field. These links are [View Purchase Order] and [Map Line Items]
The [View Purchase Order] link allows you to view the actual purchase order.
The [Map Line Items] link allows you to view and select line items on the purchase order to be paid.
In the example below, the [Map Line Items] link has been clicked. Also, the [Map Line Items] link changes to [Hide Line Items]. You can click on this link if you do not wish to map line items.
APLineMapping.JPG
As you can see in the example above, each purchase order line item is displayed with a line item selection check box and the line item selection box is grayed out. In this example, none of the line items can be mapped because the line items do not have a Received Date entered (acknowledgement info) and the System Configuration control 'Require items to be received in order to map on A/P line item?' is set to Yes.
In the next example, we have set the 'Require items to be received in order to map on A/P line item?' to no which means that we do not have to have a Received Date entered to be able to map line items for payment.
APLineMapping2.JPG
We will select 2 of the three line items to be paid as shown in the following example. After selecting our line items, you will see that the invoice total will be updated to match the line items selected, not the purchase order total amount.
APLineMapping3.JPG
When the Save button is clicked, an error message will be displayed to warn you that the amount being entered does not match the purchase order amount. This alerts you to be sure to that you know that the invoice amount and the purchase order amount are different. Since we are mapping line items and have not selected all purchase order line items, we can ignore this message. The 'Proceed Anyway' allows you to save your invoice.
APLineMapping4.JPG
After reviewing your invoice details and confirming that they are correct, click on the 'Proceed Anyway' button to save your invoice. You can now flag this invoice for payment and only the amount of the selected line items will be paid on this invoice.
You can edit this invoice to select the remaining line items before paying this invoice or you can edit the invoice to select the remaining line items after this invoice has been paid. You do not have to enter a new invoice for the same purchase order to create a new payable entry in your payables list.
- 5.2. Receive and Pay Bills
5.2.3. Receive Vendor Credits - 5.2.2. A/P Line Mapping
« Previous - 5.2.4. Create a Customer Refund
Next »
5.2.3. Receive Vendor Credits
There are 2 ways to enter a vendor credit:
1) Click on the Vendors - Receive & Pay Bills - Receive Vendor Credits menu option 2) Click on the Vendors - Receive & Pay Bills menu option and then click on the 'Receive a new vendor invoice' icon.
ReceiveVendorCreditsMenu.JPG
If you use the Receive a new vendor invoice icon to enter a vendor credit, be sure to change the Type: field to "Credit".
ReceiveVendorCreditsInput.JPG
| Field | Description |
|---|---|
| Vendor | Enter the vendor name that is issuing the credit |
| Type | This MUST be set to Credit to enter a vendor credit |
| PO No. | Enter the purchase order number that the credit is being generated for. This is optional and if not entered, credits will be applied to any payable being paid for this vendor |
| Hold Payment | To place the credit on hold, check this box. A credit that is on hold will not be used when paying invoices for this vendor |
| Amount | Enter the amount of the credit |
| Reference No | Enter the credit number from the vendor. This reference number will be printed on the check stub, if possible when the credit is used on a payment to the vendor |
| Date | Enter the date the credit was issued by the vendor |
| Notes | Enter any text you deem necessary regarding this credit |
| Total Expenses | Enter your WIP account here. Your Vendor Credits account will be updated when the vendor credit is applied to a payment |
| [add more lines | Click on this link to add account distribution lines if necessary |
| Save and Close | Your credit will be saved and the input window will close |
| Save and Add New | Your credit will be saved a the input will open again so you can enter another credit |
| Save and Add New Same Vendor | Your credit will be saved and the input window will open again with the Vendor field populated with the vendor you used on the last credit |
Vendor credits are applied automatically to vendor payments. If you wish not to use credits when paying the vendor, you can edit the Credits column in the Pay Invoices window (by changing the Credits amount to zero 0.00) and no credits will be used for that payment.
When credits are used to pay a vendor invoice, the reference number will be printed on the check stub. If multiple credits are used on a single payment, all credit reference numbers cannot be listed because of space limitations on the voucher. The Check Run Report will list all credit reference numbers used on each check (if applicable).
- 5.2. Receive and Pay Bills
5.2.4. Create a Customer Refund - 5.2.3. Receive Vendor Credits
« Previous - 6. A & D
Next »
5.2.4. Create a Customer Refund
Customer credits can be created from the main menu or from the icon in the Vendors - Receive & Pay Bills window.
CustomerRefundMenu.JPG
The Customer Refund icon also appears in the Receive & Pay Bills icon list.
CustomerRefundIcon.JPG
Both options will open the Create a New Customer Refund window.
CustomerRefundInput.JPG
| Field | Description |
|---|---|
| Customer | Enter the customer name to whom the refund is to be made. After entering the first few characters, any matches in your customer data base will be presented in a drop down selection box. Click on the entry in the selection box |
| Original Invoice No | Enter the first few characters/digits of the invoice number for which the refund is being generated. Any invoice numbers that match the characters you've entered will be displayed with the invoice amounts. Click on the invoice in the selection box |
| Refund Amount | Enter the amount of the refund |
| Refund Date | Enter the date you are creating the refund. The default is today's date |
| Due Date | Enter the date by which you want to pay the refund. This is the due date that will appear on the refund in the Receive & Pay Bills window |
| Notes | Enter any notes you deem necessary for information about this refund |
| Total Expenses | Enter the account name or number of the account or click on the drop down arrow to select your account from the list presented |
| Amount | The Amount field will automatically populate from the Refund Amount field. This field can be changed to distribute the amount between multiple accounts |
| [add more lines] | If you need to enter more accounts, click on this link and more distribution input lines will be presented |
| Save and Close | This option will save your customer refund information and close the refund window |
| Save and Add New | This option will save your refund and open a new customer refund input window |
| Save and Add New Vendor | This option will save your refund and re-open the refund window with the same customer entered previously |
After saving your customer refund, it will appear in your Receive & Pay Bills will as a payable. You must generate the refund check to be sent to your customer.
- Table of Contents
6. A & D - 5.2.4. Create a Customer Refund
« Previous - 6.1. A & D List
Next »
6. A & D
Architectual & Design Community Database
A&DMenuOption.JPG
The A & D database options have their own menu structure. Access to the A & D list may be restricted by user permissions (See Permissions).
There are 3 options available under the A & D menu item; A & D List, Create a New A & D Firm and Search A & D Firms.
A & D firms can be added to the A & D database and once added here, they can be applied to Proposals in the Proposal Project Info tab. This database is in place now to support future reporting development. Reporting options are being developed to allow you to search proposals using the A & D information in your Proposals. This may be important to you to allow you to see which A & D firms you are getting customers from and possibly which firms you want to focus more on in getting more business opportunities from.
- 6. A & D
6.1. A & D List - 6. A & D
« Previous - 6.1.1. A & D Create New A & D Firm
Next »
6.1. A & D List
Architectual & Design
The A & D list option will display a list of all A & D firms that have been entered into your system
A&DList.JPG
To see the details of any entry in the list, simply click on the entry and the Edit A&D Firm window will open. You can make any changes to the A & D firms information and save them by click on the Update Firm Button.
The entry can be deleted by clicking on the Delete Firm Button.
You can also create a new A & D firm from the A & D List by clicking on the Create a New A & D Firm icon and you can search your A & D firms by clicking on the Search A & D Firms icon.
- 6.1. A & D List
6.1.1. A & D Create New A & D Firm - 6.1. A & D List
« Previous - 6.1.2. A & D Search A & D Firms
Next »
6.1.1. A & D Create New A & D Firm
Architectural & Design
You can use with the menu bar option or the icon option to add a new A & D firm to your database. Both options open the same input window.
The Create a new A&D Firm window opens with 3 tabs. The General Info tab, the A&D Contacts tab and the A & D Stats tab.
General Info
A&DCreateGeneral.JPG
| Field | Description |
|---|---|
| Firm Name * | Enter the name of the A&D firm (required field) |
| Street * | Enter the address for the firm (required field) |
| City * | Enter the City of the A&D firm (required field) |
| State * | Select the State of the A&D firm (required field) |
| Zip * | Enter the ZIP or Postal Code of the A&D firm (required field) |
| Phone * | Enter the phone number of the A&D firm (required field) |
| Fax | Enter the FAX number for the A&D firm |
| Add Firm | After entering the required data, click on this button to save your entry |
Input field names followed by an asterisk (*) are required fields and must be entered before your entry will be saved.
A&D Contacts
A&DCreateContacts.JPG
| Field | Description |
|---|---|
| Contact Name | Enter the contacts name |
| Title | Enter the contacts title |
| Phone | Enter the contacts primary phone number |
| Phone 2 | Enter a secondary phone number for the contact |
| Mobile | Enter the contacts mobile phone number |
| Fax | Enter the contacts fax number |
| Enter the contacts email address |
There is no limit on the number of contact's you may enter per A&D firm
A&D Stats
A&DCreateStats.JPG
There are no input fields in the A&D Stats window. This window shows statistics on proposals where the A&D firm has been added on the Project Info tab of your Proposal.
Average GP margin - this is the average GP % on proposals that this A&D firm is associated with.
Total invoiced Sales - this shows the Month To Date (MTD), Quarter To Date (QTD), Year To Date (YTD) and Overall total of invoiced sales that this A&D firm is associated with.
Total Proposed Sales - this shows the Month To Date (MTD), Quarter To Date (QTD), Year To Date (YTD) and Overall total of all proposals (not booked, booked, invoiced) that this A&D firm is associated with.
- 6.1. A & D List
6.1.2. A & D Search A & D Firms - 6.1.1. A & D Create New A & D Firm
« Previous - 7. Proposals
Next »
6.1.2. A & D Search A & D Firms
Architectural & Design
You can use the menu bar option or the icon option to search A & D firm to your database. Both options open the same input window.
A&DSearch.JPG
Enter the first few characters of the A&D firm name and click on the Search button. Any matches in your A&D database will be presented in the A&D list. You can click on any entry in the list to see the details.
- Table of Contents
7. Proposals - 6.1.2. A & D Search A & D Firms
« Previous - 7.1. Proposal List
Next »
7. Proposals
The Proposals database is accessed from the main menu bar option called Proposals. There are 4 options under the Proposals menu:
Proposal List - Create a New Proposal - Search for a Proposal
Project Management
Project Management will be covered under the Project Management section of this document.

The Create a New proposal option allows you to create a proposal from the menu. You do not have to create proposals from the Proposal list. Clicking on this menu option will open the Create A New Proposal window.
The Search for a Proposal option allows you to search for a proposal from the menu. You do not have to search for proposals from the Proposal list. Clicking on this menu option will open the Proposal Search window.
These options are also available as icons from the Proposal list as well. The menu options and the icon options open the exact same window.
The Proposal menu option is managed by Permissions (See Permissions).
- 7. Proposals
7.1. Proposal List - 7. Proposals
« Previous - 7.1.1. Search Proposals
Next »
7.1. Proposal List
Click on the Proposal List menu option to display your list of proposals.
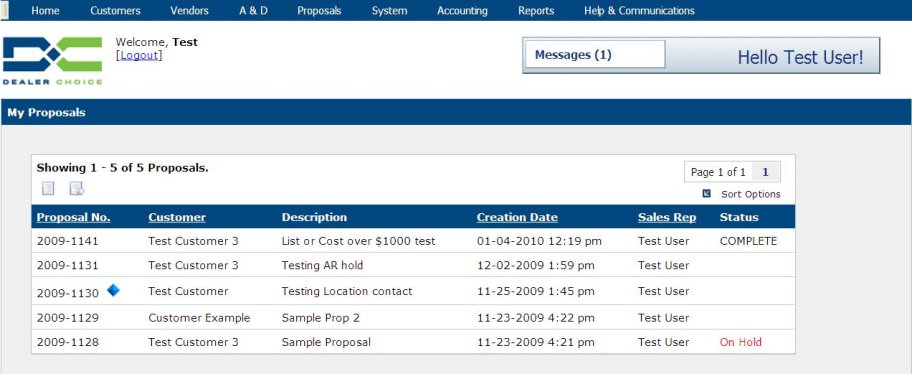
Icons
| Icons | Description |
|---|---|
| Create a New Proposal | Click on this icon to create a new proposal |
| Search Proposals | Click on this icon to search your proposal database |
Column Titles
| Column Titles | Description |
|---|---|
| Proposal No | This displays your proposal numbers, this column title is underlined which means you can click on this title to sort your proposals. Click the title once to sort the list by ascending values, click a second time to sort the list by descending values |
| Customer | This displays the customer name the proposal was created for, this column title is underlined which means you can click on this title to sort your proposals. Click the title once to sort the list by ascending values, click a second time to sort the list by descending values |
| Description | This displays the proposal description that was entered when the proposal was created |
| Creation Date | This displays the date the proposal was created, this column title is underlined which means you can click on this title to sort your proposals. Click the title once to sort the list by ascending values, click a second time to sort the list by descending values |
| Sales Rep | This displays the sales rep name that was used on the proposal, this column title is underlined which means you can click on this title to sort your proposals. Click the title once to sort the list by ascending values, click a second time to sort the list by descending values |
| Status | This is the custom status that is user defined. You create custom proposal status entries in System Configuration first, then users can select the appropriate status for their proposals from the list |
Sort Options
Proposal list sort options allow you to set and preserve certain display features of the proposal list. You can change the sort options as often as you like, or not use them at all.
| Sort Options | Description |
|---|---|
| All Proposals | This option is the default, all proposals in your Proposal database will be displayed |
| Only Active Proposals | This option, when selected, will display only active proposals - archived proposals will not be displayed |
| Only Archived Proposals | This option, when selected, will show only active proposals - active proposals will not be displayed |
| Creation Dates | You can enter a from and to date to sort your proposal list for proposals that were created within the date range you have entered |
| Sales Rep | You can select a sales rep name, or multiple sales rep names, only proposals that have been created for the sales rep names selected will be displayed. The default is to display all sales reps proposals |
- 7.1. Proposal List
7.1.1. Search Proposals - 7.1. Proposal List
« Previous - 7.1.2. Create a New Proposal
Next »
7.1.1. Search Proposals
To search your proposals
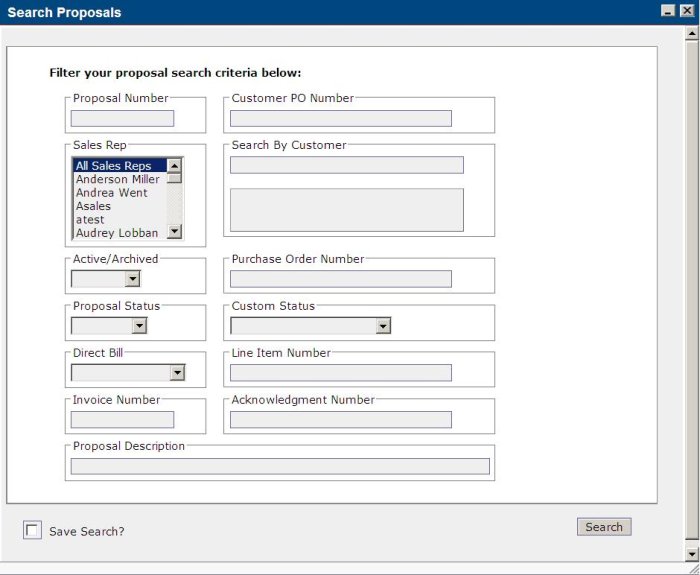
| Field | Description |
|---|---|
- 7.1. Proposal List
7.1.2. Create a New Proposal - 7.1.1. Search Proposals
« Previous - 7.2. Project Info Tab
Next »
7.1.2. Create a New Proposal
To create a new proposal, you can use the Create a New Proposal menu option or click on the Create a New Proposal icon in the Proposal List. Both options open the same input window.
ProposalsCreate.JPG
When creating a new proposal, you are only presented with 3 tabs, the Project Info tab, the Design tab and the Install Tab.
The Project Info tab is the only tab that has fields that must be entered before you are allowed to save your proposal.
When you create a new proposal, the proposal number field is automatically populated with the next available proposal number. After you enter a Sales Rep name, DealerChoice will remember this name for you and the next time you create a proposal, the sale rep name you used last will be automatically populated in the Sales Rep field for you.
Saving Your Proposal
ProposalsCreateAllTabs.JPG
Click on the Save Proposal button on the Project Info tab to save your proposal. The proposal will open with all available tabs displayed.
After you save your proposal, all available proposal tabs will be displayed. Proposal tabs are controlled by permissions (See Permissions) and depending on how your user permissions are set, your proposal view may differ from what is displayed here.
Proposal Icons
| Field | Description |
|---|---|
| Close Proposal | Clicking on this icon will close your proposal and you will be returned to the Proposal List |
| Save Proposal | You can click on the Proposal Save icon at any time. DealerChoice performs an auto save approximately every 10 minutes. |
| Delete Proposal | Click on this icon to delete your proposal. You cannot recover a proposal after it has been deleted. |
| Submit Proposal to a Group or Department | If you wish to send a message to another group regarding this proposal, click on this icon, select the group or groups that you want to notify, enter your message text in the message input box and click on the Go button. All members of the selected group(s) will be alerted by a message in their message queue. |
- 7. Proposals
7.2. Project Info Tab - 7.1.2. Create a New Proposal
« Previous - 7.3. Design Tab
Next »
7.2. Project Info Tab
ProposalsProjectInfoTab.JPG
The Project Info tab is the only tab that has fields that must be entered before you are allowed to save your proposal.
Fields that are followed with an asterisk (*) are required fields and data must be entered before you will be allowed to save your entry. You do not have to enter data in all proposal input fields to save your proposal
| Field | Description |
|---|---|
| Proposal Description * | The proposal description is a required field. Enter a description of your proposal. This description will appear in the proposal list and you can search for proposals on the description field |
| Proposal No * | The proposal number is automatically generated for you and is incremented by one each time a proposal is created. The starting proposal number is set in System Configuration. The system generated proposal number can be changed before the proposal has been saved. |
| Customer * | This is the Bill To information. Customer invoices created will be to the customer named here. Enter the first few characters of your customers name and any matches found in your customer database will be displayed in a drop down selection box. Select the entry from the list presented. If the customer does not exist in your customer database, you can create a new customer by clicking on the blue plus sign icon to the right of the customer. You can create your new customer without leaving the Create Proposal window. After entering and saving your new customer information you will be able to enter the first few characters of the new customers name and select it from the drop down selection box. You may also select any Customer locations that have been entered into the Customer database for this Customer as the bill to information. If locations exist under this customer, you may select a location as the Bill To. |
| Customer PO | If you received a purchase order number from your customer for this order, enter the customer purchase order number here |
| Propose To * | The Propose To field defaults to the Customer name. The Propose To field may be different from the Customer. If you have entered Customer locations for this Customer you may select any of these locations as the Propose To. |
| Contact | If you have entered Contacts for this Customer, you may select any of the existing contacts. This information will appear as the ATTN: field on proposal and invoices. New Customer Contacts can also be added from the Proposal window by clicking on the drop down arrow and clicking on the Add New option. This will open the Customer Contact edit window allowing you to enter customer contacts without leaving your proposal window. After you have entered and saved your contact information, you can add a contact to your proposal. |
| Expiration Date | By default, the expiration date is set to 30 days from the date your proposal is being created. The default expiration date can be modified in System Configuration. The Expiration date will print on the bottom of your proposals if the proposal print option called "Proposal Valid Thru date" has been selected (see Proposal Print Options), otherwise the Expiration date has no affect on your proposal. |
| Probable Close Date | This field is for future development and will be used for sales process evaluation reporting. It has no affect on your proposal. |
| Probability | This field is for future development and will be used for sale process evaluation reporting. It has no affect on your proposal. |
| Commission Team | This field is for future development. Commission teams are created in System Configuration and allow you to define a commission structure composed of multiple people. Each person defined on the team can receive a different commission percentage of the commission total amount. Individual people can be assigned to the specific proposal to receive commission as well by clicking on the drop down arrow and clicking on the Custom Commission Team option. You will be allowed to select user names to add to the proposal and their commission percentage amount. To add another person to the custom commission team, click on the Next link and select another name. The commission distribution must add up to 100% to use custom commission teams. The Commission Report does not yet display commission team distributions. |
| Sales Rep * | Enter the name of the sales rep assigned to this proposal. This name can be printed on proposals and invoices and this person will collect commission on this proposal if a commission rule has been assigned to them in System Configuration - Users. |
| Secondary Rep | This field is for future development. |
| Sales Coord | Enter the name of the sales coordinator assigned to this proposal if applicable. |
| A&D Firm | This field is for future development. If A&D firms have been entered into the A&D database, you can assign a firm to your proposals. A&D firms can be added without leaving your proposal by clicking on the blue plus sign icon and adding the firm information. After entering and saving the firm information the firm can be added to your proposals. |
| Contact | After entering an A&D Firm, you can select any contact that has been entered for the A&D firm here. |
| Order Type | Normal and Direct. A normal order type is a proposal where you will be invoicing the customer for the product ordered on this proposal. A direct order type is a proposal where a vendor or vendors will be invoicing your customer for the product ordered on this proposal and you will invoice the vendor(s) for your commission or dealer's fees. See Direct Bill Order Type section for details. |
| Proposal Status | Custom proposal status options are entered in System Configuration - Company & System Settings - System Settings tab via the Proposal Status Options function. You can create your own proposal status options here which can then be assigned to your proposals. The custom status option is displayed on the far right of your proposal list under the Status column. You can change this status as often as you need to. |
| Status Note | This is a free text field that allows you to enter text (if desired) to support your proposal status setting. You can add any information you want. The Status Note information is displayed when you hold your mouse pointer over the Proposal Status field. |
| Active/Archive | This field allows you to force a proposal into an Active or Archived state if you wish. Proposal archiving is handled automatically and is controlled by the parameters defined in System Configuration - Company & System Settings - System Setting tab via the "How many days should a proposal wait before being archived?" function. If a proposal is not opened/edited within the number of days set here, the proposal will automatically become archived. Archived proposals will not appear in your proposal list if you have filtered (proposal list sort options) the list to display Only Active Proposals. If your Proposal Sort Options are set to display All Proposals, archived proposals will be displayed. |
| Proposal Notes | This is a free text field that allows you to enter information about this proposal. You can enter any information that you feel is necessary for others that may be looking at this proposal to know. Currently, Proposal Notes are internal notes only, they do not appear on any customer facing documents. |
- 7. Proposals
7.3. Design Tab - 7.2. Project Info Tab
« Previous - 7.4. Install Tab
Next »
7.3. Design Tab
Design Tab
The Design tab allows you to enter information about your project that pertains to design. The more design information you enter here the better prepared your design team will be to provide their services. The information entered here is for internal use only and cannot be transmitted outside DealerChoice.
ProposalDesignTab.JPG
| Field | Description |
|---|---|
| Designer | You can assign a Designer to this proposal by typing the first few characters of the designers name. A list of matches will appear in a drop down selection box, click on the name in the list. This designer will get a message in their message queue alerting them that this proposal has been assigned to them |
| Submit Design Request | If you have a team of designers, you can click on this check box and a message will be sent to all members of the Design group that you have requested Design assistance. Typically, the Design team leader will evaluate the proposal request and then may assign a particular designer to this job by entering the designers name into the Designer field |
| Drawings Due | You can enter a date that you would like your project drawings completed on. |
| BOM Due | You can enter a date that you would like your Bill OF materials completed on |
| Check Boxes | These fields allow you to convey design information to your design team. Checking any of these boxes means that you are requesting this information to be included in the design project portion of this project |
| Value Engineer | Notes that you are trying to keep costs to the customer as low as possible, checked means YES |
| Inventory Rqrd | Does a customer product inventory need to be completed, checked mean YES |
| Typicals/Isometrics | Typical or Isometric drawings are required, checked means YES |
| Spec Tagging | Do you have product tagging requirements, checked means YES |
| Field Measure Rqrd | Do you need someone to field measure the building space, checked means YES |
| Install Tagging | Do you need the drawings tagged for installation purposes, checked means YES |
| Presentations Boards | Do you need presentation boards prepared, checked means YES |
| Building Shell | Do you need a building shell drawing, checked means YES |
| BID | Is this a bid situation, checked means YES |
| GSA | Is this a GSA project, checked means YES |
| XPRESS | Does the project contain quick ship or express ship product, checked means YES |
| No Wrkstns | If you know how many workstations are required, you can enter that number here |
| Product | If you enter a number of workstations, then you must enter a description of the workstation product to be used |
| No Offices | If you know how many offices are required, you can enter that number here |
| Products | If you enter a number of offices, then you must enter a description of the office product to be used |
| Ancillary | If ancillary (not your primary vendor lines) products will be used, you can check this box |
| Product | If you check the ancillary check box, then you must enter a description of the ancillary product to be used |
| Design Notes | This is a free text field that allows you to enter information about the design requirements for this proposal. You can enter any information that you feel is necessary for others that may be looking at this proposal to know. Currently, Design Notes are internal notes only, they do not appear on any customer facing documents. |
- 7. Proposals
7.4. Install Tab - 7.3. Design Tab
« Previous - 7.5. Item Details Tab
Next »
7.4. Install Tab
Install Tab
The Install tab allows you to enter information about your project that pertains to installation. The more information you enter here the better prepared your installation team will be to provide their services. The information entered here is for internal use only and cannot be transmitted outside DealerChoice.
ProposalInstallTab.JPG
| Field | Description |
|---|---|
| Project Manager | You can assign a Project Manager to this proposal by typing the first few characters of the PM's name. A list of matches will appear in a drop down selection box, click on the name in the list. This PM will get a message in their message queue alerting them that this proposal has been assigned to them |
| Submit PM Request | If you have a team of PM's, you can click on this check box and a message will be sent to all members of the Project Management group that you have requested PM assistance. Typically, the PM team leader will evaluate the proposal request and then may assign a particular PM to this job by entering the PM's name into the Project Mngr field |
| Delivery Only | If this project consists of a delivery of product only, check this box |
| Installation Only | If this project consists of installation work only, check this box |
| Delivery & Installation | If both delivery and installation are required on this project, check this box |
| Reconfig Only | If this projects consists of reconfiguration only, check this box |
| Target Install/Delivery Date | Enter your target installation date here, this gives your install team an idea of when you would like this work to begin |
| Scheduled Install/Delivery Date | When the installation date has been confirmed, enter the begin date here, entering a date here places this project on the Install & Delivery schedule under the Proposals - Project Management menu options |
| Install Time Available | Enter the time available (in days) that you have to install this project |
| Submit Quote Request | If you would like your install team to prepare a quote for this project, check this box. All members of the Project Management group will get a message in their Message Queue alerting them that you have requested an install quote |
| Install Location | Enter the location of where this product will be installed. This can be printed on Delivery Tickets and Purchase Orders. This field is required for sales tax to be applied to your taxable product on your finalized proposal |
| Ship To Location | Enter the default location of where the product is to be shipped. The ship to field for your product lines on your proposal will automatically be populated with this address. You can change the ship to location on individual product lines on your proposal if necessary |
| Shipping Contact Name | ENter the name of the person to be contacted with any shipping questions. This information appears on purchase orders |
| Phone | Enter the Shipping Contacts phone number |
| Fax | Enter the Shipping Contacts fax number |
| Shipping Notes | This is a free text input field where you can enter any information you desired concerning shipping instructions. This information appears on purchase orders |
| Bldg Mngmnt POC | Enter the Building Management contact if required. Some locations require the BUilding Management to be contacted before deliveries, etc. This gives you a place to store this information with your proposal. This information appears on purchase orders |
| Phone | Enter the Building Management contacts phone number |
| Fax | Enter the Building Management contacts fax number, if applicable |
| Site Information Check Boxes | These check boxes allow you to note site conditions and considerations. If any of these conditions exists and/or must be considered, check the appropriate boxes. Some of these conditions may also affect your installation quote. The more information you enter here the better prepared your installation team will be |
| Product Information Check Boxes | These check boxes allow you to note product conditions and considerations. If any of these conditions exists and/or must be considered, check the appropriate boxes. Some of these conditions may also affect your installation quote. The more information you enter here the better prepared your installation team will be |
| Install Notes | This is a free text field that allows you to enter information about this proposal. You can enter any information that you feel is necessary for others that may be looking at this proposal to know. Currently, Proposal Notes are internal notes only, they do not appear on any customer facing documents. |
- 7. Proposals
7.5. Item Details Tab - 7.4. Install Tab
« Previous - 7.6. Purchase Orders Tab
Next »
7.5. Item Details Tab
Item Details Tab
The Item Details tab is where you create the line items of your proposal. Line items can be entered manually, imported from a specification tool (CAP, Worksheet, Project Matrix) and they can be copied from another proposal. After all the line items have been created on your proposal, you must run the Proposal Finalization process by clicking on the Finalization icon. The Finalization process performs several checks on your proposal setup and line items and will alert you to any possible problems detected. This process also is where your sales tax rules are applied, direct bill invoice settings are defined and any vendor miscellaneous fees are applied. Once your proposal has passed the Finalization process, the Print and Email/Fax terminal icons will be available. If you edit a line item after the Finalization process, your proposal will automatically return to an unfinalized state so the edits can be checked again. you can finalize and unfinalize your proposal an unlimited number of times. If a line item has been ordered (exists on a purchase order) that line item will not be considered in the finalization process.
ProposalsItemDetailsTab.JPG
Item Details Tab Icons
| Field | Description |
|---|---|
| Add a line item | Click on this icon to manually enter a line item, the Create a New Line Item window will open allowing you to enter your line item data |
| Delete selected line items | Click on this icon to delete the selected line items from your proposal. To select line item, click on the selection check box to the left of the item quantity field. The line item delete function can not be reversed. Once a line item has been deleted it cannot be retrieved - it must be re-entered or imported again |
| Toggle selected line items between Active & Inactive | Click on this icon to make a line item or items inactive. Inactive line items appear on the Item Details tab grayed out (not bold like active line items). Inactive line items are not considered in proposal finalization, are not considered in the proposal's totals, will not appear on the customer's proposal and cannot be ordered. This option should be considered before deleting a line item, or it can be used for staging your proposal data to your customer. Line items must be selected before they can be made active or inactive. Selecting an inactive line item and clicking this icon will return the line item to an active state. |
| Create & edit proposal groups | Click on this icon to create group names for your proposal. You can create as many groups as you like. Line items can then be added to the groups you create to visually segment your proposal. Groups can be deleted as well. When deleting a group, only the group name is deleted. Any line items that are part of that group will remain on your proposal. |
| Add a new comment line | Click on this icon to add comment lines to your proposal. Comment lines created with this function will appear at the top of your proposal line items. Proposal comments can be assigned to print on the proposal only, all vendor purchase orders or on a specific vendor purchase order. Comments can be edited and deleted from the proposal. |
| Import items into this proposal | Click on this icon to import line items from a specification file (CAP, Worksheet, Project Matrix), or to copy line items from an existing proposal. Importing line items from a specification file is discussed later in this section. |
| Import work orders | Click on this icon to import completed work orders. Once a work order has been marked as complete, the work order must be imported into the proposal as a line item to be proposed to your customer. Work orders are discussed in detail later in this section |
Additional icons will be displayed after line items have been added to your proposal as discussed below.
Add a new line
ProposalsItemDetailsNewLine.JPG
| Field | Description |
|---|---|
| Vendor | Enter the first few characters of the vendor name, any matches found in your vendor database will be displayed in a drop down selection box. Select the vendor by clicking on the name in the selection box. |
| Ship To | This field will be populated with the vendor that was entered in the Ship To Location field on the Install tab if it was completed. The example above shows the Ship To as Test Customer 3 because Test Customer 3 was entered as the Ship To Location when the the proposal was created. If this field is empty, enter the first few characters of the Ship To vendor name, any matches in your vendor database will be displayed in a drop down selection box. Select the vendor by clicking on the name in the selection box. This field can be changed here if a particular line item needs to be shipped to a location other than that defined in the Ship To Location on the Install tab. |
| Product/Service | Select the Product/Service of this line item. In most cases this will be your default product (General Furniture). It may also be Installation Services, Design Services, or vendor miscellaneous fees. Products and Services are discussed later in this section. Products and Services can be defined by vendor in the Vendor database as well as in System Configuration. |
| Item Number | Enter the product part number or product number. This is the item number from either a paper or electronic catalog that identifies the product your are ordering. |
| Item Tagging | You are allowed to enter up to 3 item tags per line item. Item tagging fields are used differently by the various manufacturers. You can enter up to 3 item tag fields. |
| Item Description | Enter your product description here. This is where you enter your fabric and finish codes (for manual line items) |
| Quantity | Enter the quantity to order |
| Item List Price | Enter the list price of the line item |
| Discounting | Enter your buy discounting here, this is the discount that you are purchasing the product. |
| Item Cost | If you entered a list price and a buy discount, the Item Cost field will automatically be calculated for you. Otherwise, you can enter your item cost here. |
| GP Margin or % Discount Off List | Enter your GP percentage to be used to calculate the sell price or enter a discount percentage to be calculated off of the list price. |
| Item Sell Price | If a cost and GP or percentage off of list has been entered, the Sell price will be calculated for you, otherwise enter your sell price here. |
| Save | Click on the Save button to save your line item details and you line item will be added to the Item Details tab as a proposal line item. |
As you enter the pricing information on your line item, the right side of the window will update with the Extended Cost amount, Extended Sell amount and will display your Profit dollars and the calculated GP percentage. You can also apply a customer or vendor discount to this line item here as well. If discounts have been entered in the Vendor or Customer databases for this vendor or product, the discount will be applied to the product line. You can change the applied discount by clicking on the [Change] link below the Discount information.
Proposal Line Items
ProposalsManualLineItem.JPG
After saving your line item, the Item Details window will update to display the added line item as well as several additional Item Details icons that can be used for working with your proposal.
Icons Available After Line Items Are Created
| Icon | Description |
|---|---|
| Export items from this proposal | This option allows you to export your proposal line items to a spreadsheet. After clicking on this icon, the Export Items From Proposal window will open. The default option is to export the line items to a spreadsheet file. If a vendor electronic order template file has been loaded for any of the vendors appearing on this proposal, you will also have the option to export the line items in the electronic order format. Click on the Export button to export the line items and you will be prompted to open or save the file. You can view the file or save it to a local disk drive. |
| Function Menu | The function menu provides access to several additional functions that allow you to manipulate your proposal data. The Function menu details are listed below. |
| Summarize line items | Click on this icon to open the Proposal Summary window. This window gives you a snapshot of the totals of your proposal. The products are listed by vendor, by product. To return to the Item Details tab, click on the <-- Back link. |
| Finalize proposal | Click on this icon to run the proposal finalization process. Proposals must be finalized before you can print, email or fax them. |
Function Menu Options
ProposalsFunctionMenu.JPG
| Function Menu Options | Description |
|---|---|
| Discounting | This option allows you to change the purchase discount on selected line items. After entering your purchase discounting and clicking on the Update button, the selected line items will be updated with the discounting you entered here. |
| Change Discount ID | This option allows you to add or change the customer or vendor discount. You will be presented with a list of all the vendors that are used on your proposal. Select the vendor group that you want to apply a discount to. After selecting the vendor, any discounts that can be applied to this proposal will be presented to you so you can select the discount to apply. After your have selected the discount, click on the Update button and your discount will be applied to the vendor's products on this proposal. |
| GP Margins | This options allows you to add or change the GP % on the line items you have selected. You can enter a GP percentage of a percentage off of list. Click on the Update button and the selected line items will be updated. |
| Round Sell Price Up | This option allows you to round the sell prices up on the selected line items. Using this option will round the selected line items sell pricing up to the whole dollar amount. If you want to reverse the rounding, you must enter the original GP percentage or Percentage off of List on the line items. |
| Round Sell Price Down | This option allows you to round the sell prices down on the selected line items. Using this option will round the selected line items sell pricing down to the whole dollar amount. If you want to reverse the rounding, you must enter the original GP percentage or Percentage off of List on the line items. |
| Update Items to Zero Sell | You can force the sell price to zero on the selected line items with this option. To reverse this function, enter the original GP percentage or Percentage off of List on the line items. |
| Update Items to Zero Cost | This option will change the selected line items cost to zero. To reverse this function, enter the original buy discount percentage. |
| Adjust List Pricing | This option allows you to modify the list pricing by a percentage amount. You can enter a positive amount to increase the list pricing or you can enter a negative amount to decrease the list pricing on the selected line items. |
| Change Shipping Location | This option allows you to change the Shipping Location on the selected line items. |
| Add Tagging Information | This option allows you to add tagging information to the selected line items. You can enter up to 3 tag fields. |
| Smart Grouping | This function will automatically group your line items by the information found in the Tag 1 tag field. You can un-check any of the tag names to prevent that group from being created. If the group already exists, the line items matching that tag will be added to that group. The groups will be automatically created for you on your proposal using the Tag 1 data as the group name. |
| Add Proposal Fee | This function allows for a line item to be added to proposals that can be calculated on the Total List, Totals Cost or Total Sell of selected line items on the proposal. A flat dollar amount can be entered as well. This option can be used for calculating vendor fees such as electronic procurement fees or Industrial Funding Fees. This can also be used to charge customers a fee. |
Working with line items Right Mouse Click Options
Proposal Line items can be manipulated by using a right mouse click on the line item. The Line Move menu will appear. Depending on where the line items exists on your proposal will determine the line move options you see. If you have right clicked on the first line item on your proposal, you will not see the 'Move up' option. You can move line items (each line may be moved either up or down one line or to the top or to the bottom) or you can move groups in the same manner.
ProposalsLineMoveMenu.JPG
| Option | Description |
|---|---|
| Copy as a new line item | This option will open the View & Edit Line Item window allowing you to make any necessary changes before saving the item as a new line in your proposal. You can also define where the line should be saved on your proposal by selecting an insert location on the Save button options. |
| Move to top | This option will move your line item to the top of your proposal |
| Move up | This option will move your line item up one line |
| Move down | This option will move your line item down one line |
| Move to bottom | This option will move your line item to the bottom of your proposal |
| Move group to top | This option will move the entire group to the top of your proposal |
| Move group up | This option will move your group up one group |
| Move group down | This option will move your group down on group |
| Move group to bottom | This option will move your group to the bottom of your proposal |
Moving line items via Save button
Line items can be moved to any location in your proposal by editing the line item, then selecting an option as to where the line item is to be saved. If this is your first line item on the proposal, the 'Save and insert' option is not available. Only the Save button is available.
The line item Save button options allow you to save your proposal lin items anywhere on your proposal.
ProposalsLineMoveSave.JPG
Importing Items into a Proposal
There are three ways to populate your proposals with line items. Lines can be added manually, imported from a specification file and copied from another proposal. Any combination of these methods can be used on any proposal.
Your proposal line items can be created by importing a specification file from CAP, Worksheet or Project Matrix.
If you are using a specification tool not named here, please contact DealerChoice Support (support@dc-sysllc.com) and tell them what spec tool you are using. You will be contacted for information regarding your spec tool and tests will be run to verify the accuracy of importing spec files from your application.
Imported line items appear as proposal line items on the Item Details window. If customer or vendor discounting has been defined in the customer or vendor database, product discounting may be applied automatically to your line items during the import process. Your proposal must be created and saved before you can import specification files to create line items. The import process begins on the Item Details tab.
Specification tools allow you to export your projects using different export formats to allow you to import your line items into DealerChoice. Contact DealerChoice Support (support@dc-sysllc.com) if you have questions on which export format to use for your application.
Most specification tools allow you to export your project files in multiple formats. The two primary export formats are XML and SIF. After exporting your project data to either an XML file or a SIF file and saving the file to a local disk drive, you can import that file to create your proposal line items.
ProposalsImport.JPG
| Option | Description |
|---|---|
| OFDA XML (version 2.0 or higher) | Use this option to import spec files that were exported using the OFDA XML option |
| Express XML (DesignExpress) | Use this option if you exported your spec file from Design Express |
| SIF | Use this option for most SIF file exports |
| ProjectMatrix SIF (Customer SIF) | Use this option if you exported your project using the ProjectMatrix Custom SIF option |
| Another Proposal | Use this option to copy lines from an existing proposal |
After selecting your import format, use the Browse button to locate the specification file on your local disk drive.
Select the file that you want to import into the proposal. After selecting your import file, the Import Preview window will open displaying the contents of the file you selected. The Import Preview allows you to verify that this is the file you want to import before you complete the import process.
ProposalsImportPreview.JPG
If this is the file you that you want to import into this proposal, click on the Complete Import button and your line items will be imported into the proposal and will appear as line items on the Item Details tab. If you have selected the incorrect spec file to import, you can click on the Select Import File tab and select a different file to import.
The Existing Line Items tab displays the line items that are on your proposal before you import the current spec file. If you select any of the existing line items on this tab, they will be overwritten by the lines that you are about to import on the Import Preview window.
ProposalsImportItemsDetail.JPG
Your line items have been imported into your proposal. If customer or vendor discounts have been defined and match the product being imported, the discount will be applied to your proposal during the import process. You can now make any necessary adjustments or modifications to your proposal via the Function menu or line item editing.
There is no limit to the number of spec files that you can import into a single proposal. You can also manually add lines to your proposal and/or copy lines from other proposals either before or after importing specification files.
Before you can print, email or fax a copy of your proposal, your must run the proposal finalization process. You cannot generate purchase orders if your proposal has not been finalized.
Proposal Finalization
The proposal finalization process is your last step in preparing your proposals before presenting them to your customers. The finalization process checks your proposals for discounting conflicts, missing Ship To information, incomplete item specification, missing Install Location information as well as presenting vendor miscellaneous charges such as freight and small order charges. If finalization identifies a problem it will be presented in the finalization window and you will be allowed to edit or add the missing data.
Conflicts or missing data do not prevent you from completing the finalization process. The warnings are presented to be sure that you are aware that potential problems exist on your proposal. There are cases where the warnings may not apply or may be ignored such as budgetary pricing estimates.
Applying Sales Tax
Sales tax rules are also applied to your proposal during the finalization process. Sales tax is based on the Install Location information entered on the Install tab. If you do not have an Install Location defined for your proposal, you will not be presented with the sales tax rules selection option and your proposal will not include sales tax.
To start the proposal finalization process, click on the proposal finalization icon on the Item Details tab.
The finalization process will review your proposal checking for missing data such as the Ship To location and the Install Location and will notify you of such omissions. You have the option of continuing with the finalization process by completing the missing information or cancelling the process and reviewing your proposal again.
ProposalsFinalizationOne.JPG
In this example, a purchase discount was manually entered on the line item displayed and the system found a Customer or Vendor discount that may apply to this line item. This does not mean that the discounting entered manually is wrong, this is simply a warning that another discount exists and may be applicable. After reviewing the line item for accuracy, you may choose to ignore the warning or you may have to update the discounting on the line item. The warning can be ignored by un-checking the Discount Expected check box. If left checked, DealerChoice will change the discount to the "expected" discount for this line item.
Note that in the Discount Conflicts title bar there is an [uncheck all] link that will remove the check marks from all discounting conflicts presented. If you have received special pricing and you know that you have used the correct discounting you can over-ride the systems recommendation by leaving your discounting in place.
This example also shows the sales tax rules options. Again, the sales tax rules are based on the Install Location as defined on the Install tab of your proposal.
You can click on the '<-- Back' link to discontinue the finalization process and return to the Item Details tab or you can click on the Finalize button to proceed.
ProposalsFinalizationTwo.JPG
This example shows two vendor charges that are defined in the vendor database for this vendor. The rule being applied is detailed under the rule type and the amount of the fee is presented to you. You can edit the Sell amount with a specific dollar amount or you can use the [GP margin] calculator to add a GP percentage to the fee. If these fees are left checked in the finalization window, these fees will be automatically added to your proposal as additional line items. These line items can be edited from the Item Details tab if you do not change the sell pricing in the finalization window.
If you edit a line item on your proposal that was not added by the finalization process, your proposal will revert back to an un-finalized status and the line items that may have been added by the finalization process will be automatically removed. Since you have edited a line item, the proposal must be evaluated again to see if the vendor charges and fees are applicable or not. For example if you changed a quantity on a line item from 100 to 10 because of a typing mistake, a small order fee that was not applicable before may apply now. The finalization process will capture this extra cost and allow you to include it on your proposal.
ProposalsFinalizationComplete.JPG
If no issues are identified with your proposal you will see a clean finalization window as shown above. You can select the applicable tax rules and click on the Finalize button to complete the process and you will be returned to the Item Details tab.
ProposalsFinalizedItemDetails.JPG
After finalization you have additional icons available on the Item Details tab.
The Finalization icon has changed to the 'Un-finalize this proposal' and you now have a new icon to print the proposal and one for the email and fax terminal.
Proposal Printing
To to select your proposal print options and to preview your proposal, click on the Printer icon in the Item Details tab. This will open the Proposal Print options window.
ProposalsPrintOptions.JPG
| Proposal Print Options | Description |
|---|---|
| Print Prefs | If print preferences have been saved, the title of your saved print preferences will appear in this list. Selecting a saved print preference eliminates having to select specific print options. You can select a set of print options and save the settings (see Save Print Preferences). Then you can use the saved print preferences to print your document by selecting a saved print preferences option instead of have to modify your default set of print options. |
| Company Logo | If you have uploaded multiple company logos, you will be able to select which logo is to appear on your document. To change logo's, select the appropriate logo from the drop down selection list. Company logo's are uploaded in System Configuration. There is no limit on the number of logos you can upload. |
| Print Logo? | Even if you have a logo selected, you can choose to have the logo print (or not) by selecting this check box. If the box is checked, your logo will print, if not checked, your logo will not print. |
| General Print Fields | Description |
|---|---|
| Print Logo on First page Only | If selected, your company logo will appear on the first page only of your proposal |
| Proposal Description | If selected, the proposal description will appear on your proposal |
| Proposal Totals | If selected, sell pricing totals will appear on your proposal |
| Group Totals | If selected and if you have groups defined on your proposal, each group will appear with a subtotal amount |
| Page Break After Groups | If selected, a page break (new page) will be inserted after a proposal group has printed |
| Group Summary | If selected, a subtotal amount for each group will appear at the end of your proposal |
| Tax Amount Due | If selected, the sales tax amount will appear on your proposal in the Totals section |
| Deposit Requirements | If selected, the deposit request text will appear at the bottom of your proposal |
| Propose To | If selected, the Propose To information from the Project Info tab will appear on your proposal |
| Customer Contact | If selected, the Customer Contact from the Project Info tab will appear on your proposal |
| Shipping Location | If selected, the Shipping Location from the Install tab will appear in your proposal |
| Installation Location | If selected, the Installation Location from the Install tab will appear on your proposal |
| Proposal valid Thru Date | If selected, the Expiration date from the Project Info tab will appear on your proposal |
| Panel Attribute Details | If selected, Teknion panel attributes will be displayed in detail on your proposal |
| Company Contact Details in Footer | If selected, your company address information from System Configuration will appear in the footer of your proposal |
| Sales Rep Contact Phone | If selected and if this information has been added to the User's definition in System Configuration, this information will appear in the header of your proposal |
| Sales Rep Contact Fax | If selected and if this information has been added to the User's definition in System Configuration, this information will appear in the header of your proposal |
| Sales Rep Contact Email | If selected and if this information has been added to the User's definition in System Configuration, this information will appear in the header of your proposal |
| Hide PO Instructions | If Selected and if the proposal is set as a Direct order type on the Project Info tab, the purchase order instructions to your customer will not be displayed |
| Customer PO | If selected and if the Customer PO field on the Project Info tab has been completed, the Customers PO number will appear on your proposal |
| Display Sub Totals | If selected and if Products and Services have been defined as Sub Total fields in System Configuration, then the appropriate sub total fields will appear at the bottom of your proposal. |
| Line Item Print Fields | Description |
|---|---|
| Line Numbers | If selected, the proposal line items will be numbered |
| Vendor Name | If selected, the Vendor Name will appear for each line item |
| Product Name | If selected, the Product Name will appear for each line item |
| Item Number | If selected, the item number (product code, part number) will appear for each line item |
| Item Description | If selected, the item description will appear for each line item |
| Item Quantity | If selected, the item quantity will appear for each line item |
| Item List Pricing | If selected, the item list price will appear for each line item |
| Extended List Pricing | If selected, the extended list price for each line item will appear |
| Item Sell | If selected, the item sell price will appear for each line item |
| Extended Sell | If selected, the extended sell price will appear for each line item |
| Item Tagging | If selected and if item tags are in use, the tagging information will appear for tagged line items |
| Item Finishes & Options | If selected, the finishes and options for line items that have been imported via a specification file will appear |
| Zero Sell Items | If selected, line items with a zero sell price will appear |
| Buy Discounting | If selected, the buy discounting will appear for each line item |
| GP Margin | If selected, the GP margin will appear for each line item |
| Customer Discounting | If selected, the discounting used to calculate the sell price will appear |
| Item Special | If selected and if the item special flag exists for an imported line item, the item special code will appear |
| Item Cost | If selected, the item cost will appear for each line item |
| Extended Cost | If selected, the extended item cost will appear for each line item |
| Print lines that are Not Booked | If selected, only the line items that are not on a purchase order will appear |
| Print lines that are Booked But Not Invoiced | If selected, line items that are on a purchase order and not on an invoice will appear |
| Print lines that are Invoiced | If selected, only line items that have been invoiced will appear |
| Proposal Details | Description |
|---|---|
| Print Line Item Details | If selected, the line item details will appear |
| Print Summarized by Group | If selected, line item details will not appear on your proposal. If no groups are defined, only the proposal totals will appear |
| Display Pricing in Currency | Description |
|---|---|
| Currency Selection | If multiple currencies have been defined in your site, you can select the default currency for your site |
| Proposal Print Options | Description |
|---|---|
| Proposal Date | You can change the date to appear in the proposal header by changing the date in this field |
| Proposal Footer Message | The default proposal footer message is defined in System Configuration and will appear here. You can add information to the proposal footer message by adding your text here. |
| Save These Print Preferences | This option allows you to save your selected print preferences. |
Saving Proposal Print Preferences
The Saving Proposal Print Preferences function was created to allow you to save a set of proposal print options that may be different from your normal proposal print option needs. Proposal Print Preferences can be shared so everyone in your company can use it.
ProposalsSavePrintPrefs.JPG
To save a set of proposal print preferences, click on the 'Save These Print Preferences?' check box and you will be presented with a text input box to enter a name for your print preferences. This may be customer specific so you could name it using the customers name. Any future proposals for that customer will be printed using this set of saved print preferences. If you want your print preferences to be available to everyone, check the 'Make these public?' check box. When this box is checked, everyone in your company will be able to select this saved print preference option.
ProposalsSavePrintPrefs2.JPG
The example above shows a set of print options being saved as Customers Proposal and it has been set as a public (shared) print option.
ProposalsSavePrintPrefs3.JPG
After printing then proposal you will now have a new Print Preference to choose from when you print proposals. As you can see in the example above, the proposal print option called 'Customers Proposal' is available to be used for printing proposals. Once a saved print preference is selected, the Proposal Print Options window changes so other options cannot be selected. If you wish to select your own print preferences, simply choose the 'Select my print options below' option and you can continue to select the options you want n your proposal.
Also notice the a red x icon appears to the right of the saved print preference. This is the delete icon and it is only presented to the user that created it so only that user can delete their own print preferences. The ability to edit/save print preferences is managed by permissions so only the users that have permission can create and edit saved print preferences. To delete a saved print preference you must select it from the list first, then click on the delete icon and your saved print preference will be deleted.
ProposalsSavePrintPrefs4.JPG
Marking the saved print preference as public allows the print preference to be used by others. It will appear in every users Saved Print Prefs drop down selection box.
Email and Fax Terminal
The Email and Fax terminal allows you to transmit documents to your customers and vendors. You must have completed the proposal finalization process before your can use the email and fax terminal. The email and fax terminal icon does not appear on the Item Details tab until you have completed the finalization process. To open the email and fax terminal, click on the Email and Fax icon on the Item Details tab.
If your message fails to send and DealerChoice can determine that your message failed, you will get a message in your DealerChoice message queue alerting you that the message was not sent. Some mail servers and fax machines do not report failures. It is highly recommended that when emailing a document, you include your own email address in the Recipient list so if you do not receive it, there is a very good chance that the intended recipient did not receive it either. If you are faxing a document, it is highly recommended that you follow up with the recipient to be sure that they have received your fax message.
When you "Send" your message by clicking on the Send button, your message is placed in the message queue. You can check on the status of your message by clicking on the Message Log tab. The message queue is processed approximately every 10 minutes by DealerChoice. You have the option of removing your message from the message queue up to the time that the system starts to process your message.
ProposalsEmailTerm.JPG
| Email Options | Description |
|---|---|
| Message Type | You can choose to send an email or fax message. The email input windows options are defined here |
| Document selection | As you create documents (proposals, purchase orders, invoices, etc) they will appear under the Message Type selection field. Any document that is selected will be transmitted to the recipient |
| Recipient Email | Enter the email address of the person or persons you wish to send the document to. You can enter multiple email addresses just be sure to enter each address on a separate line |
| [search] | The search option allows you to search through all the contacts you have entered email addresses for into DealerChoice. Type the first few letters of the persons first name and any matches found in the contacts database will be displayed, click on an entry in the list to select that person |
| Subject | Enter the subject line for your email |
| Message Body | Enter the message text for your email |
| Attachments From File Vault | If you have uploaded any documents into this proposals File Vault, they will be displayed here for selection as attachments to your email message. To include multiple documents, hold the CTRL key and click on the documents. |
| Send | Click on the Send button to place your email in the message queue to be processed by the message processor |
ProposalsFaxTerm.JPG
| Fax Options | Description |
|---|---|
| Message Type | You can choose to send an email or fax message. The fax input windows options are defined here |
| Document selection | As you create documents (proposals, purchase orders, invoices, etc) they will appear under the Message Type selection field. Any document that is selected will be transmitted to the recipient |
| To | Enter the name of the person you wish to send the document to. |
| [search] | The search option allows you to search through all the contacts you have entered fax numbers for into DealerChoice. Type the first few letters of the persons first name and any matches found in the contacts database will be displayed, click on an entry in the list to select that person |
| Fax | If you have selected a name from the search option, the fax number will be populated for you, otherwise you can enter the fax number to send the fax to |
| From | Your name will be populated in this field for you. |
| Date | Today's date will be populated in this field. |
| Re: | Enter the reason for your fax |
| Attachments From File Vault | If you have uploaded any documents into this proposals File Vault, they will be displayed here for selection as attachments to your fax message. To include multiple documents, hold the CTRL key and click on the documents. |
| Send | Click on the Send button to place your fax in the message queue to be processed by the message processor |
Message Log Tab
The message log tab will display all messages that have been sent on this proposal. The messages appear in datestamp order and the most recent message will appear at the top of the list. All messages queued will have a status of 'Pending' until they begin to be processed by the message processor. The status will change to 'Processing'. After the message has been processed, the status will change to 'Sent' or 'Failed'. Messages can be removed from the queue up until they begin being processed by the message queue.
ProposalsMessageLogTab.JPG
| Message Log Field | Description |
|---|---|
| Type | The Type field notes whether the message was emailed or faxed |
| TimeStamp | This field notes the date and time the message was sent to the message queue |
| Recipient | This field displays either the email address or fax number of the recipient of the message |
| Subject | This field displays the subject of your message |
| Status | As noted above, the status can be 'Pending', 'Processing', 'Sent' or 'Failed' |
| Remove from queue icon | This icon allows you to remove a message that is still in the 'Pending' status from the message queue. Once processing of the message begins, the message cannot be removed from the queue |
- 7. Proposals
7.6. Purchase Orders Tab - 7.5. Item Details Tab
« Previous - 7.7. Receivables Tab
Next »
7.6. Purchase Orders Tab
Purchase Orders Tab
To create purchase orders click on the Purchase Orders tab of your proposal. If no purchase orders have been created yet, you will only see the 'Create purchase orders' icon. Click on this icon to start the Purchase Order process. Your proposal must be finalized before you can create purchase orders. If your proposal has not been finalized and you try to create purchase orders, you will see a message noting that you must first run the finalization process.
ProposalsPOTab.JPG
After clicking on the 'Create purchase orders' icon, your proposal line items will be displayed in the Select Line Items window. You can choose all line items, specific line items or select line items by group, if groups were used on your proposal in the Item Details tab. If you click on the check box to the left of a Group name, all line items in that group will be selected.
ProposalsPOSelectLines.JPG
Once you have the line items that are to be ordered selected, click on the Next button to Review your items to be ordered.
ProposalsPOReview.JPG
The <-- Back button allows you to exit the Review window and returns you to the Purchase Order select lines window.
In the example above, notice that a warning message appears noting that a customer deposit is required in order to proceed. This message is telling you that you have set a Customer Deposit Required amount in the customer database and is alerting you that you have not yet received or entered a deposit from this customer. This is a warning only, it will not prevent you from creating purchase orders for this customer.
The Place Orders button will complete the purchase order creation process and your purchase orders will be generated.
| Purchase Order Review Fields | Description |
|---|---|
| Purchase Amt | This is the total amount of your purchase order for this vendor product |
| Submit Via | The default options for the Submit Via field are 'Fax', 'Email' and "Don't send just let me print it". If an electronic order template exists for this vendor you will have two more options: 'Generate electronic order and send it' and 'Generate electronic order and let me save it'. |
| Submit To | This prompt will appear if you choose to email your purchase order from the Submit Via options noted above. Enter either the email address or fax number to send the purchase order to. If this information has been defined in the vendor database for this vendor, the information from the vendor database will be populated here for you |
| CC | This prompt will appear if you choose to email your purchase order from the Submit Via options noted above. The CC field allows you to add recipients to receive this purchase order. You cannot add multiple recipients for faxed orders, only a single fax number may be entered. |
| Company Logo | You can select which company logo you want included on your purchase order if you have uploaded multiple logos |
| Print Logo? | You can select whether or not you want your company logo to print on your purchase order |
| Attach Files | If files have been uploaded to the File Vault, they will appear here and are available to be selected and will be sent with your purchase order as attachments. To select multiple files, hold the CTRL key down and click on files |
| PO Comment | Enter any specific text you want included on your purchase order. If this text will be the same all the time for this vendor, you can define the PO Comment text in the vendor database. |
| Ship To | This is the Ship To address from the Install Info tab or from the specific line item Ship To address if it was changed on the Item Details tab |
| Shipping Contact | This is a text field that you can enter a shipping contact name. If the Shipping Contact information was completed on the Install Tab, that information will appear here. |
| Contact Phone | This is a text field that you can enter a shipping contact phone. If the Shipping Contact information was completed on the Install Tab, that information will appear here. |
| Contact Fax | This is a text field that you can enter a shipping contact fax. If the Shipping Contact information was completed on the Install Tab, that information will appear here. |
| Req Ship Date | You can select a Required Ship Date by entering that date here |
| Req Arrive Date | You can select a Required Arrival Date by entering that date here |
| Items to be Purchased | This section displays the line items that are to be purchased from this vendor on this purchase order |
Vendor Deposit Required Example
The example below shows a case where a vendor deposit is required. If this vendor requires a deposit with orders and you have set the Required Deposit Percentage amount in your vendor database for this vendor, you will see the Vendor Deposit Required field in the Review Your Purchase Orders window. The amount displayed is the amount calculated per the percentage amount that exists in your vendor database for this vendor. If you create the purchase order with this box checked, a deposit payable will be created and will appear in your Vendor Bills window. If you un-check this box, the deposit payable will not be created.
ProposalsPOReviewVendorDeposit.JPG
Once you click on the Place Orders button, your purchase order(s) will be created. Depending on your Submit Via option selection, your purchase order(s) may be emailed and/or faxed as well. The Print Purchase Orders window will open displaying the purchase orders you have just created and the purchase orders will be listed in the Purchase Orders tab. You can print copies of your purchase order(s) if you wish.
After creating purchase orders, you will see two additional icons on the Purchase Orders Tab.
ProposalsPOList.JPG
New Purchase Order Tab Icons
| Icon | Description |
|---|---|
| Print Purchase Order Summary | Clicking on this icon will generate the Purchase Order Summary report. This report lists all purchase orders that exist on this proposal and allows you to print the report if required. The Purchase Order Summary report includes order acknowledgement information if it has been entered as well. |
| Print Delivery Tickets | Clicking on this icon opens the Delivery Ticket Print Options window allowing you to select fields to appear on your Delivery Ticket. |
Purchase Order Summary Report
The Purchase Order Summary report will list each purchase order that has been created on this proposal. It displays key elements of each purchase order.
ProposalsPOSummary.JPG
| PO Summary Column Titles | Description |
|---|---|
| PO No. | The purchase order number |
| Ack No | If the acknowledgment number has been entered for the purchase order it will be displayed here |
| Ship Date | If the Ship Date has been entered it will be displayed here |
| Receive Date | If the Receive Date have been entered it will be displayed here |
| Vendor | The vendor that the purchase order is made out to will be displayed here |
| Order Amount | The total cost amount of the purchase order will be displayed here |
| Shipping Location | The shipping location of the purchase order will be displayed here |
Delivery Ticket Report
The Delivery Ticket Print Options window allows you to specify what data is to be included on your Delivery Ticket. This report allows you to use the Delivery Ticket for multiple uses although it was originally intended as a form to accompany your installers to the job site to record what product has been delivered to your customer. The document title can be changed to any text you want so the form can be tailored to meet your needs.
ProposalsPODeliveryTicketPrintOptions.JPG
| Delivery Ticket Print Option | Description |
|---|---|
| Print Prefs | If print preferences have been saved, the title of your save print preferences will appear in this list. Selecting a saved print preference eliminates having to select specific print options. You can select a set of print options and save the settings (see Save Print Preferences). Then you can use the saved print preferences to print your document by selecting a saved print preferences option instead of having to modify your default set of print options. |
| Company Logo | If you have uploaded multiple company logo's, you will be able to select which logo is to appear on your document. To change logos, select the appropriate logo from the drop down selection list. Company logo's are uploaded in System Configuration. There is no limit on the number of logos you can upload. |
| Print Logo? | Even if you have a logo selected, you can choose to have the logo print (or not) by selecting this check box. If the box is checked, your logo will print, if not checked, your logo will not print. |
| General Print Fields | Select the fields that you want to appear on your document |
| Customer | If selected the customer name will appear |
| Customer Contact | If selected the customer contact from the Project Info tab will appear |
| Shipping Location | If selected the shipping location from the Install tab will appear |
| Install Location | If selected the install location from the Install tab will appear |
| Vendor Address | If selected the vendor address will appear |
| Dealer PO | If selected the purchase order number will appear |
| Customer PO | If selected the customer purchase order number will appear |
| Proposal No | If selected the proposal number will appear |
| PO Date | If selected the purchase order date will appear |
| Bldg Mngmt POC | If selected the building management point of contact from the Install tab will appear |
| Bldg Mngmt Phone | If selected the building management phone number from the Install tab will appear |
| Bldg Mngmt Fax | If selected the building management fax number from the Install tab will appear |
| Purchase Order Comments | If selected the purchase order comments will appear |
| Line Item Print Fields | Select the fields for displaying your line items |
| Line Numbers | If selected your line items will be numbered |
| Vendor Name | If selected the Vendor Name will appear on each line item |
| Product Name | If selected the Product Name will appear on each line item |
| Item Number | If selected the Item Number will appear for each line item |
| Item Description | If selected the Item Description will appear for each line item |
| Item Quantity | If selected the Quantity for each line item will be displayed |
| Item Tagging | If selected the Item Tagging will appear for each line item |
| Item Finishes & Options | If selected the Item Finishes and Options will appear for each line item |
| Acknowledgement Number | If selected the ACK Number will appear for each line item |
| Ship Date | If selected the Ship Date will appear for each line item |
| Receive Date | If selected the Receive Date will appear for each line item |
| Quantity Received | If selected the Quantity Received field will appear for each line item |
| Document Title | The default title is Delivery Ticket. Depending on how you plan to use this document, you can change the title to whatever text you want, some examples are Customer Pickup, Will Call and Drop Ship |
| Shipping Location Title | The default is Shipping Location. You can change this field to whatever text you want |
| Dealer Contact | You can enter the name of a person that is to be contacted regarding this document if desired |
| Ticket Comments | You can enter text in this field to relay instructions or any other information you want to appear on this document |
| Save These Print Preferences? | This option allows you to save your selected print preferences. |
A sample Delivery Ticket appears below
ProposalsPODeliveryTicketPrint.JPG
Purchase Order Summary Window
After you create your purchase orders, you can review them and make adjustments via the Purchase Order Summary window. To view the Purchase Order Summary window, click on any purchase order that exists in the Purchase Orders tab of any proposal.
ProposalsPOSummaryWindow.JPG
| Purchase Order Summary Window Icons | Description |
|---|---|
| Print Purchase Order | This icon allows you to print a copy (or save a PDF copy) of your purchase order |
| Delete Purchase Order | This icon allows you to delete the purchase order. If the product has been invoiced to your customer or if you have received a vendor invoice against this purchase order, you cannot delete it without removing the customer invoice or vendor invoice first |
| Print Delivery Ticket for this Purchase Order | This icon allow you to print a Delivery Ticket for this purchase order |
| Email & Fax Terminal | This icon allow you to email or fax this purchase order |
| Purchase Order Summary Fields | Description |
|---|---|
| Customer | The Customer Name from your proposal |
| Sales Rep | The Sales Rep Name on this proposal |
| Vendor | The Vendor Name that the purchase order is made out to |
| Purchased On | The Creation Date of the purchase order |
| Order Amount | The Total Cost amount of the purchase order |
| Total Sell | The Total Sell amount of the product on this purchase order |
| Total List | The Total List amount of the product on this purchase order |
| Shipping To | The Ship To address for the product on this purchase order |
| [change] | Allows you to change the Shipping To address on this purchase order |
Entering Purchase Order Acknowledgement Information
There are two methods for entering your purchase order acknowledgement data. The first method is to enter the information directly on the Purchase Order Summary window (Purchase Orders tab on Proposal) and the second is to enter the the information via the Project Status Report (under Reports - Proposals & Sales - Project Status)
To enter acknowledgment information from the Purchase Order Summary window, open your proposal and click on the Purchase Orders tab. Click on the purchase order that the information is to be entered on to open the Purchase Order Summary window.
In the Item Summary section of this window you will see your purchase order line items displayed. There are several icons
| Item Summary Icons | Description |
|---|---|
| Add Line Item to Purchase Order | Click on this icon to add line items to this purchase order. The line item(s) to be added, must be entered on the Item Details tab, must have the same vendor and must have the same ship to address. |
| Delete Selected Line Items | Click on this icon to delete any lines that have been selected (check box to left on line item). This will remove the selected line items from this purchase order and they will revert back to a 'not ordered' status on your Item Details tab. |
| Enter Acknowledgement information on selected items | Clicking on this icon open the Enter Ack Info window and allows you to enter your acknowledgement information on the selected line items. |
| [check all] | Clicking on this icon will select all the line items on this purchase order. |
ProposalsPOEnterAckInfo.JPG
In the example above, the [check all] button was clicked to select all the line items on this purchase order, then the Enter Acknowledgement Info icon was clicked.
Enter the acknowledgement information into the appropriate input box and click on the Save button to save your data. The selected line items will be updated to display the ack info you entered as shown below.
ProposalsPOAckInfoEntered.JPG
When you close the Purchase Order Summary window you acknowledgement number will also be displayed in parenthesis next to the vendor name in the Purchase Order tab window as shown below.
ProposalsPOAckData.JPG
Editing Purchase Orders
To edit the data on a purchase, click on the purchase order containing the line item(s) you wish to modify to open the Purchase Order Summary Window.
Each line item on the purchase order is displayed with the [edit] button to the right on the product description. Click on the [edit] button to open the View & Edit a Booked Line Item window.
ProposalsPOEditBookedLine.JPG
The edit window displays the line item details and all fields are locked. This is to allow you to view the line item details without making any changes unintentionally. To unlock the data fields, click on the Edit button in the upper right hand corner of this window and all eligible fields willbe unlocked.
When editing purchase order data, certain fields will remain locked if the line item has been invoiced. Once the line item has been invoiced, you can only change the cost of the line item.
After making changes to the line item you must click on the Save button and your changes will be saved.
- 7. Proposals
7.7. Receivables Tab - 7.6. Purchase Orders Tab
« Previous - 7.8. Proposals Payables Tab
Next »
7.7. Receivables Tab
The Receivables tab is where you create your customer invoices, create proforma invoices, receive customer deposits and credit customer credits.
The Customer Invoices tab displays all customer invoices that were created on this proposals and the Customer Credits tab displays all customer credits that were created for this proposal
Customer Invoices Tab
ProposalsReceivablesTab.JPG
| Receivables Tab Icons | Description |
|---|---|
| Create Customer Invoices | Click on this icon to start the invoice creation process |
| Pro Forma Invoice | Click on this icon to start the proforma invoice process |
| Receive Customer Deposits | Click on this icon to receive a customer deposit |
Create Customer Invoices
After clicking on the Create Customer invoices icon the Select Line Items window will open. This allows you to select the line items that you want to include on your customer invoice. You can also select lines by Group. If you check the selection box to the left of any Group name, all the line items contained in that group will be selected. Click on the Next button to continue the invoice creation process.
ProposalsCustomerInvoiceLinesSelect.JPG
The Review Your Invoice window will open.
ProposalsCustomerInvoiceReview.JPG
The Review You Invoice window displays the invoice information for you before the invoice is created. Several of the fields in this window can be edited.
| Review Your Invoice Fields | Description |
|---|---|
| [update tax] | This link allows you to update or modify the tax rules that have been applied to the proposal. Clicking on this icon will open the Change Tax Rules window and allows you to either apply sales tax or modify the tax rules that were applied. |
| Invoice Date | You can pre or post date your invoice created date by adjusting the date here. The default is the date you are running this process |
| Submit Via | The Submit Via options allow you to choose how your invoice is to be submitted to your customer. You can select Email, Fax or Mail. If you select the Mail option, then the invoice will be created and the invoice PDF preview window will open displaying your final invoice. You can then print a copy of the invoice to mail to your customer. If you select Email or Fax, you must enter the customers email address or fax number. The invoice will be created and submitted to the message queue to be processed as an email or fax to your customer. |
| Remit To | If you have defined remit to addresses in your System Configuration, you will have the option of which remit to address is to be printed on your invoice. |
| Company Logo | If you have multiple company logos uploaded in your System Configuration, you can select which logo is to appear on this invoice. |
| Print Prefs | If customer invoice print preferences has been saved, then the print preferences options will be available for selection here |
| Create Invoice | Clicking on this button will complete the invoice creation process and your invoice will be created. You invoice will appear as in your Receivables tab. |
[update tax]
ProposalsCustomerInvoiceChangeTax.JPG
The [update tax] link allows you to add or modify the tax rules that were applied to your proposal during finalization. Select the tax rules to be applied to your customer invoice and click on the Save Tax button. You invoice Preview window will update to display the new tax rules applied.
Pro Forma Invoice
The pro forma invoice option allows you to generate a document that can be used for many purposes. The document can be used to create what looks like an invoice, proposal, or a receipt/invoice for a customer deposit.
The pro forma invoice has absolutely no accounting impact at all. It is simply a document that you can use to create an "invoice" for a customer deposit, or to request a payment from your customer without having to create a customer invoice. If you receive a payment that is the result of sending a pro forma invoice, you will receive that payment as a deposit on the proposal. When you do create the customer invoice, the deposit amount obtained from the pro forma invoice can be applied to that invoice. There is no limit to the number of pro forma invoices you can generate.
Click on the Pro Forma invoice icon and the Pro Forma Invoice Print Options window will open
ProposalsCustomerInvoiceProForma.JPG
| Pro Forma Print Options Fields | Description |
|---|---|
| Print Prefs | If print preferences have been saved, you can select from the available options here |
| Company Logo | If multiple company logo's have been uploaded in your System Configuration, you can select which log is to be applied to your document |
| General Print Fields | These fields affect the overall appearance and header information on your document |
| Print logo on First Page Only | If you only want your company logo to appear on the first page select this option |
| Invoice Description | If you want the text in the Invoice Option input field to appear select this option |
| Total Due | If selected the total amount of the line items you selected will appear on your document |
| Group Totals | If selected and if you have groups on your proposal each group will appear with a sub total amount |
| Page Break After Groups | If selected and if you have groups on your proposal a new page will print after each Group has printed |
| Group Summary | If selected and if you have groups on your proposal each group name and subtotal will be listed at the end of your document |
| Tax Amount Due | If selected the sales tax applied to the proposal will appear on the document |
| Customer PO | If selected and if the Customer PO field on the Project Info tab is populated the Customer PO data will appear on your document |
| Billing Address | If selected the Customer address from the project Info tab will appear on your document |
| Shipping Location | If selected the Shipping Location from the Install Tab will appear on your document |
| Installation Address | If selected the Installation address from the Install Tab will appear on your document |
| Panel Attribute Details | If selected and if Teknion panels have been imported into your proposal then panel details will appear on your document |
| Line Item Print Fields | These fields affect the appearance of each line item on your document |
| Line Numbers | If selected your line items will be numbered |
| Vendor Name | If selected the Vendor Name will appear on each line item |
| Product Name | If selected the Product Name will appear on each line item |
| Item Number | If selected the Item Number (product code) will appear for each line item |
| Item Description | If selected the Item Description will appear for each line item |
| Item Quantity | If selected the Item Quantity will appear for each lien item |
| Item List Pricing | If selected the item List Price will appear for each line item |
| Extended List Pricing | If selected the Extended List pricing will appear for each line item |
| Item Sell | If selected the item Sell Price will appear for each line item |
| Extended Sell | If selected the Extended Sell pricing will appear for each line item |
| Item Tagging | If tagging was used on the Item Details tab the tagging will appear for each line item |
| Item Finishes & Options | If selected the Finishes and Options will appear for each line item |
| Zero Sell Items | If selected line items with a zero sell price will appear on your document |
| Discounting | If selected the Discounting used will appear for each line item |
| GP Margin | If selected the GP margin percentage will appear for each line item |
| List Discount | If selected the Discount Off of List used will appear for each line item |
| Item Special | If selected and the Item Special flag is set (imported files only) then the item special information will appear for each line item that is flagged as a special |
| Item Cost | If selected the Item Cost will appear for each line item |
| Extended Cost | If selected the Extended Cost for each line item will appear |
| Line Items [toggle all] | Select the Line Items to appear on your document, the [toggle all] button will select all line items. You must select at least one line item to appear on your document. |
| Invoice Message | You can type a specific message to appear on your document by entering that text here |
| $$ Percentage | You can enter a percentage amount of the total of the selected line items to appear as the amount due on your document |
| $$ Amount | You can enter a specific dollar amount to appear as the amount due on your document |
| Document Title | You can change the title of the document to any text you want by entering that text here. This gives you the flexibility to use this document in multiple ways. The text you enter here appears at the top of the document |
| Proforma Invoice No | The default is PF - followed by the proposal number. This is your only link to the proposal that you are creating the pro forma invoice for. This is a free text field and you can enter any number that you wish. |
| Invoice Description | You can enter any text you want here. This text may be a description of what the document is for. |
| Remit To | If you have entered multiple Remit To addresses in your System Configuration, you can select the remit to address you want to appear on your document |
| Address | The default is your company address. You can change the address here if desired |
| Footer Message | The default is the invoice footer message from your System Configuration. You may change this text here if desired |
| Save to File Vault? | If selected a copy of this document will automatically be saved to the File Vault of this proposal |
| Save Print Preferences | This option allows you to save the print options that you have selected above for use on future pro forma documents. |
Receiving Customer Deposits
There are two methods for receiving customer payments. The first method is from the Customers menu options (Customers - Receive Payments). The second method is from the Receive Customer Deposits icon on the Receivables tab on the proposal which is the method discussed here.
ProposalsReceivablesReceiveDeposit.JPG
| Receive Deposits Fields | Description |
|---|---|
| Customer | The customer name will be filled in for you from the proposal information |
| Check No | Enter the customers check number that you have received |
| [Receive From Unapplied Receipts] | If deposits have been received for this customer but have not been applied to any proposal, you can select and assign unapplied deposits with this option |
| Receipt Date | Enter the date that you receive the deposit |
| Amount | Enter the amount of the deposit |
| Account | Select the cash account that you are receiving the deposit into |
| Comments | This is a free text field that you can enter text into to describe the deposit or note any information you feel necessary regarding this payment |
| Save | Click on the Save button to save your entry |
After entering the customer deposit information and clicking on the Save button, the deposit information will be saved and listed in the Receivables tab. Customer deposits are displayed as Customer Deposits as shown below.
To apply a deposit directly to an invoice, click on the invoice and then click on the Receive Payment tab. You will see a link called [Receive From Proposal Deposits]. Click on this link to select the deposit and apply it to your customer invoice. Once the deposit has been applied to an invoice, the balance of the deposit will update to zero (if the entire deposit has been applied) to indicate that the deposit balance has been applied.
ProposalsReceivablesReceiveDepositDisplay.JPG
Receiving Unapplied Receipts
If you have received a payment from a customer as an unapplied deposit (did not receive it directly on a proposal) then you will see the [Receive From Unapplied Receipts] link in the Receive Customer Deposit window. Unapplied deposits must be applied to a proposal before they can be used on an invoice. Clicking on this link will display any unapplied deposits that exist for this customer as shown above. You can select the unapplied deposit and apply it to any proposal for this customer so it can be used as a payment towards an invoice.
Deposits not applied to a customer invoice can be moved to another proposal for the customer. If the deposit was received on the wrong proposal, you can click on the "move deposit to another proposal" link to enter and select the correct proposal that the deposit should be entered on as shown below.
ProposalsReceivablesDepositMove.JPG
Select the correct proposal number and click on the Go button and the deposit will be moved for you.
ProposalsReceivablesDepositMoveGo.JPG
Receiving Payments On An Invoice
There are two methods for receiving customer payments. The first method is from the Customers menu (Customers - Receive Payments). The second method is from the Receivables tab on the proposal which is the method discussed here.
There is a difference between receiving a customer deposit and a receiving a customer payment. A deposit can be entered at anytime via the Receivables tab by clicking on the Receive Customer Deposits icon as noted above. An invoice does not need to exist to receive a deposit. When customer invoices are created, any existing deposits will automatically be applied to the invoice. You do have the option of removing the deposit from the invoice if you wish.
A customer payment is any payment that the customer has sent to you from them receiving a customer invoice. Payments are entered via the Receive Payment tab.
To receive a payment on an invoice, click on the invoice in the Receivables tab that the payment is to be applied to and then click on the Receive Payment tab.
ProposalsReceivablesReceivePaymentTab.JPG
| Receive Payment Tab Icons | Description |
|---|---|
| Print invoice | Opens the invoice print options window to allow you to select which attributes are to appear on your document |
| Delete invoice | This icon allows you to delete a customer invoice. An invoice cannot be deleted if payments have been applied to the invoice. Any payments applied to a customer invoice must be removed from the invoice before the invoice can be deleted |
| Email & Fax Terminal | Allows you to access the email and fax terminal to transmit your documents |
| Apply finance charges to invoice | Allows you to apply finance charges to the customer invoice |
| Issue credits on invoice | Allows you to create and apply credits on this customer invoice |
| Receive Payment Fields | Description |
|---|---|
| Check No | Enter the customer's check number or payment identification number |
| [Receive from Proposal Deposits] | If deposits have been received on this proposal but have not yet been applied, this link will display. Clicking on this link will display all available deposits. Select the deposit to be applied to this invoice and click on the Go button and the deposit will be applied. |
| Receipt Date | The Receipt Date defaults to today's date. You can change the Receipts date if you choose by editing the date fields here |
| [Apply from Customer Credits] | If customer credits exist for this customer, this link will display. Click on this link to view the available credits and to select a credit to be applied to the invoice |
| Amount | If you have selected a deposit or credit, the amount field will be populated for you. Otherwise enter the amount of the customer payment that your are receiving |
| Account | Select the cash account that you are receiving the payment into |
| Comments | This is a free text field that you can use to enter information regarding this payment if desired. |
| Save Payment | Click on the Save Payment button to save your payment entry. The customer invoice will be updated with the payment information and the Receipt Log tab will now appear in the Customer Invoice Summary window. |
Receipt Log Tab
ProposalsReceivablesReceiptLogTab.JPG
The Receipt Log Tab exits once you have received a payment or entered a credit on the customer invoice. The Receipt Log tab allows you to view what payments have been applied to the customer invoice. To see the details of any of the payments displayed here, click on the payment record in the list. To remove a payment from the invoice, you must click on the payment in the Receipt Log tab and then click on the Delete button. The invoice balance will update to reflect that the payment has been removed from the invoice.
Invoice Print Options
ProposalsReceivablesInvoicePrintOptions.JPG
| Invoice Print Options | Description |
|---|---|
| Print Prefs | If a print preference has been saved via the Save These Print Preferences option, your saved preferences will be displayed and available for selection in this drop down selection box |
| Company Logo | If you have uploaded logo's in your System Configuration you can select the desired logo to print on this document here |
| Print Logo | You can select to have the company logo print on your document or not by checking or unchecking this box |
| General Print Fields | These items affect the overall appearance on your document |
| Customer Contact | Select this option to have the Customer Contact from the Project Info tab appear or from the Customer Contact input field below in the invoice print options window. Otherwise, you can enter a contact name here. |
| Customer PO | Select this option to have the Customer PO Number from the Project Info tab appear |
| Item Groups | Select this option if you want your Group Names (as grouped on the Item Details tab) to appear |
| Group Totals | Select this option to have Sub Total Amounts appear for your item groups |
| Page Break After Groups | Select this option to have your Groups start on a new invoice page (each group will begin a new page) |
| Proposal Description | Select this option to have your Proposal Description appear |
| Proposal Comments | Select this option to have your Proposal Comments appear |
| Installation Location | Select this option to have your Installation Location appear |
| Remittance Address | Select this option to have your Remittance Address appear |
| Line Item Print Fields | These items affect the appearance of the line items on your document |
| Line Numbers | Select this option to have Line Numbers appear for each line item |
| Item Number | Select this option to have the Item Number or product/part number appear |
| Item Description | Selected this option to have the Item Descriptions appear |
| Item Quantity | Select this option to have the item Quantities appear |
| Item Sell | Select this option to have the Sell Price appear |
| Extended Sell | Select this option to have the Extended Sell Price appear |
| Item List | Select this option to have the List Price appear |
| Extended List | Select this option to have the Extended List price appear |
| Item Discounting | Select this option to have the Item Discounting appear |
| List Discount | Select this option to have the Discount Off of List price appear |
| Item Product | Select this option to have the Product & Service type appear |
| Item Finishes & Options | Select this option to have the Item Finishes and Options appear |
| Hide Vendor Name | Select this option to exclude the vendor name from each line |
| Zero Sell Items | Select this option to have items with a zero sell price appear |
| Invoice Details | This option allows you to select if line item details are to be displayed on your document |
| Print Line Item Details | Select this option to print details for each line item |
| Print Summarized by Group | Select this option to print your document summarized by Group |
| Document Title | The default is "Invoice". You can change the document title to whatever text you enter here |
| Customer Contact | You can enter a specific customer name here to have appear on your document. If you enter text here you must select the General Print Field option called Customer Contact |
| Invoice Footer Message | This text defaults to what you have defined in your System Configuration default, but if you want different text to appear in the footer of your document, enter it here |
| Save These Print Preferences? | If you wish to save specific print options, you can use this function to save this set of print options. If a customer has a specific way they want to see their invoices, after selecting the options, you can then save those print options using the customer's name and then select that set of print options when creating invoices for that customer so you do not have to change your print options when you print an invoice for that customer |
| Print Invoice | Click on this button to generate the PDF preview of your document with the print options you have selected. |
Apply Finance Charges to a Customer invoice
To apply finance charges to a customer invoice, click on the Apply Finance Charges icon to open the Add Finance Charges window.
ProposalsReceivablesAddFinanceCharges.JPG
[information] Fields followed with an asterisk (*) are required fields and must be entered.
[information] Fields followed by an asterisk are required input fields.
| Add Finance Charges Fields | Description |
|---|---|
| Add Charge To * | You can select to apply finance charges on the Remaining Balance due or to the Invoice Total amount. |
| Posting Date | The default is today's date, this is the date that the finance charge entry will be dated in your journal |
| Interest Rate | Select the interest rate of the finance change to be applied. This rate is used to calculate the finance charge on either the Remaining Balance or the Invoice Total |
| Finance Charge * | You can enter a specific finance charge amount if you do not enter an Interest Rate. |
| Comment | You can enter a free text comment regarding your finance charge entry. This comment does not appear on your invoice, it appears in the memo field on the journal entry made for this transaction |
| Resend Invoice | If this box is checked, after applying the finance charges to the invoice, the invoice will be resent to your customer if the invoice was emailed or faxed to them originally. If the invoice was printed and mailed, this has no affect |
| Save & Apply | Click on this button to save the finance charge and to have it applied to your customers invoice |
Finance charges will appear in the totals section of your customer invoice and will be included in the Invoice Total amount due field.
Customer Credits Tab
ProposalsReceivablesCustCreditsTab.JPG
The Customer Credits tab displays any credits that have been issued on invoices on the proposal.
Issue Customer Credits on an Invoice
To issue a credit on an invoice, click on the invoice that the credit is to be applied to and then click on the Issue Customer Credits icon to open the Issue Credits window.
ProposalsReceivablesIssueCredits.JPG
To issue a credit, select the line item(s) that you are issuing the credit for by placing a check mark in the line item selection check box. Then enter the amount of the credit. The sales tax rules used when the proposal was finalized will be used to calculate the sales tax on the item being credited. In this case, 6% percent sales tax was charged on the product. The credit amount is $100.00, plus the $6.00 (6%) sales tax for a total credit of $106.00. The sales tax amount, per the credit amount will be displayed as well.
| Issue Credits Fields | Description |
|---|---|
| Code | Select the credit code to be used for your credit. You can define credit codes in System Configuration or you can use the "AUTO" selection. This option will credit the product or service account defined by the product/service code used on this line item. |
| Amt | Enter the amount of the credit to be issued for the selected line item |
| Reference No | The Reference No field is automatically populated with the letters "CR - " followed by the original invoice number. You can change this number if desired but it is not recommended. Each customer credit will be issued a unique Reference number by the system. |
| Comments | The Comments field allows you to enter free text describing the credit. |
| Credit Date | The Credit Date field defaults to today's date, however, you can post and/or predate your customer credits by changing the date in this field. |
| Save Credit | Click on the Save Credit button to apply the credit to the invoice |
If sales tax was applied to the invoice during proposal finalization or during the invoice creation time ([update tax]) then the sales tax rules applied will be used to calculate the amount of tax due to your customer for the credit amount and that tax amount will appear in the Tax field in the Credit Amount summary section.
After the credit has been applied to the invoice, the Customer Invoice Summary window will update to display the applied credit amount as shown below. The Open Balance amount includes the credit amount issued.
ProposalsReceivablesIssueCreditDisplay.JPG
Customer credit will be displayed under the Customer Credits tab.
Delete or Edit a Customer Credit
You can edit or delete a customer credit from the invoice the credit was issued on or from the Customer Credits tab.
To delete or edit a credit from the invoice, click on the invoice in the Receivables tab, then click on the Receipt Log tab. Any credits issued will be displayed here as shown below.
ProposalsReceivablesCreditReceiptLog.JPG
Click on the appropriate credit from the list displayed to open the Edit Invoice Credit window as shown below.
ProposalsReceivablesEdit.JPG
You can edit the credit amount by changing the credit dollar value and then click on the Save Credit button or you can delete the credit by clicking on the Delete Credit button at the bottom of the window and the invoice will be updated.
The credit can be edited or deleted from the Customer Credits tab as well. Just click on the credit to be edited or deleted in the Customer Credits window and the Edit Invoice Credit window will open. Follow the steps described above for editing or deleting the credit.
- 7. Proposals
7.8. Proposals Payables Tab - 7.7. Receivables Tab
« Previous - 7.9. File Vault Tab
Next »
7.8. Proposals Payables Tab
Payables Tab
The Payables tab can be used to enter vendor invoices that are received for Purchase Orders created on this proposal. Vendor invoice can also be received from the Vendors - Receive & Pay Bills menu option. Only vendor invoices and vendor deposits can be flagged for payment.
You cannot pay vendor invoices or vendor deposit requests from the Payables tab. Vendor invoices and deposit requests must be paid from the Receive & Pay Bills window.
To view or enter Payables for this proposal, click on the Payables Tab to view the payable information.
ProposalsPayablesTab.JPG
If no payables have been entered for purchase orders on this proposal, then you will only see one icon and that is the "New vendor bill/deposit" icon. This icon allows you to enter vendor bills or to create a vendor deposit payables entry.
There are three tabs available under the Payables tab.
Vendor Bills Tab
The vendor bills tab is where you can enter vendor payables and vendor deposit requests. Payables can be flagged for payment but they cannot be paid from this tab. They must be paid from the Vendors - Receive & Pay Bills menu option
Memo Costs Tab
Memo Costs (additional proposal costs) can be added to a proposal using the Memo Costs tab. See below for details
Commissions Paid Tab
The Commissions Paid tab will display and commissions paid to sales reps on this proposal.
Entering a vendor payable
| Payables Tab Icons on Vendor Bills tab | Description |
|---|---|
| New vendor bill/deposit for this proposal | This is the only icon that will exist until payables have been entered. Click on this icon to enter a vendor invoice or to create a vendor deposit payable. |
ProposalsPayablesEntry.JPG
| Create A New Vendor Invoice/Deposit Fields | Description |
|---|---|
| Vendor | Select the vendor that issued the payable from the drop down selection box. This selection box will display vendor names for which purchase orders have been created for on this proposal. |
| Type | Select the payable type from the drop down selection box. You can select Bill or Deposit. |
| PO No | Enter the first few characters/digits of the purchase order that you are creating the payable for and and matching entries will be displayed. Select the correct purchase order number from the list presented |
| Hold Payment | If this box is checked, the payable will be placed on hold. It cannot be paid while on hold. It will appear in red text to indicate that the payable is on hold. |
| Invoice Amount | Enter the amount of the invoice |
| Invoice No | Enter the invoice number here |
| Invoice Date | Enter the invoice date here. This field defaults to today's date |
| Date of Receipt | Enter the date that your received the invoice. This field defaults to today's date |
| Due Date | Enter the Due date of the invoice. This field defaults to today's date |
| Notes | You can enter any text you desire here concerning this payable. Anyone reviewing this payable will see the notes entered here. This text does not appear on any documents. |
| Total Expenses | Enter your account distribution here |
| Account | Select the expense accounts here. For every payable that you are entering that is the direct result of a purchase order you have created, you will use your Work In Progress (WIP) account as the first expense account. You may add additional expense accounts if necessary |
| Amount | If you are using multiple expense accounts enter the amount that is to be accrued in each account line |
| Memo | You can enter a memo to describe any specific information about the expense line |
| Proposal | You can enter a proposal number here to assign the costs entered to a specific proposal. If you have entered the purchase order number above, DO NOT enter a proposal number. Entering a purchase order number and a proposal number will double post the costs on this proposal. |
| [add more lines] | If you need more distribution lines to enter your expenses, click on this link and additional expense line will appear |
| Save & Close | After entering your payable information, click on the Save & Close button to save your payable |
WIP Account Usage
When entering payables that are associated with a purchase order, you will use your Work In Progress (WIP) account as the expense account. When you enter a payable, your WIP account is debited. When you create customer invoices. your WIP account is credited. If you use accounts other than your WIP account, your WIP account will not balance.
Proposal Number Usage
When entering payables that are associated with a purchase order, you DO NOT enter the proposal number in the account distribution section. The link to the proposal is made through the purchase order number. If you add the proposal number (as well as the purchase order number) you will double post the costs on this proposal.
Additional Proposal Costs
If you have incurred costs on a project that were not covered on a purchase order for charges such as overnight fees for sending parts or drawings to a job site or customer, you can enter the costs as a payable and assign them to the proposal by entering the payable without selecting a purchase order number (because none exits) and entering the proposal number in the Proposal input field in the account distribution section. You can also enter these charges as Memo Costs covered later in this chapter.
Payables Icons After Payables Entry
After entering a payable you will have one additional icon on the Payables tab.
| Payables Tab Icons | Description |
|---|---|
| New vendor bill/deposit for this proposal | Click on this icon to enter a vendor invoice or to create a vendor deposit payable. |
| Flag selected invoice for payment | After selecting payables click on this icon to flag them for payment. Payables must be flagged for payment before they can be paid. After a payable has been flagged for payment it can be submitted to the Pay Bills queue to be processed for payment - See Vendors - Receive & Pay Bills. Once a payable has been flagged for payment it will appear is a flag icon where the selection icon existed. To unflag a payable, simply click on the flag icon again. |
Deleting a Vendor Payable
To delete a vendor payable, click on the Vendor Bills tab under the Payables tab on your proposal. Click on the vendor payable to be deleted. You will see the Delete icon in the Bill Summary window. If a payable has been paid the delete icon will not be present. The check that the payable was paid on must be voided before a paid payable can be deleted.
Entering a Vendor Deposit Request
If your vendor requests that a deposit be paid on a purchase order, you can create your deposit request here as well.
Click on the "New vendor bill/deposit for this proposal" icon. The difference between entering a vendor invoice and creating a vendor deposit is handled in the Type field.
ProposalsPayablesDepositEntry.JPG
To enter a deposit request, select Deposit as the Type in the "Create a New Vendor Invoice/Deposit" window. Again, since the deposit is being generated from a purchase order, you will use your Work In Progress (WIP) account as the expense account when entering the deposit information. You Vendor Deposits account will be updated when the deposit is paid and applied to the vendor invoice you enter for the purchase order the deposit is create for.
If you have created and paid a deposit for a purchase order, be sure you enter the vendor invoice using the full amount of the invoice (don't deduct the deposit paid). The deposit amount paid on the purchase order will be automatically deducted from the invoice payment when you pay the invoice.
Memo Costs Tab
The Memo Costs tab is where you can enter additional costs on proposals that were not generated by a purchase order, such as overnight shipping fees or for any additional costs that need to be applied to the proposal. Additional costs added to a proposal via the Memo Costs function will appear in the Job Costing report and will affect the overall GP of the proposal. Since additional costs are being added, the overall GP will be reduced as well as the commission amount (if applicable).
ProposalsPayablesMemoCostsTab.JPG
Click on the Plus sign icon to open the New Memo Cost input window.
| New Memo Costs Input Fields | Description |
|---|---|
| Entry Date | The default is today's date. You can adjust the date by making the date changes here |
| Amount | Enter the total cost amount of the additional charge being added |
| Is this memo cost non-posting? | If this box is checked, then the debit account and credit account are not required to be selected. A journal entry will not be created for this entry. The cost will still appear on the Job Costing report and will affect the proposals GP margin |
| Debit Account | If this is a posting transaction, then you must enter a debit account and a credit to be used by the journal entry for this charge. |
| Credit Account | If this is a posting transaction, then you must enter a debit account and a credit to be used by the journal entry for this charge. |
| Memo | This is a free text field. The text your enter here should describe the charge. This text will appear on the Job Costing report with the cost amount. |
| Save & Close | Click on the Save & Close button to save your Memo Cost entry. You entry will appear in the Memo Cost tab. |
If you want to remove your memo cost entry from the proposal, you can click on the memo cost in the list and you will see the delete icon. Click on the delete icon and your memo cost entry will be removed.
Commissions Paid Tab
There are no icons or input fields on the Commissions Paid tab. This is strictly a display only tab. Once commissions have been paid on a proposal via the Commissions Paid report, this tab will display a line item showing when the commission was paid and the amount of the commission.
- 7. Proposals
7.9. File Vault Tab - 7.8. Proposals Payables Tab
« Previous - 7.10. Service & Punch Tab
Next »
7.9. File Vault Tab
The proposal File Vault tab allows you to store documents related to this proposal as part of the proposal. Documents that are uploaded to the file vault become part of the database and are encrypted for protection. There is no limit to the number of files that can be uploaded to the vault. Files stored in the vault can be included as email and fax attachments when using the email and fax terminal. The file vault is not intended to be used as a file backup option nor is it intended to be a storage location for your only copy of the file(s). It is intended as an option to allow you to keep all necessary documents with the proposal for sharing the files with other DealerChoice users in your company or for easy access for sending the documents from DealerChoice as attachments. Each proposal has its own file vault. Files that are uploaded for a proposal are not visible in another proposals file vault.
Any file to be uploaded to the file vault cannot be larger than 32 megabytes (MB). Files larger than 32 MB must either be compressed to a size smaller than 32 MB or broken into segments that are less than 32 MB.
Certain files cannot be used as fax message attachments.
Certain files cannot be faxed. If you plan on faxing a document keep in mind that a printable/viewable image of the file must be uploaded to the vault. Binary files, such as files with extensions like "exe" or "dwg" are binary files. If you intended to fax drawing files, you must save them as PDF files. Binary files can be included as attachments to email messages but the receiving server may reject them as unsafe files.
File Vault Tab
ProposalsFileVaultTab.JPG
Only the Upload icon is available on the File Vault tab until you upload a file. Once a file has been uploaded, additional icons will be present.
To upload a file to the vault, click on the Upload files icon to open the Upload & Save a File window.
ProposalsFileVaultUpload.JPG
| File Vault Upload Fields | Description |
|---|---|
| File Description | Enter a description of the file being uploaded. The description is displayed with the filename. |
| Make this file public? | This is for future development and will be used for making files "public". A public file type will be available for other users to see and download. |
| File (Browse) | The Browse button is used for locating and selecting the file that you want to upload from your local or network disk drives. |
After uploading a file to the vault, the following icons will be available.
ProposalsFileVaultIcons.JPG
| File Vault Tab Icons | Description |
|---|---|
| Upload Files | Click on this icon to upload a file to the vault |
| Email & Fax terminal | Open the email & fax terminal for sending documents from DealerChoice |
| File Vault Columns | Description |
|---|---|
| File Name | This is the name of the file as it exists on the drive |
| File Type | This is the file type from the file extension |
| Description | This is the description that you entered to describe what the file is |
| Public | This is for future development. Public files will be used when the customer interface with DealerChoice has been completed. The customer interface is an option that will allow your customers certain access ability to their proposals in your DealerChoice site, if you enable these features |
| Size | This is the size of the file. Emailing or faxing larger files can dramatically impact the amount of time it takes to process and send the message. Some servers do have attachment size limitations and may reject messages with large files attached. |
| Timestamp | This is the date and time that the file was uploaded to the file vault |
| File Vault Line Item Icons | Description |
|---|---|
| Download File | Click on this icon to save a copy of the file to your local disk drive or to view the document. After clicking on this icon, the file will be retrieved from the vault. The filename will appear as a link (underlined). Click on the filename and you will be given the option to Save or Open the file. If you want to view the file, click on the Open button. If you want to save a copy of the file to your local disk drive, click on the Save button and then choose the folder in which the file is to be saved. |
| Check this file out | This option will allow you to save a copy of this file and it will be marked as checked out by you. Other users will not be allowed to download this file until you check it back in. If another user tries to check this file out, they will see a message saying that the file has been checked out by you. You may be making changes to this file so the file is locked by you until you check it back in by uploading the file to the vault again. Once you check the file back in, other users may download the file. |
| Delete file | This icon allows you to delete a file from the vault. If you delete a file from the vault by accident, it must be uploaded again from your local or network disk drive |
- 7. Proposals
7.10. Service & Punch Tab - 7.9. File Vault Tab
« Previous - 7.11. Ledger Tab
Next »
7.10. Service & Punch Tab
Service & Punch Tab
There are two tabs under the Service & Punch tab.
The Punchlist tab and the Work Orders tab. The Punchlist tab is where you can create a punchlist proposal, punch purchase orders and punch invoices.
The Work Orders tab is one access option for creating work orders. You can also create work orders under the Project Management menu item found under Proposals in the main menu. There are multiple options for accessing the Work Orders function because certain users in your company may not have access to Proposals but they may need access to the Work Order function. See the description of the Work Order Tab later in this chapter for details.
ProposalsServicePunchTab.JPG
The Punchlist tab allows you to create a punch proposal within your main proposal. This proposal does not get issued a proposal number. The default title for proposals created here is "Punchlist Proposal" and the primary proposal number is displayed on the Punchlist Proposal as shown below. You can change the title of your Punchlist proposal in the Punchlist Proposal Print Options window. See below for details on the Punchlist Print Options.
The default Punchlist proposal icons are listed below. All proposal icons on the Item Details tab are available in the Punchlist tab. Once line items are added to your Punchlist proposal, additional icons will be available.
| Punch Tab Icons | Description |
|---|---|
| Add new line item | Click this icon to manually enter a line item. |
| Delete selected line items | Use this icon to delete any selected line items. To select a line item click in the check box to the left of the line item in the proposal list. Deleted line items cannot be recovered once deleted. |
| Toggle the selected items between active & inactive | Use this icon to toggle any selected line items between active and inactive. Inactive line items are displayed on proposals and cannot be included on purchase orders. To make an inactive line item active again, select the line item and click this icon. Inactive line items appear in the Item List in grey. To select a line item click in the check box to the left of the line item in the proposal list. |
| Create & edit proposal groups | Use this icon to create proposal Group names. Line items can be added to appear in Groups that you create. Groups can be moved and or deleted. When you delete a Group, the line items in the Group are not removed from the proposal. |
| Add a new comment line | Click on this icon to add a comment to your proposal. Comment lines can be added to the proposal or to purchase orders. Comments can be edited or deleted. |
| Import items into this proposal | Use this icon to import a design specification file into the Punchlist proposal. |
| Summarize line items | Click on this icon to see a pricing summary of the line items on your proposal. |
ProposalsPunchProposalSample.JPG
The punch line items are displayed on the Punchlist tab, not on the Item Details tab. Purchase orders created for punch line items are displayed on the Purchase Orders tab and invoices created for punch line items are displayed on the Receivables tab.
You have all the same icons and functionality for working with punch line items as you do working with lines on the Item Details tab. You are literally creating proposal line items under the Punchlist tab.
Since the Punchlist process of working with line items is the same as working with line items on the Item Details tab, please see the Item Details chapter for details. Differences between the Item Detail tab and the Punchlist tab are discussed here.
Punchlist Tab
The Punchlist tab has the same set of icons as the Item Details tab. They perform the exact same functions except that they only affect the line items on the Punchlist tab.
Punchlist purchase orders are created from the Punchlist tab, not from the Purchase Orders tab, but punchlist purchase orders will be displayed in the Purchase Orders tab after being created.
Punchlist invoices are also created from the Punchlist tab, not from the Receivables tab, but punchlist invoices will be displayed in the Receivables tab after being created
Adding Punch Line Items Damaged Items Tab
ProposalsAddPunchLine.JPG
When you click on the Add Line Items icon on the Punchlist tab the Create a New Punch Item window opens and displays line items from your primary proposal that have been ordered. To be eligible for the Punchlist proposal, the line item must have been ordered (on a purchase order) first.
You can add items that were not specifically ordered on your proposal, such as part numbers, or items that were not on the original proposal by using the the New Items tab.
Adding Punch Line Items New Items Tab
ProposalsAddPunchLineNewItem.JPG
The New Items tab allows you to manually enter a line item. If you need to order a part that is not listed as a line item on your primary proposal then this option allows you to enter the specific part number and description so you can get your part(s) ordered.
After selecting a line item(s) and clicking on the Create Punch button, the selected line items will appear as line items in the Punchlist tab. You can edit your line item for the correct quantity to be ordered and to adjust the pricing if necessary.
ProposalsPunchLineItem.JPG
When working with punch line items it is important to set up the pricing correctly. If you must pay for the product be sure to include a cost amount so the cost appears on the purchase order. If you plan on invoicing your customer or a vendor for the punch item, you MUST include a sell price.
When a punch item has a sell price, you are given the option to select who you wish to invoice for the product. This may include backcharges to a manufacturer or it may be to invoice a subcontractor (installer, etc) that may have damaged or lost product. It may even be to invoice your customer for additional items or customer change orders.
After adding your punch line items, be sure to check them just as you would a normal proposal line item. Be sure that the quantity is correct on your punch line items especially if you selected your punch items from the original proposals (Damaged Items tab). The line item is copied to the punch list proposal exactly as it appears on the primary proposal.
After you have reviewed your punch line items, you must finalize your punch proposal to be able to create purchase orders and invoices.
Punch Finalization
The Finalization icon appears on the Punchlist tab and your punch list proposal must go through the finalization process just as your primary proposal did. Click on the Finalize icon to start the process.
ProposalsPunchFinalization.JPG
The punch finalization process works exactly the same as the primary proposal finalization process. You may be presented with options for including vendor charges and for applying sales tax. You can abort the finalization process and return to your punch line items to make any adjustments if necessary by clicking on the <--Back link at the top of the window.
To complete the finalization process, click on the Finalize button on the lower right and the process will continue.
Once the finalization process completes, you will have two new links available on the upper right of the Punchlist window, The links are [create purchase orders] and [create invoices].
You create your punch purchase orders and punch invoices on the Punchlist window, not from the Purchase Orders tab or the Receivables tab.
[create purchase orders] link
Click on the [create purchase orders] in the Punchlist tab link to create your punch purchase orders. This is the exact same process as creating purchase orders on your primary proposal. Punch purchase orders will be displayed on the Purchase Order tab.
After your punch purchase orders are created, the selection check box to the left of the punch line item will be inactive so the line item cannot be changed. Your punch purchase order will be displayed on the Purchase Orders tab with the purchase orders that were created on your primary proposal. You can edit and enter acknowledgement information on punch purchase orders exactly the same way you do on regular purchase orders. Punch purchase orders also appear on the Project Status report highlighted in yellow, so you can easily identify your punch orders.
[create invoices]
When you are ready to invoice for your punch items, you must return to the Punchlist tab and use the [create invoices] link.
In this example, we have a punch line item that has a sell price. This example assumes that the installer on the project has damaged this product and it must be re-ordered to be installed. We are going to invoice the installer for the product.
Click on the [create invoices] link and select the line items to be invoiced. This will open the Review Your Invoice window. In this example, you will notice that the Invoice To: input field now has a selection drop down arrow. You can choose to invoice your customer or a vendor now. For this example, we will say that the vendor DealerChoice is the installer and they are to be invoiced for the product.
ProposalsPunchLineInvoicePreview.JPG
Select the Vendor option and the vendor name input box will appear. Type in the first few characters of the vendors name and select the correct one from the list presented.
ProposalsPunchLineInvoiceVendor.JPG
Click on the Create Invoice button and the invoice will be created to the vendor as shown below.
ProposalsPunchLineInvoiceVendorPrint.JPG
When you receive payment for this invoice, you will enter the payment exactly as you would normally (either from the Receivables tab or from Customers - Receive Payments menu option).
Work Orders Tab
The work order process allows you to bundle multiple resources, (i.e. vendors) into a single line item on your proposal.
Allowing resources (or vendors) to be assigned to a work order allows you to keep the individual vendor names from appearing on your proposals.
For example, if you use a different vendor on a project for installation, electrical and painting, you can bundle the costs from all three vendors into a single line item by adding them all to a work order and then importing that work order into your proposal.
This allows you to have a single line item on your proposal for all the services that you are providing. The work order line item appears as a single services line on the proposal instead of having individual line items for each of the three services that you are providing.
In order to use this feature, the resources must be defined in your Vendor database (see section 5.1) and these vendors must be defined as resources in System Configuration - Company & System Settings - Resources tab (see section 8.1.3.4).
There are internal resources and external resources. Internal resources are your employees and external resources are vendors. Once the resources (vendors) are added to a work order, the work order is imported into your proposals just like any other line item. When you generate purchase orders, a purchase order will be created for each resource (vendor) on the work order.
The work order process consists of creating the work order, adding resources, marking the work order as complete, then importing the work order into a proposal as a line item. To start the process, click on the Work Orders tab under the Service & Punch tab.
ProposalsWorkOrderTab.JPG
To create a work order, click on the Plus sign icon ("+") to open the Create a New Work Order window where you can enter your work order header information and save the work order.
ProposalsCreateWorkOrder.JPG
Work Order Input Fields
| Create Work Order Fields | Description |
|---|---|
| Description | Enter a description of your work order. The text entered here will appear as the work order line description on your proposal. |
| Order No | This number is generated automatically for you and should not be changed (See System Configuration for details) |
| Work Order Date | This is the creation date of your work order. The default is today's date. You can change this date to any date you wish. |
| Order Status | For future development. This field will allow you to select a status for your work order. Similar to the proposal status, you will be able to create your own work order status levels and you will be able to assign them to your work order via this field. |
| Status Note | For future development. The status note allows you to enter text to support your Work order Status setting. This is a free text input field. |
| Ship To Location | All proposal line items need a Ship To Location. Typically, this is the exact same location as set on your Install tab in the Installation Location field. |
| Notes | This is a free text input field and is for adding additional information to your work order. Work Order notes appear on the printed work order. |
After entering the work order information click on the Save Work Order icon to save your work order. Once the Work Order is saved, the window will change in the following ways as shown in the following figure.
1 - You will see 2 additional icons; Print Work Order and Delete Work Order. 2 - The Scope of Work and the Resources tabs will appear with the Scope of WOrk tab selected to allow you to edit the information you originally entered. 3 - 3 Additional fields will appear under the Description field.
ProposalsWorkOrderEdit.JPG
After saving your work order 3 new fields appear under the Description field.
| Work Order Edit Fields | Description |
|---|---|
| Complete | Check box to signify that all edits to the work order is complete. This flag must be checked to allow the work order to be available to be imported into the proposal. |
| Total True Cost | The True Cost is the actual cost of the work to be performed by the resource (vendor) that has been assigned to the work order. The true cost will be the cost on the purchase order that is generated to this vendor for the services provided. |
| Total Internal Cost | The internal cost allows you add profit dollars on the true cost if desired. The amount you enter in the Internal Cost field will be the Cost amount that appears on the work order line item when it is imported into the proposal. This allows you to "sell" the services to your sales reps. They will then mark up the line item on their proposal to sell to the customer. |
The True Cost and Internal Cost fields will update for you after you have added resources.
After reviewing your work order information, the next step is to add resources (vendors).
Adding Resources to a Work Order
Click on the Resources tab to add resources to your work order. The resources must be defined as resources in your System Configuration before you can assign them to work orders.
When adding resources to a work order, you can see a list of resources defined in your System Configuration by entering a space in the Resource field. A drop down box displaying the defined Resources will appear. Resources are saved in your System Configuration with a Resource Name, which identifies the resource. The Resource name is assigned to the Vendor. See System Configuration for setting up Resources.
The View/Edit Work Order window appears below. This is where you assign your resources to the work order.
ProposalsWorkOrderAddResource.JPG
| New Work Order Resource Fields | Description |
|---|---|
| Resource | This field is where you select your resources (vendors) that have been defined in your System Configuration. Resources selected here will be assigned to this work order. |
| Time Quoted | Enter the units of time that have been quoted by the vendor to complete the work. You can select a number of Hours, number of Days, number of Half Days or Fixed. Select fixed if the quote has returned with a fixed cost to complete the work. |
| Description | You can enter a description for the resource |
| True Cost | Enter the actual amount that the vendor is charging your dealership for this work. This amount will appear as the cost on the purchase order that you generate to the vendor. |
| Internal Cost | The internal cost field allows to to add profit dollars on the true cost if desired. The amount you enter in the Internal Cost field will be the Cost amount that appears on the work order line item when it is imported into the proposal. This allows you to "sell" the services to your sales reps. They will then mark up the line item on their proposal to sell to the customer. |
| Save Resource button | When you have completed entering your resource information, click on the Save Resource button to add the resource to the work order. |
An example of a resource to be added to a work order appears below.
ProposalsWorkOrderAddResourceExample.JPG
After clicking on the Save Resource button, your resource will be added to this work order and will be displayed as shown below. In this example, two resources have been added to this work order, an Installation Mechanic and a Painter.
ProposalsWorkOrderSavedResource.JPG
You can continue to add resources if desired. Once you have added all the necessary resources to the work order, Click on the Scope of Work tab and mark your work order Complete then click on the Save Work Order icon to save your work order.
Work Orders cannot be imported into proposals unless they have been marked as Complete. This allows for the work order to be modified for several hours or days, while the scope of work is being defined and for the quotes from the resources (vendors) to be returned to you so you have accurate pricing (True Costs).
After you have added all the necessary resources to your work order you are ready to mark it complete to make it available to be imported into the proposal.
Marking Work Order as Complete
To mark a work order as complete, check the Complete check box and then click on the Save Work Order icon.
When you mark a work order as complete and save it, the sales rep assigned to the proposal will get a message in his/her Message Queue that the work order is Complete. At this point the sales rep can import the work order into his/her proposal. If you are not ready for the work order to be imported into a proposal, do not mark it complete. You can save changes to your work order without it being marked complete. Only mark the work order complete when you have finished making changes to it.
ProposalsWorkOrderComplete.JPG
When you have checked the 'Complete' box, your work order will appear in the Work Orders tab as complete and is ready to be imported into the proposal as a line item as shown below.
ProposalsWorkOrderList.JPG
Making changes to a work order after it has been marked as Complete:
If you need to make additional changes to a work order that has been marked as Complete, you can open it from the Work Order tab and remove the Complete flag and save it. If the Work Order has already been imported into a proposal, you cannot remove the Complete flag. The line item must be deleted from the proposal (Item Details tab) first, then you can edit the work order.
Importing Work Order Into Proposal
After the work order has been marked as Complete, the sales rep assigned to the proposal that the work order was created for will get a message in his/her message queue alerting them that the work order is ready to be imported into the proposal.
Completed work orders that are ready for import into a proposal are displayed on the Install tab in the Proposal.
ProposalsWorkOrderInstallTab.JPG
On the Install tab, to the right of the Install Location and Ship To Location fields, completed work orders will be displayed. Work orders will not appear here until that have been marked as Complete. The designated sales rep on the proposal will be notified via the Message queue that the work order has been completed and is ready to be imported.
The work order must be imported into the proposal as a line item. Work Orders are imported into the proposal from the Item Details tab using the Import Work Orders icon.
Select the work order to be imported by clicking on the select button. The work order selection buttons are present because you can import multiple work orders on a single proposal.
ProposalsWorkOrderImport.JPG
After selecting the work order the Edit the work order line item window opens allowing you to complete the line items details for your work order as a proposal line item. Typically, you will use your Dealership's name as the vendor and you can enter a GP% to mark up the sell price.
ProposalsWorkOrderLineEdit.JPG
The New Line item From A Work Order Window will open allowing you to complete the line item details for your proposal.
| Work Order Fields | Description |
|---|---|
| Vendor | Enter your DealerShip name here. Since you are providing the services to your customer your dealership name will be present as the Vendor on the proposal. This is also how you keep the individual resource (vendor) names that have been assigned to the work order from appearing on your proposal. |
| Description | The Description field is populated from the work order Description and the work order Notes fields entered when creating your work order. |
| Product/Service | Select the Product/Service that reflects the services |
| GP Margin | You can add a GP margin to calculate the sell price of your work order |
| Item Sell Price | You can enter a specific sell price on your line item. |
| Save | Click on the Save button to save the work order as a proposal line item. |
The work order will appear as a line item on your proposal as shown below. The last line on this proposal is the work order that was imported. It looks and functions like any other line on the proposal.
The Work Order part number will be the Work Order number assigned to the work order when it was created.
The last line item on the proposal shown below is the imported work order line item.
ProposalsWorkOrderLineSave.JPG
Now that your line item is part of your proposal, you must run the finalization process. After the finalization process, you can print, email or fax your proposal to your customer. The next step is to create purchase orders on your proposal.
Another key factor of using work orders (besides hiding the resource (vendor) names on your proposal) is that when you go to generate purchase orders, DealerChoice will create a purchase order for each of the resources you added to the work order for you. When you create purchase orders for a work order line item, a purchase order will be generated for each resource (vendor) that has been assigned to the work order. You need a purchase order for each resource because you will receive an invoice from each vendor for the work they are doing. You will enter these invoices against the purchase orders created from the work order so you can pay your vendors.
Work Order Purchase Orders
Your work order must be a line item on your proposal and you must finalize your proposal before you can generate purchase orders. You generate your work order purchase orders exactly the same way you create product purchase orders. Click on the Purchase Orders tab and then click on the Create Purchase Orders icon. You can create the work order purchase orders by selecting the work order line item only, or by selecting all line items on your proposal.
ProposalsWorkOrderPurchaseOrdersCreate.JPG
In the example above, the work order line item was the only line item selected to be converted to a purchase order. On our example work order, we added two resources (Install Mechanic and Painter) so we will end up with two purchase orders. You can see in the image above that two purchase orders will be created from our work order line item. The purchase orders will be to the vendors associated with the Install Mechanic resource and the Painter Resource. In our example, the Install Mechanic resource is associated with Test Vendor II and the Painter resource is associated with the vendor DealerChoice.
When we click on the Place Orders button, a purchase order will be created for each vendor on the work order and the purchase order(s) can be viewed on the Purchase Orders tab as shown below.
ProposalsWorkOrderPurchaseOrders.JPG
As you can see in the image above, two new purchase orders have been created. A purchase order for each resource (vendor) on our work order now exists. You now have purchase orders that you can send to the respective vendors. When you receive the invoice (payable) from each vendor, you will enter the payable with the purchase order number that was created here so you can pay your vendors.
- 7. Proposals
7.11. Ledger Tab - 7.10. Service & Punch Tab
« Previous - 7.12. Proposals Direct Bill
Next »
7.11. Ledger Tab
The Ledger tab displays a snapshot of all the journal transactions that have taken place on this proposal. User permission settings determine which users have access to the Ledger Tab and or the icon to create journal entries. If you have the necessary permission settings, the Ledger tab will be available to you.
You can conveniently view the journal entries for this specific proposal from the Ledger Tab.
ProposalsLedgerTab.JPG
The Ledger tab displays all journal transactions that have occurred regarding this proposal.
Ledger Tab Icons
There is only one possible icon that can appear on the Ledger Tab and that is the Create a New Journal Entry icon.
| Ledger Tab Icons | Description |
|---|---|
| Create a New Journal Entry | Click on this icon to open the Make Journal Entry window. |
- 7. Proposals
7.12. Proposals Direct Bill - 7.11. Ledger Tab
« Previous - 7.13. Project Management
Next »
7.12. Proposals Direct Bill
Direct Bill proposals are proposals where you need to invoice a vendor, or multiple vendors, for a dealer commission or dealer service fee and the vendor(s) will invoice your customer directly. Typically you will not be invoicing your customer for the product. You are not technically buying the product from the vendor(s) but you are the dealership on record for carrying the sale. Your sales numbers will reflect the total sales. You can invoice your customer for product on a Direct bill proposal and invoice the vendors for your commissions. You also have the option of invoice the vendors for the full sell price of Products or Services that the vendor does not provide. You will typically invoice the vendor for Installation services that you provide so you need to invoice for the full sell price of that service.
You do not have to create multiple proposals to be able to invoice each vendor. You can include all your product on a single proposal.
Direct Bill processing tales place in three steps.
1 - Designate the proposal as a direct bill order type on the Project Info tab.
2 - Select the vendor(s) that will be invoicing your customer for the product during proposal finalization.
3 - Select either the Sell amount or Commission amount to invoice to each vendor.
The first step to creating a direct bill proposal is to change the Order Type field on the Project Info tab to Direct. There are two options for Order Type on the Project Info tab; Normal and Direct. In the example below, the Order Type for this proposal has been changed to Direct.
Step 1: Designate your proposal as a Direct Bill proposal
ProposalsDirectOrderType.JPG
A Direct bill order type proposal processing is slightly different than a normal bill proposal type. You create your Direct bill proposal exactly as you create any other proposal and you must select Direct as the order type on the Project Info tab.
After designating your proposal as a Direct order type, create you line items as you normally do. The line items can be imported from a specification file or manually entered or copied from an existing proposal. The next step of working with a Direct bill proposal occurs during proposal finalization. Below is an image of our direct bill proposal with two line items. The product and installation lines will be invoiced to the customer by the vendor. In this case, we will invoice the vendor for the commission amount on the product line and for the full sell price on the Installation line because we are providing that service to our customer, the vendor is not.
ProposalsDirectLineItems.JPG
Our proposal is ready for finalization so we can create purchase orders for the the product and Installation services.
Since the proposal is designated are a Direct bill, you must now select which vendor will be invoicing your customer for the products and services on the proposal. You select the vendor(s) that will be invoicing for the product in the finalization window.
Step 2: Select Direct Bill Vendors
ProposalsDirectVendorSelect.JPG
In the example above, each vendor on your proposal will be listed with the Total Sell and Total Cost amounts of their product contained on this proposal. In the drop down selection box to the right of each vendor listed, you select how this product is to be invoice. The drop down selection box lists each vendor that is used on this proposal. You can select which vendor will be doing the invoicing for the product here. The last option, "Treat as normal (open) market business" allows you to invoice your customer for this product line. If this option is selected then you will be able to create an invoice to your customer for this vendors product.
If the vendor options selected during proposal finalization need to be modified, you have the ability to change these settings during the Invoice Preview process. A single vendor can be selected to invoice for all the products and services on the proposal or each product line may be invoiced by the vendor providing the product.
In our example above, we have selected the vendor Teknion to invoice for our product and for the Installation services. You will choose to invoice the selected vendor for the commission amount or the full sell price of the product/service during the invoice creation process.
In the example above, we will generate two purchase orders, one for each vendor on this proposal.
Step 3: Invoice Direct Bill Vendors
After the product has been received and installed you are now ready to invoice. You create invoices from the Receivables Tab by clicking on the Create Customer Invoices icon and selecting the product lines to be invoiced.
ProposalsDirectBillInvoicePreview.JPG
In the Review Your Invoice window on Direct Bill proposals, you will be presented with a link that allows you to change the direct bill vendors selected during the proposal finalization process if necessary. At the top of the Review Your Invoice window you will see the warning symbol noting that you can change your vendor selections if you want to.
ProposalsDirectBillChangeVendors.JPG
The Change Direct Bill Designation window will open allowing you to change the vendor that are to be invoiced by you. If you make changes to the designated vendor in this window, your Review Your invoice window will update with the selections you have made. If you select the "Treat as a normal (open) market business" option for all the vendors on your proposal, then you will be creating a single invoice to your customer for the sell price on your proposal. This will result in a Normal billing condition meaning that the Direct Bill order type was not necessary on the Project Info tab. You can invoice a vendor, multiple vendors and your customer on a Direct Bill proposal.
ProposalsDirectBillCommSell.JPG
In the example above, we have selected to invoice the vendor Teknion for the commission on the product and for the full sell price for the Installation service line item. You select the amount you are invoicing for by selecting Commission or the Total Sell amount from the drop down selection box under each vendors name.
We are invoicing the vendor Teknion for the Total sell amount of the Installation service line because Teknion will be invoicing our customer for the installation for us. We need to receive that amount from Teknion as well as the commission on the product line item.
Creating the Direct Bill Invoice
Our invoice to the vendor will be created for the commission amount on the product line item and for the Total Sell amount of the Installation line item as shown below.
ProposalsDirectBillInvoice.JPG
This invoice allows us to receive our commission payment as well as the full sell amount for the installation service. When the payment from the vendor is received it will be entered against this invoice.
- 7. Proposals
7.13. Project Management - 7.12. Proposals Direct Bill
« Previous - 7.13.1. Install and Delivery Schedule
Next »
7.13. Project Management
The Project Management menu is accessed from the Proposals menu in the main navigation menu. There are two menu options available under the Project Management menu; Install & Delivery Schedule and Work orders. This option is intended to be used as a tool to view scheduled installations and deliveries. This gives anyone that has access to this feature instant information as to what projects have been scheduled and when.
The information displayed on the Installation & Delivery Schedule is currently only available to users of your site. There is no print or export option. This information is intended for in-house project managers to manage and schedule their project installations.
The menu path to the Installation & Delivery schedule is shown below:
ProjectMgtMenu.JPG
- 7.13. Project Management
7.13.1. Install and Delivery Schedule - 7.13. Project Management
« Previous - 7.13.2. Work Orders
Next »
7.13.1. Install and Delivery Schedule
Installation & Delivery Schedule
The Installation & Delivery Schedule will display any proposals that have a Scheduled install date entered on its Install Tab. The schedule gives an overview of projects that are due to begin installation. In the example below, we can see that we have a proposal with a scheduled installation date of March 27.
ProjectMgtSchedule.JPG
The proposal schedule entry is a link to the proposal. You can click on the schedule entry and the Proposal Installation Details window will open. You have access to the Project Info tab, Install Info tab, File Vault tab and Work Orders tab on the proposal as shown below.
ProjectMgtPropInstallDetails.JPG
There is a link at the top of this window called [open this proposal] which will open the proposal and allow access to the proposal information based on the users permission settings.
The Project Mngr: input field also allows for a Project Manager to be assigned to this project. You can enter the first few characters of any employees name and select the appropriate project manager from the list or you can click on the [assign me] link to have your name automatically filling in as the Project Manager.
When a project manager has been assigned to a project, the assigned proposals will be listed in the My Jobs frame above the Installation & Delivery Schedule as shown below. This gives the Project Manager quick access to any of the projects that have been assign to him/her. They can click on the any of the assigned jobs link to instantly open the Proposal Installation Details window. This removes the need for the Project Manager to have to search for projects assigned to them by clicking on projects on the schedule.
ProjectMgtAssigned.JPG
Project Info Tab
From this view you can edit (permissions based) the customer (or Bill To) information, Install Location and the Shipping Location. The Install Date and Start Time can also be edited from this view.
Install Info Tab
There are no input fields on this tab.
File Vault Tab
The File Vault tab does allow for files to be uploaded to the proposals File Vault. File can be deleted from the vault as well. To upload a file to the vault from this tab, click on the Browse button to search for the file(s) you want to upload.
Work Orders Tab
The work order tab displays any work orders that have been created for this proposal. The work orders can be viewed, printed and edited from this view.
If any changes have been made that you wish to retain, click on the Save button after your changes are complete.
- 7.13. Project Management
7.13.2. Work Orders - 7.13.1. Install and Delivery Schedule
« Previous - 8. System
Next »
7.13.2. Work Orders
Work Orders Menu Option
Work Order are discussed in detail in the Work Orders section In the Service and Punch section of this document. See that section for details on creating and editing Work Orders.
Work Orders do not have to be created from the Service & Punch tab on proposals. The Work Orders menu item allows direct access to creating and editing Work Orders without having to open a proposal first. When you click on the Work Orders menu item the Project Management window will open and it will display Pending work orders and work order that have been marked as Complete.
ProjectMgtWorkOrdersWindow.JPG
Pending work orders are work orders that have not yet marked as Complete. Work orders can be created and edited over a period of time to allow for all the appropriate information to be collected. The work order is considered "pending" until it has been marked complete.
To edit a pending work order, simply click on the entry in the Pending Work Orders list and the Work Order edit window will open allowing you to update your work order.
The lower frame of this window displays all work orders that have been marked as Complete. The details of any of these entries can be accessed by clicking on the entry in the list. The Completed Work Order list also displays colored diamonds to the right of the Work Order number. These diamonds denote the status of the work order. a green diamond indicates that the work order has been ordered (on a purchase order) and a blue diamond indicates that the work order has been invoiced.
The Work Order list displays very much like the proposal list. Several of the column titles in the Work Order list are underlined meaning that they are links for sorting the list. Click on any of the underlined column titles to sort the list in ascending order, click the title a second time to sort the list in descending order.
The work order list can also be sorted with the Sort Option menu on the right side on the window under the pagination controls.
- Table of Contents
8. System - 7.13.2. Work Orders
« Previous - 8.1. System Configuration
Next »
8. System
The System menu option is only available to user that have permission to view system settings. You want to restrict the number of users that have access to the System settings. Changing some settings without fully understanding the outcome can result in significant problems.
SystemMenu.JPG
Currently the only option available under the System menu is System Configuration. This may be expanded in the future.
- 8. System
8.1. System Configuration - 8. System
« Previous - 8.1.1. Users & Groups
Next »
8.1. System Configuration
Click on the System Configuration menu option to open the System Configuration and Settings Window. This is where you control user access to your site and configure your site settings
SystemConfigWindow.JPG
There are two tabs in the System Configuration & Settings window.
| System Configuration Tabs | Description |
|---|---|
| Users & Groups | This tab is where you manage your system users. |
| Company & System Settings | This tab is where you configure your site settings. |
- 8.1. System Configuration
8.1.1. Users & Groups - 8.1. System Configuration
« Previous - 8.1.1.1. New User
Next »
8.1.1. Users & Groups
The Users & Groups tab is where your control access to your site. This is where you manage your user and can set individual user permissions as well as assign users to Groups.
SystemConfigUsers&Groups.JPG
| Users & Groups Frames | Description |
|---|---|
| Add & Edit Users | This is where you add, disable and edit the Users for your site |
| Add & Edit Groups | This is where you add, disable and edit the Groups for your site |
There is a link for adding users to your site called [new user] and there is a link for adding new groups to your site called [new group]. Clicking on either of these options will open the appropriate window for creating a new user or new group.
To edit the settings for an existing user or group, simply click on that entry in the list to open it.
- 8.1.1. Users & Groups
8.1.1.1. New User - 8.1.1. Users & Groups
« Previous - 8.1.1.2. New Group
Next »
8.1.1.1. New User
To add a new user to your site, click on the [new user] link in the Users & Groups frame. This will open the Create a New User window.
Fields followed by an asterisk are required fields and must be entered to save your data.
The New User input window:
SystemConfigNewUser.JPG
| Create a New user Fields | Description |
|---|---|
| Name * | Required field. This is the persons real name and is typically entered as Firstname Lastname in this field |
| Is this user active? | If this account is actively being used, check this box to allow this user access to your site |
| Place a lock on this user? | By checking this box, you immediately lock the user out of your site, even if they are logged in |
| User Name * | Required field. This is the user name that the person enters in the User name prompt in the DealerChoice login window. This input field in not case sensitive. You can enter the user name ini any combination of upper and lower case letters and the user name can be entered in the login widow in any combination of upper and lower case letters. |
| Password * | Required field. This is the password the the person enters in the Password prompt in the DealerCHoice login window. This input field IS case sensitive. If you enter PASSword in the field, then the user will have to enter their password as PASSword in the login window. |
| Login Date Restriction | You can restrict the period of activity of a user account by setting a from date and a thru date here. If the user tries to login outside of the timeframe set here, they will not be allowed to. You must make the account inactive and locked to disable the account. |
| IP Address Restriction | You can restrict access to your site to allow access from a specific computer IP address. If you wanted to restrict certain users access to access your site only from your office, enter the IP address of your in house server here. If the user then tries to access your site from their home computer, the IP addresses will not match and access will be denied. |
| User ID | This field allows to you enter an alphanumeric identifier (5 characters max) for this user. This identifier can be a number, letters or a combination of numbers and letters. This field is typically used on sales reps user accounts. If this field is populated, then purchase orders and customer invoices will include the User ID as part of the purchase order and customer invoice number. This helps identify the sales rep associated with the purchase order or customer invoice just by looking at the document number. |
| Commission | This field is used to assign a commission rule to a sales rep. The commission rule definition will determine the commission this sales rep is eligible to receive on proposals. Once commission rules are defined in your system (Commissions and Overhead Tab under Company & System Settings) the commission rules can be assigned to sales reps. |
| Email * | Required field. Enter the users email address. This address is used by DealerChoice as the From address in the Sender field on any email messages sent from within DealerChoice. Replies to messages sent from DealerChoice will be received in the users normal email client inbox. |
| Receive messages & alerts as email? | This is for future development. Checking this box will allow any DealerChoice message and alerts to be forwarded to the users normal email client inbox. |
| Phone | Typically this is the sales reps phone number. This is a print option field to be included on proposals and customer invoices in the document header. |
| Fax | Typically this is the sales reps fax number. This is a print option field to be included on proposals and customer invoices in the document header. |
| Group | This is where you assign a user to a Group. Users can be members of a single group, multiple groups or no group. Typically system permissions are assigned to a Group. All members of the group inherit the permissions of the group so individual permissions do not have to be assigned to every single user of your system. |
| Save User button | After entering or editing user information, click on the Save User button to create or save your user information. |
Editing an Existing User
To edit an existing user, simply click on the user entry in the User List to open the Edit User window.
SystemConfigEditUser.JPG
When you open an existing user you will notice two additional tabs; Permissions and Resources.
User Permissions are covered in the User and Group Permissions chapter.
Resources Tab
The Resources tab allows you to denote a user as a resource that can be used when creating work orders. If you have an inhouse design team, for example, and you want to include Design as a resource on a work order so you can recover the costs of design on your proposals, you can mark your designers as resources. Users of your site that are marked resources are considered "internal resources" because your dealership is the vendor associated with this resource. Users of your site that are set as active resources here can be included as resources on work orders.
Resources that are defined under the Resources tab under the Company Settings tab are considered "external resources" because a vendor (or sub contractor that you use) is the vendor assigned to these resources. See the Resources Tab section under Company Settings for details on external resources.
SystemConfigUserResource.JPG
| Resource Tab fields | Description |
|---|---|
| Resource Name * | This can be either the users name or a name that you assign for this resource. You can enter a resources name such as "Designer" or "Designer 1" here, for example. Resources added to a work order are selected by the name you enter here. |
| Active? | If this flag is checked, you will be able to select this resource to be included on work orders. |
| Vendor | Since this is an internal resource, the vendor here will be your dealership name. Your dealership must be an entry in your vendor database. |
| Hourly Cost | Enter the actual hourly cost of this resource. This can be the resources hourly wages plus benefits or it can be any value that you want to enter for the actual cost of your designer resource. The Sell field can be used to enter a value that is higher than your actual cost (Hourly field). The Sell amount will be used as the Cost field when this resource is imported into a proposal line item. |
| Daily Cost | Enter the actual daily cost of this resource. This can be the resources daily wages plus benefits or it can be any value that you want to enter for the actual cost of your resource. The Sell field can be used to enter a value that is higher than your actual cost (Daily field). The Sell amount will be used as the Cost field when this resource is imported into a proposal line item. |
| Half Day Cost | Enter the actual half day cost of this resource. This can be the resources half day wages plus benefits or it can be any value that you want to enter for the actual cost of your resource. The Sell field can be used to enter a value that is higher than your actual cost (Half Day field). The Sell amount will be used as the Cost field when this resource is imported into a proposal line item. |
| Description | The description field is a free text input field to allow you to enter descriptive text concerning this resource. The text entered here is for internal use only. |
| Save User button | Click on the Save User button to save your changes. |
The example below shows an internal designer resource definition.
SystemConfigUserResourceDetail.JPG
The resource is set as active and saved. It is now available for use on a work order. An example of selecting this resource on a work order is shown below.
SystemConfigUserResourceUse.JPG
The example above shows the Designer I resource being added to a work order.
- 8.1.1. Users & Groups
8.1.1.2. New Group - 8.1.1.1. New User
« Previous - 8.1.2. User and Group Permissions
Next »
8.1.1.2. New Group
The primary function of groups are to allow for easy communication using the DealerChoice internal messaging system and to save a significant amount of time when setting permissions.
You can create as many groups as you like. Groups can have a single user or multiple users and users can belong to more than one group.
Creating a new Group
Click on the [new group] link to open the Create a New Group window. There are two tabs in this window; Group Info and Permissions.
SystemConfigNewGroup.JPG
Group Info Tab
| Group Info tab Fields | Description |
|---|---|
| Group Name * | Required field. Enter the name of the group you are creating. Group names usually denote the different departments that you have in your company such as Sales, Design, Install, Customer Support. You can create a group with a person's name. |
| Place a lock on this group? | If a group is locked then every member of that group is immediately logged out of DealerChoice |
| Allow 'submit to' functionality? | Allows internal DealerChoice message to be sent to all members of this group. |
| Group Members | This is where you select the members of this group. If you are selecting multiple users hold down the CRTL (control) key while clicking on the names |
| Save Group button | Click on the Save Group button to save your Group information. |
Group Permissions Tab
Group Permissions are covered in the User and Group Permissions chapter.
- 8.1. System Configuration
8.1.2. User and Group Permissions - 8.1.1.2. New Group
« Previous - 8.1.3. Company & System Settings
Next »
8.1.2. User and Group Permissions
User Permissions
Individual user permissions can be set for each user of your site. Keep in mind that permissions set for a group are inherited by each member of that group. To avoid having to set individual permissions for every user of your site, set the primary set of permissions for a group of like users then add users to that group. If a particular user in the group needs a few extra or specific permission settings, you can edit the individual user permissions to add functionality to the specific user.
You have the ability to set permissions for each individual user in your site. Clicking on the Permissions tab displays all the categories of where permissions can be set.
SystemConfigUserPerms.JPG
To set the permissions for an individual user, click on the category to open the details for that category. Select the desired permissions for the user by checking the permission option. After selecting your permission settings you can click on the category again to hide the permission details. Be sure to save your settings by clicking on the Save Permissions button.
SystemConfigUserPermsDetail.JPG
You can change user permissions at any time and permissions can be added or removed whenever necessary to meet your users needs.
Permissions are applied to the users session during the login process. If you make permission settings while a user is logged into DealerChoice, the permission updates will not take affect until the user logs in again.
Group Permissions
The Group Permissions detail is exactly the same as the individual permissions detail. The only difference is that you are setting the permissions for the group and all members of the group will have the permissions set here.
SystemConfigGroupPermDetail.JPG
If a member of a group needs additional permissions settings that you don't want to issue to the entire group, edit the individual users permission settings and add the extra permissions only to the user that needs them.
- 8.1. System Configuration
8.1.3. Company & System Settings - 8.1.2. User and Group Permissions
« Previous - 8.1.3.1. System Settings
Next »
8.1.3. Company & System Settings
Under the Company & System Settings tab are 5 additional tabs; System Settings, Company Settings, Products & Services, Resources and Commissions & Overhead
SysConfigCo&SysSettings.JPG
- 8.1.3. Company & System Settings
8.1.3.1. System Settings - 8.1.3. Company & System Settings
« Previous - 8.1.3.2. Company Settings
Next »
8.1.3.1. System Settings
The System Settings tab allows you to configure various settings of your site. Most of these settings will be configured during your training session and or long before you go live. You may need to visit the System Settings tab on occasion to make some adjustments to your site.
SysConfigSysSettingsTab.JPG
| System Settings Fields | Description |
|---|---|
| Number of items to show in primary lists (i.e. proposals, customer, vendors): | This controls the number of items that will be displayed in primary lists such as the Proposal, Customer and Vendor lists. |
| Number of items to show in secondary lists (i.e. customer contacts, customer locations, discounts, etc): | The controls the number of items that are displayed in secondary lists such as Locations and Contacts. |
| Your company Logos: | Use the [upload] link to locate and upload your company logo files. The logo files must be in jpeg (.jpg) format. There is no limit on the number of logo files you can upload. Once uploaded you can select which logo is to appear on your proposals, purchase orders and customer invoices. |
| Your Company Docs: | Use the [upload] link to locate and upload company documents. There is no limit to the number of company documents you can upload. See below for details. |
| Default product for vendor freight charges: | A product/service must be selected here to define the product/service to be used for vendor freight charges because DealerChoice can create these proposal line items during proposal finalization. The product/service definition includes the income and expense account to be used and the tax rules to be applied. |
| Default product for vendor small order fees: | A product/service must be selected here to define the product/service to be used for vendor freight charges because DealerChoice can create these proposal line items during proposal finalization. The product/service definition includes the income and expense account to be used and the tax rules to be applied. |
| Default product for vendor fuel charges: | A product/service must be selected here to define the product/service to be used for vendor freight charges because DealerChoice can create these proposal line items during proposal finalization. The product/service definition includes the income and expense account to be used and the tax rules to be applied. |
| Default product for CBD fees: | A product/service must be selected here to define the product/service to be used for vendor freight charges because DealerChoice can create these proposal line items during proposal finalization. The product/service definition includes the income and expense account to be used and the tax rules to be applied. |
| Outgoing Mail/Fax queue: | The Mail/Fax queue can be disabled with this control. By default the queue should always be Enabled. If you need to disable the queue, you can change this setting to Disabled. |
| Force Non-SSL Requests to SSL? | This setting allows you to force connections to your site to use the Secure Sockets Layer (SSL) connection between the client and server. This type of connection encrypts the data sent between machines. If this feature is in use, you may see a warning message regarding the security certificate presented by the website. This is a warning message only and you should select the "Continue to this website" option to continue using the secure connection. |
| Require items to be received in order to map on A/P line item? | If you use the line item mapping option when entering Payables (vendor invoices) and if this control is set to Yes, line items cannot be received individually unless they have a received date entered (purchase order acknowledgement information). The line item selection check box will be grayed out if it has not be received. The payable can still be entered, but not via line item mapping. |
| Proposal status options: | Through this control, you can create custom proposal status messages and assign them to your proposals. The custom proposal status messages appear in the Proposal List under the Status column title. See below for details on adding Proposal Status message to your site. |
| Default new customers to manual credit hold? | This control allows you to force new customers to have the Manual Credit Hold flag set when a new customer is added to the Customer database. You may want this control set to Yes if you need time to check credit references or to allow time for receiving documentation from your customers prior to allowing purchase orders to be created. If this control is set to No then new customers will not have the Manual Credit hold flag set automatically when they are created. |
| Activate Item Library? | The Item Library feature stores the Vendor Name, Item Number, Item Description and Item List Price for you as you manually enter line items into a proposal or when you import line items into a proposal. If this feature is set to 'Yes', then the information noted above will be saved into the database. Then, as you begin to enter an Item Number in the Item No field on the Item Details tab of Proposals, if any matches are found in the Item Library database, a drop down selection window will appear allowing you to select that item from the list provided. You must enter the vendor name and select the Product before entering the Item Number. The Item Description and Item List Price fields will be populated with the information from the Item Library database for you. If this feature is set to 'No', then no item information will be stored and there will be no selection options available when manually entering line items on Proposals. |
| Number of days between the ship date and install date to display storage request notification warning: | Setting a number of days here check the Ship date against the Install date and if the range is greater than the value set here, the Install Date will appear with an asterisk on the Project Status report to warning you of the time between ship date and install date. |
| Number of days prior to a bill coming due to place it in the payment queue? | This control will automatically flag a payable for payment if it has not manually been flagged for payment if the due date on the payable is within the number of days set here. |
| When a customer refund is created, how many days until it should be placed in the payment queue? | This control will automatically flag a customer refund for payment if it has not manually been flagged for payment if the due date on the refund is within the number of days set here. |
| In which timezone does your company reside? | Select the time zone that you are in for proper date/time stamping on your documents. |
| How long (in minutes) should DealerChoice wait before logging out an inactive user? | This control will automatically log out a users session after the period entered here has been reached an no activity has been logged in that session. |
| How to format date stamps: | Select the format that you wish for the date to appear on documents. |
| How to format timestamps: | Select the format that you wish for the time to appear on documents. |
| How many days should a proposal wait before being archived? | Set the number of days here for your proposals to be automatically archived. Any proposal that has no activity logged within this timeframe will automatically be archived. |
| After a new proposal is created, how many days until it is no longer valid? | This is the default date that will appear on the Expiration Date field on the Project Info tab on proposals. The default is 30 days. This control will print a message at the bottom of your proposals saying that the proposal pricing is invalid after X days. |
| Allow users to modify customer invoice date upon creation: | If this control is set to No, then the invoice date field will be locked when creating customer invoices and will default to today's date. If it is set to Yes, the users will be allowed to pre or post date customer invoices. |
| Once a purchase order has been invoiced, should it be locked to prevent changes? | This control will lock editing of purchase orders if the product on the purchase has been invoiced to the customer. If it is set to Yes, then the purchase order cannot be edited, if it is set to No, then the purchase order can be edited. |
| Allow customer login: | For future development, this will allow your customers to log into you site to view customer specific data that you allow to be viewed. |
| Allow Employee Login: | This control allows you to lock you site down. If set to Login Allowed then users can login to your site, if set to Login Disabled, the your users cannot log into your site. |
| Customer credit correction codes: | Customer credit correction codes must be created before a customer credit can be generated and are used to issue a customer a credit memo. Each correction code can be used to identify the reason for the credit being issued, as well as the chart of account that is affected by the credit. See below for details. |
| Field customization: | For Future Development (Custom Reporting Fields). This control allows you to add input fields and or check box fields to Proposals, Customers and Vendors. Custom fields can be added now and they are intended for use with the Custom Reporting function. The Custom Reporting function will allow you to select specific fields to be used as filters to run your reports. This feature will include and customer fields that you have created. See below for details. |
| Posting date to use when entering new payables | This control allows you to select the Invoice date or the Receipt for the posting date when entering vendor invoices. This control is set to Invoice date by default and should remain as the posting date per the Generally Accepted Accounting Principles. |
Your Company Docs:
You can upload documents to the database to be used as attachments on your proposals, purchase orders, customer invoices and delivery tickets. Uploaded documents must be in either PDF or DOC format. You can upload your Terms and Conditions document and attach it to Proposals so ever proposal you email or fax from DealerChoice will include your T&C's document as an attachment. You can even upload sales flyers if you wish.
SysConfigCoDocs.JPG
After selecting your document to upload you can specify it to be appended to outgoing documents. You can select if it is to be attached to Proposals, Purchase Orders, Customer Invoices and Delivery tickets. When you email or fax from DealerChoice, the specified document(s) will be included as attachments to that document.
Proposal Status Options
To add a Proposal Status message, click on the [edit list] link and the Edit List window will open. If any proposal status messages have been entered, they will be displayed in this window. To Edit an existing status, just click on the status in the list.
SysConfigProposalStatus.JPG
Click on the [add new] link to add a status and the Status input box will appear. Enter the name of your status, select the color that you want the text to appear in and select whether or not you want the text to appear in bold.
SysConfigProposalStatusAdd.JPG
Click on the Save button to save your new status and your status will now appear in the list and is ready to be assigned to proposals in the Proposal Status field on the Project Info tab. We created the status called New Status and saved it and it now appears in our list of available Proposal Status messages as shown below.
SysConfigProposalStatusView.JPG
Customer Credit Correction Codes
Corrections codes must be defined before a credit can be issued. If any correction codes exist, you can click on that code to view and edit the details of that code. Click on the [edit list] link to open the Edit Correction Code window to view, edit or add correction codes.
SysConfigCreditCodes.JPG
To add a new correction code click on the [add new code] link to open the Edit Correction Code input window.
SysConfigCreditCodesAdd.JPG
| Correction Code Fields | Description |
|---|---|
| Description | Enter a text description of the credit reason, for example; Customer Returns or Product Damage |
| Active? | By default the Active flag is set, if you no longer wish to use this code, uncheck this field and the credit will no longer be available for selection when customer credits are being entered. |
| Correction Code | Enter a brief code to identify this credit reason, for example; C-RET for customer returns. |
| Income/Expense Account | Select the income or expense account that will be affected by this credit. The drop down selection box will allow you to view all of your income and expense accounts defined in your Chart of Accounts. |
| Save | Click the Save button to save your credit code. |
Now the correction code you have created can be used when entering customer credits.
Field Customization
This control allows you to create custom input fields that will appear in the specified tab for Proposals, CUstomers and Vendors database windows. Click on the [customize fields] link to open the Custom Field Editor window. Select the form that you want to add a custom field to by clicking on the drop down selection box under the Section header and the available tabs will be displayed.
You can add custom fields to Proposals, Customers and Vendors.
Under Proposals, you can add fields to the Project Info tab, Design tab and Install Info tab.
Under Customers, you can add fields to the General Info tab, Payment Info tab, Contacts tab and Locations tab.
Under Vendors, you can add fields to the General Info tab, Payment Info tab, Contacts tab, Locations tab and Products tab.
SysConfigCustomFields.JPG
In the example below, we will add a field to Proposals, Project Info tab. We have selected Proposals in the Section selection box and we have clicked on the Project Info frame.
SysConfigCustomFieldsAdd.JPG
| Custom Field Editor Fields | Description |
|---|---|
| Field Name | Enter the text description for this field. This text will appear in the tab you have selected as the input field prompt text. |
| Active? | By default new fields are active. If you no longer wish to use this field, un check this box and the field will no longer appear on the tab. |
| Field Type | Select the type of field you are adding. The options are; Text Input Box, Drop Down Selection Box, Multiple Select Box, Check Box and Scrolling Comment box. See below for details on each of these selections. |
| Sample | This field displays an example of the field type you have selected above. This gives you a visual example of how the new field will look. |
| Max Length | Enter a number for the maximum number of characters for this field. This field is only presented on input type field types, selection type fields have pre-defined values that are selected from the entries stored in the Pre-Populated input field. The user can only select from the options you enter here for selection type fields. |
| Required | This check box allows you to determine if the field you are adding must be populated by the user, if check. If unchecked, this field may be left blank. |
| Field Width | You can specify a field width for the expected input data. If you leave this field blank DealerChoice will manage the field width for you. |
| Field Height | You can specify a field height for the expected input data. If you leave this field blank DealerChoice will manage the field height for you. |
| Default Value | Any text entered here will be the default data that appears in the field. If this data will be the same most of the time it is best to enter it here. |
| Sector | Only available for Proposals. The proposal tabs are separated by frames or sectors. You can choose which sector your custom field is to appear in by selecting the appropriate sector. |
| [sector layout map] | Clicking on this link will display the proposal tab with each sector numbered to help you decide on which sector your field is to be added to. |
| Position | You can choose the position of your custom field by selection the position here. If you add a second field and want it to appear before the first field you created, you can just change the position of the fields. |
| Save button | Click on the Save button to save your custom field information. |
After saving your customer field (and it is set as Active), the new field will appear on the selected tab/sector immediately and is available for use. If you do not want your custom field to be used, you can un-check the Active flag.
If you do want to remove a custom field, simply click on the Section and tab name that the field was added to, then click on the field to open the field details. Click on the Remove button to delete the field. The Remove button is shown in the example below.
SysConfigCustomFieldsRemove.JPG
- 8.1.3. Company & System Settings
8.1.3.2. Company Settings - 8.1.3.1. System Settings
« Previous - 8.1.3.3. Products & Services
Next »
8.1.3.2. Company Settings
The Company Settings tab contains additional settings to allow you to control your site environment.
The image below does not include the Tax Rules setup, Tax Rules setup is covered in detail below this image.
Company Settings Tab
SysConfigCoSettingsTab.JPG
| Company Settings Tab Fields | Description |
|---|---|
| A seed number to precede proposal numbers | If you want an identifier to precede your proposal numbers enter that identifier here. This field may contain letters and or numbers. If this field is populated, the data contained here will precede every proposal number that you generate. This field does not change for each proposal. This field is typically used to denote the 4 digit year (for example, 2010)that your proposals are created in. This field must be edited to change its value, the system does not update this value for you. This field is optional. |
| Next proposal number to use | Enter the number that you want to use as your starting proposal number. This field must be numeric. Each time a proposal is created the system will increment this number by one and store the value for the next proposal number here. |
| A seed number to precede PO numbers | If you want an identifier to precede your purchase order numbers enter that identifier here. This field may contain letters and or numbers. If this field is populated, the data contained here will precede every purchase order number that you generate. This field does not change for each purchase order. This field is typically used to denote the 4 digit year (for example, 2010)that your purchase orders are created in. This field must be edited to change its value, the system does not update this value for you. This field is optional. |
| Next PO number to use | Enter the number that you want to use as your starting purchase order number. This field must be numeric. Each time a purchase order is created the system will increment this number by one and store the value for the next purchase order number here. |
| A seed number to precede work order numbers | See above for seed numbers information. |
| Next Work Order number to use | See above for document numbers information. |
| A seed number to precede invoice numbers | See above for seed numbers information. |
| Next invoice number to use | See above for document numbers information. |
| Default Customer Payment Terms | This setting controls the terms of your due date on customer invoices. A value set here will also be the default value in the Customer Payment Terms input field on the Payment Info tab when new customers are created. Of course, you can change this value in System Configuration or in the Customer database at any time. |
| Minimum GP margin flag | The control allows you to set a company wide minimum GP margin on proposals. The proposal finalization process checks the proposal GP against the value set here. If the proposal GP is below the value set here, a warning message will be presented in the proposal finalization window alerting the user that the proposal falls below the company standard GP margin. This does not prevent finalization from completing. The user has the opportunity to correct the proposal or continue with the finalization process. |
| Require Authorization? | For future development. When functional, if this flag is set and a proposal falls below the company standard GP margin during the finalization process, the user will be required to obtain authorization before being able to continue with finalization. Of course, if the proposal meets or exceeds the standard GOP margin, authorization is not required. |
| Apply a company wide overhead factor? | The company overhead factor allows you to reserve a percentage of the cost or sell amount on proposals. This percentage amount is removed from the total profit on the proposal before commission is calculated. |
| Rate | Enter the percentage to be retained for the overhead factor. |
| Default deposit requirement for new customers | This setting controls the default customer deposit amount requirement. A value set here will be the default value in the Required Deposit Percentage input field on the Payment Info tab when new customers are created. Of course, you can change this value in System Configuration or in the Customer database at any time. If set, a message will appear at the bottom of all proposals to customers requesting the customer deposit in percentage form and in dollar amount. The deposit requirement is also a proposal print option and can be excluded from proposals if desired by not selecting the Deposit Requirement print option. If set and if a deposit has not been received from the customer, a warning message will appear in the Purchase Order window that the customer deposit has not been received. This does not prevent purchase orders from being generated, it is simply a warning that a customer deposit has not been received and that a customer deposit is required from this customer. |
| If a customer's A/R is over | For future development. This control will allow you to prevent proposal finalization for customers with outstanding accounts receivables per the criteria set here. You can enter a dollar or percentage amount as well as a number of days outstanding. This criteria will be checked during finalization and if the customer's outstanding balance is higher than the amount or percentage set here and more than the number of days past due setting, the proposal will not be allowed to complete finalization and a warning message will be displayed during finalization alerting the user that the customer's A/R is past due. |
| Enable multiple currencies? | You can enable the use of multiple currencies with this control. When the Enable Multiple Currencies check box is checked, the Open Currency Table link will be available. Use this link to define the currencies you will use in your system. See below for details. |
| Account to be used when applying finance charges | Use the drop down selection arrow to select the account that is to be used for your finance charges. This GL account will hold the transactions related to finance charges that you may apply to customer invoices. |
| If a customer falls short of the required deposit, what percent threshold would prevent PO's from being cut? | This control allows you to set a threshold percentage on the customer's deposit amount paid. If you require a customer deposit and a deposit has been paid but the amount paid does not equal the deposit required percentage, this setting will allow you to avoid the customer deposit required warning message when generating purchase orders. |
| Footer message to be printed on all proposals | Enter the text here that you want to appear in the footer area of all your proposals. |
| Vendor to be assigned to internal resources | Enter your dealership's vendor entry from the vendor database. A purchase order will be generated for internal resources used on Work Orders. The value entered here will be the default in the Resources tab in the User database when defining internal resources. |
| Your company name | Enter your company name here. |
| Your company address | Enter your company address here. |
| Your company zip code | Enter your company zip/postal code here. |
| Your company country | Enter your company's home country here. |
| Your company's federal identification number | If applicable, enter your Federal Tax Id number here. This number will be included on any 1099 forms that you generate. |
| Your company remit to addresses | If applicable, enter any alternate remittance addresses you may have. YOu can enter multiple remit to addresses and you can select which remit to address is to be included on your customer invoices. |
| Your company phone number | Enter your company phone number here. |
| Your company fax number | Enter your company fax number here. |
| Your company web site | Enter your company web site address here. |
| Overrides & Authorizations may be made by the following groups | For future development. The groups selected here are the groups responsible for any action that requires authorization. For example, the Minimum GP Margin control has a Require Authorization check box. When this feature is active and if the Require Authorization flag is set on the Minimum GP margin control, users will not be able to finalize a proposal that does not meet the minimum GP margin set in System Configuration without getting authorization. When authorization is requested, the member(s) of the selected Overrides & Authorizations groups will receive a message in their DealerChoice Messages inbox alerting them that a user has requested an override or authorization. There will be a process in which the authorizing member(s) can grant or deny the request. |
US Tax Rules Setup
At the bottom of the Company Settings window is where the tax rules are defined.
SysConfigCoSettingsTax.JPG
To create a tax rule, click on the [new tax rule] link to open the Create a New Tax Rule window.
SysConfigCoSettingsTaxRule.JPG
Enter the appropriate information for the tax entity and save your rule.
| Create a New Tax Rule Fields | Description |
|---|---|
| State * | Select the state for which the tax rule is being created. |
| Active? | By default the new tax rule will be active, if you do not want this tax rule to be applied, uncheck the Active check box and the tax rule cannot be applied to proposals or invoices. |
| Local | If you are creating a County, City or Municipality tax rule, enter the name of the County, City or Municipality here. This will identify the tax collections by this name in your Sales Tax Liability report. |
| Rate | Enter the percentage to be collected for this rule. |
| County/City Maximum Tax: | If creating a County, City or Municipality tax rule and if the County or City has a maximum taxable amount, enter the taxable maximum dollar amount here. When this tax rule is applied to proposals or invoices and if there is a taxable maximum dollar amount here, then sales tax will only be calculated on the taxable product sell amount up to this value. |
| Sales Tax Payable Account | Select the appropriate liability account that will be updated with the tax transactions for this tax rule. |
| Taxable Products & Services | Select which products and services are taxable for this tax location. |
| Inherit product rules from state? | This check box will allow you (if checked) to apply the same product rules defined for the State tax rule to be applied to this County, City or Municipality tax rule. After applying the State tax rules, this tax rule can be editing to make any changes if necessary. |
| Save Tax Rule button | Click this button to save your tax rule. |
Enter a tax rule for each taxable location that you are required to collect tax for. The Sales Tax Liability report will display the tax collected for each tax entity you define.
Canadian Tax Rules Setup
SysConfigCoSettingsTaxCAD.JPG
To define tax rule for a Province, place your mouse over the tax type in the appropriate column (GST, HST, PST, QST for that Province and click. This will open the Edit Tax Rule window as shown below.
SysConfigCoSettingsTaxCADEdit.JPG
| Canadian Tax Rule Edit | Description |
|---|---|
| Rate | Enter the percentage rate for the tax to be calculated for the tax type in this Province. |
| Account | Select the appropriate liability account that will be updated with the tax transactions for this tax rule. |
| Active | By default the new tax rule will be active, if you do not want this tax rule to be applied, uncheck the Active check box and the tax rule cannot be applied to proposals or invoices. |
| Save button | Click on the Save button to save your tax rule. |
Enable Multiple Currencies
You can enable the use of multiple currencies for your site by checking the Enable Multiple Currencies check box. When multiple currencies are enabled, you will see the Open Currency Table link that allow you to define the currencies to be used and to enter the exchange rate. The View & Edit Currency Exchange Tables window will open when you click on the Open Currency Table link as shown below.
SysConfigCurrExchangeTable.JPG
This example shows two currencies defined, the Canada dollar and the Untied States dollar.
To define a currency, click on the [add a new currency] to open the Add Currency window as shown below.
SysConfigAddCurrency.JPG
| Add Currency Fields | Description |
|---|---|
| Currency Name | Enter the country that the currency is from. |
| Active | By default, new currencies are active, if you do not wish to use this currency, uncheck this box. |
| Country | Select the Country that this currency is from from the drop down selection box. |
| Currency Code | Enter the world currency code for this currency. Please contact support if you need assistance. |
| Currency Symbol | Enter the 3 letter code used internationally to distinguish one currency from another, such as "USD" for the United States dollar and "GBP" for the United Kingdom Pound. The Symbol entered here will be displayed anywhere this currency is used in DealerChoice. |
| Printed Name | Enter the name of the currency such as "Dollars" or "Pounds" or "Euro" |
| Exchange Rate | Enter the exchange rate percentage compared to your home currency. If this is your home currency the exchange rate is always 1. The exchange rate must be updated manually. You can update the exchange rate as often as you like. Any transactions that take place in a currency other than your home currency store the exchange rate at the time of document creation. When changes are made to the exchange rate and transactions are affected, adjustments will be stored in the Gain/Loss account that has been selected in System Configuration. |
After adding currencies, they will be listed in the View & Edit Currency Exchange Table window as shown above. To edit an entry in this list, simply, click on the currency in the list.
- 8.1.3. Company & System Settings
8.1.3.3. Products & Services - 8.1.3.2. Company Settings
« Previous - 8.1.3.4. Resources
Next »
8.1.3.3. Products & Services
The Products & Services tab allows you to define your dealerships default set of products and services. Products and services are used to categorize your proposal line items. Define a product or service for each type of product and/or service that you provide to your customers. You do not define products available from the vendors that you represent here. Vendor products are defined in the Vendor database under the Products tab.
Examples of Products are General Furniture Sales and New product and Used Product. Example of Services are Installation and Project Management and Design. DealerChoice uses these products and services to combine accounting and tax information in the database, so when they are used on a proposal a sales rep or customer service rep does not have to know any of the accounting or tax details regarding each proposal line item. Since the products are defined here, the income and expense accounts have already been determined as well as where you must collect sales tax for the sale of this product or service.
Products and Services are typically identified by the Catalog Codes that are used in electronic specification catalogs for that product line. You do not have to enter a catalog code to define a product or service here. Entering products allows you to specify the characteristics of how that product is handled in DealerChoice. The taxable information for each Product is stored here as well as the income and expense account for tracking dollars associated with each Product.
The Product and Services can also be defined for Vendors on the Products tab in the Vendor database. Products and Services defined in the Vendor database are specific to that vendor and are typically the catalog product line names as defined in the vendors electronic catalog files used by specification tools.
Products & Services Tab
SysConfigProd&ServTab.JPG
The image above shows a list of Products and Services. To view and or edit any of these entries, simply, click on the entry in the list.
The example below shows the details for the Delivery product.
SysConfigProd&ServDetail.JPG
| Edit Product or Service Fields | Description |
|---|---|
| Product/Service Name or Description * | The name or description entered here will be displayed on proposals and invoices for each line item but it can be hidden with print options. This data describes the type of the line item (General Sales, New Product, Design, Installation Services, etc). |
| Active? | By default, new Products & Services are active. Any product or Service that is not active cannot be used on proposal line items. If you no longer wish to use a specific product or service you can uncheck this box or if you are creating a new product or service and if you are not ready for it to be put into use, uncheck this box. When you are ready to put the product or service into use, check this box. |
| Catalog Code | Enter the 3 character catalog exactly as it appears in the vendors electronic specification catalogs. The catalog code code entered here is compared to the data contained in SIF or XML files that are imported to create proposal line items. If the catalog code in the SIF or XML file matches a catalog code found in the Products database, DealerChoice can immediately identify the associated vendor, the income and expense account used by this product, the tax rules applied to this product and can even be used for determining product discounting. |
| Cut Separate Purchase Order? | This control allows you to force any line items on your proposals using this product to be placed on their own purchase order. No other product will be on the purchase order with this product type. If left unchecked, this product will not be forced onto its own purchase order. |
| Income Account* | Select the income account account to use to track the sales of this product. |
| Expense Account* | Select the expense account to use to track the costs of this product. |
| Taxable? | If the product or service is taxable, meaning that you must collect sales tax for this product or service, check the Taxable check box. When you check the Taxable check box, a list of all the tax rules that you have created on the Company & Settings tab will be displayed allowing you to select where you must collect sales tax on this product. Select all the taxable entities that require you to report sales of this product or service. |
| Sub Total? | Select this check box to make this field available as a sub total field on proposals and customer invoices as a Proposal and Customer invoice Print Option. Products and Services must be set as a Sub Total field in System Configuration before they will appear on Proposals or Customer Invoices as sub totals. After setting Products and/or Services as a Sub Total field here, they may be selected to be displayed on your Proposals and Customer Invoices as sub totals at the bottom of these documents. In the General Print Fields section of the Proposal and Customer Invoice Print Options window, a field called Display Sub Totals must be selected (turned on) to allow the Products and Services set as Sub Total fields here, to display as sub totals. When sub totals are printed, the line items on your proposal that are associated with this Product/Service will be sub totaled at the bottom of the document. |
| Sub Total Title: | Enter the text that you want to display on Proposals and Customer Invoices as the sub total description. This title will appear to the left of the dollar amount for the products defined with this Product or Service when Sub Totals are selected to be displayed on Proposals and Customer Invoices. |
| Save Product button | Click on the Save Product button to save your changes. |
All Products and Services created in this tab that are Active will be available as a selection option in all of your proposals line items in the Products & Services input box. You can always use a product or service on any proposal if it exists in your System Configuration Products & Services tab. The only time you can use Products and Services defined for specific vendors is if that vendor (not your dealership) is selected as the vendor for the line item. Once a vendor has been selected on a proposal line item, any Products & Services defined for that vendor will also be available.
- 8.1.3. Company & System Settings
8.1.3.4. Resources - 8.1.3.3. Products & Services
« Previous - 8.1.3.5. Commissions & Overhead
Next »
8.1.3.4. Resources
Resources Tab
There are internal and external resources. Internal resources are your employees that use DealerChoice. You define internal resources in the Users database by going to the Resources tab when editing an existing user. An external resource can be any vendor in your vendor database that you designate here as a resource.
Typically, you add an entry in the Resources tab for vendors that you use for installation, warehousing services, painting, electrical work, etc. An external resource is any vendor that you use as a sub-contractor. The only difference between a vendor in your vendor database and a vendor defined as a Resource is that you can use a vendor defined as a Resource on Work Orders.
Work Orders allow you to bundle several resources (or vendors) services into a single line item on proposals. This feature allows you to hide the individual vendor names and individual line items for each service on your proposals.
Once a work order is created and imported as a line item on your proposal, DealerChoice will still create a purchase order for each vendor assigned to the Work Order. See the Work Orders section of this document for details on creating work orders.
Of course, you can still create a proposal line item for each vendor that you use on a project.
SysConfigResourcesTab.JPG
The example above shows the Resources tab in System Configuration that lists two existing resources.
| Resource Tab Column Titles | Description |
|---|---|
| Resource Name | The resource name is the name that you assign to the vendor. It should describe the type of work that this resource provides, i.e. Installers, Painters, Electrical, etc. |
| Vendor | This is the actual vendor that provides the service from your vendor database. |
| Active | This flag allows you to make resources available (active) or not available (inactive) for use in creating work orders. |
SysConfigResourcesDetail.JPG
The example above shows the Create a New Resource window. When creating a new Resource, you link the resource name to a vendor in your database. The link to a vendor in your vendor database allows DealerChoice to generate a purchase order for this vendor when it is used on a Work Order.
The resource feature also allows you to enter a cost price and sell price per resource. This gives you the flexibility to mark up your resource sell amounts before the work order is forwarded on to be imported into proposals. This creates an internal revenue center for resources where the cost amount is lower than the sell amount.
| Create A New Resource Fields | Description |
|---|---|
| Resource Name * | As noted above, the resource name is a descriptive name that describes the type of service that this resource provides, such as Installers, Painters, Project Management, etc). |
| Active? | If the Active check box is checked, then this resource can be used in Work Orders. If the Active check box is not checked, the resource cannot be used in Work Orders. |
| Vendor | This field is used to link the Resource Name to an actual vendor in your vendor database. This association must be made for all resources (internal and external) so DealerChoice can generate a purchase order for this resource. |
| Hourly Cost | This field is optional. Enter the actual amount that this vendor charges you per hour for this resource. |
| Hourly Sell | This field is optional. The amount entered here will be the COST amount that appears in the work order line when it is imported into proposals. |
| Daily Cost | This field is optional. Enter the actual amount that this vendor charges you per day for this resource. |
| Daily Sell | This field is optional. The amount entered here will be the COST amount that appears in the work order line when it is imported into proposals. |
| Half Day Cost | This field is optional. Enter the actual amount that this vendor charges you per half hour for this resource. |
| Half Day Sell | This field is optional. The amount entered here will be the COST amount that appears in the work order line when it is imported into proposals. |
| Save Resource Button | Click on the Save Resource button to save your changes. |
| Delete Resource Button | Click on the Delete Resource button to delete an existing resource. |
- 8.1.3. Company & System Settings
8.1.3.5. Commissions & Overhead - 8.1.3.4. Resources
« Previous - 9. Accounting
Next »
8.1.3.5. Commissions & Overhead
Commissions & Overhead Tab
The Commissions & Overhead tab is where you create your commission payment structures for your sales reps. Currently, the commission structure can only be calculated on the Gross Profit of a proposal. Only one commission rule can be in effect for a sales rep at a time. As mentioned in the User & Groups section, a commission rule must be assigned to a sales rep in teh sales reps Users configuration. If no commission rule is assigned to a sales rep, then they will not appear in the Commissions Report.
Commission&Ovrhd.JPG
The image above displays several sample commission rules and overhead rules.
Adding a Commission Rule
To add a commission rule, click on the [Add New Commission Rule] link to open the Create A New Commission Rule window.
NewCommissionRule.JPG
There are several commission rule types that can be created and can be selected by clicking on the drop down selection arrow in the Rule Type selection box.
CommissionRuleTypes.JPG
| Commission Rule Types | Description |
|---|---|
| Generic Commission Rule | This rule can be applied to any sales rep. All proposals for this sales rep |
| Customer Commission Rule | This rule can be used to create a specific commission structure for a particular customer. After selecting this rule type, an input prompt field will appear to allow you to select the customer that you are creating the rule for. |
| GSA Commission Rule | If you have a specific set of commission rules for GSA customers that is different from your Generic Commission Rules, you can create that rule here. This rule will only be applied to proposals created for customer flagged as GSA customers in the customer database. |
| Commission Team | This rule type will allow you to create a commission team. Commission team typically consist of multiple sales reps (or any DealerChoice users in your company). |
Generic Commission Rule
GenericCommissionRule.JPG
| Generic Commission Rule Fields | Description |
|---|---|
| Commission Name * | Enter a name for your commission rule. The name entered here will appear in the Commission input prompt in the Users edit window (for assigning a commission rule to your sales reps). |
| Active? | If this box is checked, this commission rule will be applied in the Commission Report. If the box is not checked, the rule will not be applied. |
| Effective Date | Enter a date that the commission rule comes into effect. |
| Expiration Date | Enter a date that the commission rules expires. The commission rule will only be applied in the COmmission Report if the date the COmmission Report is run falls between the Effective and Expiration dates. |
| GP Margin Structure | Enter the amount of commission that is to be calculated for ranges of GP margins. You must define your structure for 100% of the GP margin. You will not see the Save Commission button until the rule is defined up to 100% GP. The commission rule can be set to calculate no commission, point for point, or at a rate that your specify. See the example below for more information. |
GP Margin Structure Example
Example 1:
From 0 to 9% GP, no commission will be calculated
From 9.01% to 25% GP, commission will be calculated at point for point
From 25.01% to 100% GP, commission will be calculated at 35% of the GP%
CommRuleDef1.JPG
The image above shows our commission rule being created for the first tier (0 to 9% GP then no commission). Notice that there is no Save Commission button. This is because the commission is not complete. You must define tiers for 100% of the GP margin before you can save your commission rule. This does not mean that you have to pay commission on GP margins up to 100%, you can select to pay no commission once you have reached the highest GP level that you will commission on.
Now we will add the second tier of our commission rule, which is from 9.01% to 25%, calculate commission at point for point. To enter the next tier, click on the [Next] link.
CommRuleDef2.JPG
We will click on the [Next] link again to enter our third and final commission tier and then click on the [Next] link.
CommRuleDef3.JPG
The end result is our completed commission rule as shown below and we now see the Save Commission and Delete Commission buttons. Click on the Save Commission button to save your commission rule.
CommExample1.JPG
The saved commission rule will now appear in the Commission Rule list.
Customer Commission Rule
CustomerCommissionRule.JPG
The Customer commission rule type option allows you to create a commission rule for a specific customer. You can create commission rules for as many different customers that you need. When a Customer commission rule exists, the Customer commission rule will be applied to all proposals for this customer. You do not have to assign this commission rule to your sales reps. Once the Customer commission rule is in effect, any proposals for this customer will use the customer specific commission rule for calculating commission.
After selecting the Customer Commission rule type, The Customer input prompt will appear under the Rule Type prompt allowing you to enter the first few characters of the customers name and selecting them from the selection list. Setup the remainder of the commission exactly the same way as you would a Generic Commission rule.
When the Commission Report is run, and if there are proposals for this customer that meet your commission report criteria, the specific customer commission rule will be used to calculate the commission for those proposals.
CustomerCommReport.JPG
The example above shows a proposal in the Commission Report for customer Test Customer 3. You can see that the Commission Rate field displays the 'Test Cust 3' commission rule has been used to calculate the commission amount.
GSA Commission Rule
GSACommissionRule.JPG
The GSA commission rule type option allows you to create a commission rule for customers flagged as a GSA customer in the Customer database. Only one GSA commission rule can be in effect at a time. When the Commission Report is run, and if there are proposals that meet your commission report criteria, the GSA commission rule will be used to calculate the commission on proposals for customers that are flagged as GSA customers. The commission rule name used to calculate the commission on each proposal in the Commission Report is always displayed so you know which rule is being used. You do not have to assign this commission rule to your sales reps. If the GSA commission rule is in effect, it will be automatically applied to proposals for customers that are flagged as GSA customers.
Commission Team Rule
CommissionTeamRule.JPG
The Commission Team rule type allows you to create a commission rule that includes multiple people. You can have as many people in the Commission Team as you want as long as the commission rates for all assigned to the commission team totals 100%. You will not be allowed to save the commission rule unless tiers are defined for up to 100% of the GP margin and the commission distribution between team members equals 100%. You can define as many Commission Teams as you need.
Entering the GP Margin Structure is exactly the same as for a Generic Commission rule. Once the Commission Team has been created and is in effect, the Commission Team rule name must be applied to any proposals that you want this rule to be used to calculate commissions on. Commission Teams are assigned to proposals on the Project Info tab, in the Commission Team input prompt field.
A Commission Team rule applied to a proposal will take precedence over any commission rule assigned to the designated Sales Rep on proposals. The Commission Report will display the proposal with the sales reps commission rate applied per the definition of the Commission Team commission rule.
The example below shows a Commission Team rule being created.
CommissionTeamAddUser.JPG
The GP Margin Structure has been defined and each member of the Commission Team has been assigned a percentage of the commission amount that will be calculated for each member based on the GP margin of the proposals that this Commission Team rule is applied to.
- Table of Contents
9. Accounting - 8.1.3.5. Commissions & Overhead
« Previous - 9.1. General Journal
Next »
9. Accounting
The Accounting menu allows access to several accounting system functions and controls. The Accounting menu may be hidden from users that do not need or should not have access to this menu item by permission settings. If the user or group does not have View access to the Accounting menu, then this option will not be displayed for those users or groups.
The Accounting menu options are shown below.
AccountingMenu.JPG
- 9. Accounting
9.1. General Journal - 9. Accounting
« Previous - 9.1.1. View General Journal
Next »
9.1. General Journal
General Journal
AccountingGenJournal.JPG
Clicking on the General Journal menu option directly under the Accounting menu will display all transactions in the general journal as shown below.
AccountingJournalList.JPG
| Icons available in the Journal list | Description |
|---|---|
| Create a new journal entry | This function allows you to create a manual journal entry. |
| Search journal | This function allows you to search your transactions. |
| Perform Period Closings | This function allows you to close and or open periods. |
| Configure your business cycle & settings | This function allows you to configure your business cycle settings and set business system defaults. |
- 9.1. General Journal
9.1.1. View General Journal - 9.1. General Journal
« Previous - 9.1.1.1. Search Journal Entries
Next »
9.1.1. View General Journal
View General Journal
The first menu option under Accounting is General Journal. This allows you to view and search your entire journal transaction history.
Under the General Journal menu option there are 3 options:
View General Journal
Perform Period Closings
Business Cycle Settings
The View General Journal option allows you to view your journal transactions exactly as the General Journal option does. The Perform Period Closings option allows you to open or close periods. This is the same function that is available from the General Journal icon option. The Business Cycle Settings option allows you to configure your business cycles and settings. This is the same function that is available from the General Journal icon option.
See below from detail on each of these menu items.
- 9.1.1. View General Journal
9.1.1.1. Search Journal Entries - 9.1.1. View General Journal
« Previous - 9.1.1.2. Create Journal Entries
Next »
9.1.1.1. Search Journal Entries
Search Journal Entries
The Search Journal option allows you to search your journal history. Click on the Search Journal icon to open the Journal Search window as shown below.
JournalSearch.JPG
| Search Journal Input Options | Description |
|---|---|
| Check Number | Search the journal by check number, this is a check number that you have printed from DealerChoice. |
| Transaction Type | Allows you to search for transactions by their transaction type. Click on the drop down selection arrow and elect the transaction type you wish to search for. Only one type can be selected at a time. |
| Matching Account | You can select the account or accounts to search in for transactions. Multiple accounts can be selected as well as all accounts. |
| Date Range | You can search for a transaction by date range by selecting the From and Thru dates. |
| Customer/Vendor Invoice No | You can search by a specific customer or vendor invoice number by entering that invoice number is this field. |
| By Proposal | Enter a specific proposal number to find all transactions regarding that proposal. Multiple proposals can be entered. Once you type the first few characters of the proposal number, all matching entries will be displayed. Select the entry that you wish to search on from the list. |
| By Vendor | Enter a specific vendor name to find all transactions regarding that vendor. Multiple vendors can be entered. Once you type the first few characters of the vendor name, all matching entries will be displayed. Select the entry that you wish to search on from the list. |
| By Customer | Enter a specific Customer to find all transactions regarding that proposal. Multiple proposals can be entered. Once you type the first few characters of the customer name, all matching entries will be displayed. Select the entry that you wish to search on from the list. |
After selecting your search criteria, click on the Search button to review the results.
- 9.1.1. View General Journal
9.1.1.2. Create Journal Entries - 9.1.1.1. Search Journal Entries
« Previous - 9.1.2. Perform Period Closings
Next »
9.1.1.2. Create Journal Entries
Use the 'Create a new journal entry' function to create manual journal entries.
Create a new journal entry
Clicking on this icon will open the Make a Journal Entry window as shown below.
JournalEntryCreate.JPG
| Journal Entry Types | Description |
|---|---|
| Check | This transaction type allows you to create a manual check. The payee list is limited to vendors only for this option. |
| Cash Receipt | To manually record a cash receipt, use this transaction type. |
| General Journal | General Journal may be used for most manual journal entries. |
| Payroll | To create a transaction that reflects payroll information you can use this transaction type. |
| Adjustment | To record an adjustment journal entry, use this type. |
| Memo Cost | To record a Memo Cost entry, use this type. You will be prompted for the associated proposal number for the memo cost to be logged against to the adjustment will be logged against the proposal. |
| Vendor Credit | To create a vendor credit journal entry, use this transaction type. |
| Closing | If you are creating manual year end closing journal entries, use this transaction type. |
| Finance Charge | If you are entering a finance charge journal entry, use this transaction type. |
| Customer Credit | If you are creating a customer credit journal entry, use this transaction type. |
Manual Journal Check
JournalCheck.JPG
If you need to manually create a check entry to a vendor, you can use the Check transaction type to create the journal entry and to generate the check entry in your Check Register, with this transaction type.
| Check Transaction type input fields | Description |
|---|---|
| Checking Acct | Select the cash account that you want to generate the payment from. |
| Check No | Enter the check number that you wish to use to |
| Payee | Enter the first few characters of the payee name and any matches in your vendor database will be displayed, select the appropriate entry from the list. |
| Remit To | This information will be pulled from the Remittance Address information in the vendor database. You can edit this data here if necessary. |
Select the appropriate expense distribution accounts in the Account distribution section. Your debits and credits must balance, you cannot enter an out of balance journal transaction.
- 9.1. General Journal
9.1.2. Perform Period Closings - 9.1.1.2. Create Journal Entries
« Previous - 9.1.3. Business Cycle Settings
Next »
9.1.2. Perform Period Closings
Period Closings
To perform period closings or to open a closed period, select the Perform Period Closings option under Accounting - General Journal - Perform Period Closings, as shown below. By closing a period, you prevent any transactions from being posted into the closed period. If you need to post a transaction to a closed period, the period must be opened first. Be sure to close the period after performing your transaction.
PeriodClosingsMenuItem.JPG
To view, close or open a period, click on the Perform Period Closings menu option to open the Perform Period Closings window as shown below.
PeriodClosings.JPG
This example shows all the periods in the current fiscal year period. A check mark to the left of the period indicates that period is closed. A check box to the left of the period indicates that the period is still open.
If you are ready to close a period, simply click on the check box to the left of the period and then click on the Close Period button. A check mark will appear to the left of the period indicating that it has been closed.
Transactions cannot be posted to closed periods. If a transaction is attempted to a closed period the user will see a warning message noting that the period is closed and they will not be allowed to continue unless they adjust the dates of the transaction to reflect an open period.
If you need to open a closed period, simply click on the check mark to the left of the closed period. A message box will appear asking if you are sure that you want to open the period. If you want to proceed with opening the period, click on the OK button and the period will be opened.
Closing the Year
Once all periods in a fiscal year have been closed, the Close Year button will appear next to the Close Period button as shown below.
ClosingYear.JPG
The year end closing process creates the closing account entries for the year being closed. The account balances will be balanced to zero and retained earnings will be moved forward into the new fiscal year. Click on the Close Year button and a list of your accounts with their ending balances and the closing entry balances will be displayed for review.
ClosingYearDetail.JPG
After reviewing the account ending balances and if no adjustments need to be made, click on the Close Year button to complete the year end closing.
After the year has been closed, you can make adjustments for the closed year if necessary. These adjustments may be manual journal entries, or you can open the appropriate period(s) to process your transactions. Once the adjustments have been made you will have to run the Close Year process again to create the closing entries for any accounts that have been modified since the last Close Year process was run. Only the accounts that have been modified will be displayed in the Year Closing window. To complete the process click on the Close Year button and the fiscal year will be closed.
- 9.1. General Journal
9.1.3. Business Cycle Settings - 9.1.2. Perform Period Closings
« Previous - 9.2. Chart of Accounts
Next »
9.1.3. Business Cycle Settings
Business Cycle Settings
The Business Cycle Settings window allows you to configure some basic business controls.
BusCycleSettingsMenu.JPG
The Business Cycle Settings window is displayed below in two images.
BusCycleSettings1.JPG
Fiscal Year Period Configuration
To configure your fiscal year periods, select the year that you want to configure in the 'What fiscal year are you setting up?' selection box.
PeriodConfig1.JPG
Then select select the first day of the of the fiscal year being configured.
Then select the type of periods that you want to operate your fiscal year.
PeriodConfig2.JPG
The default is to use the last day of each month as the date the period will be closed. You can also select the 13 week periods in either the 4-4-5, 5-4-4 or 4-5-4 configuration. You can even configure your own periods with the 'Let me define my own' option.
After selecting your period type, the period layout will update according to your selections. You can adjust the closing date for each period if you choose.
Once your periods are configured, you can click on the Save Settings button to save your period configuration.
WIP Auto Reconciliation
The WIP Auto Reconciliation parameters allow you to select defaults that will appear in the WIP Reconciliation Report print options window. The values you set here are the default values that will be presented in the report print options window before you run the report. You can change these values in the report options window before running the report. The report can be run multiple times with different values.
WIPReportConfig.JPG
Account Aging
The account aging section allows you to define the default aging for your system. These defaults will appear in your Accounts Receivable report options window before you run the report. The defaults can be changed at any time in the Account Receivable report options window and you the report can be run multiple times with different values.
AccntAging.JPG
The image below displays the lower half of the Business Cycle Settings window.
BusCycleSettings2.JPG
Assigning Your Default Accounts
By selecting the default Cost of Goods Sold, Cash and Work In Progress accounts from your chart of accounts, these can be presented as defaults in other sections of the application. You can have multiple COGS and Cash accounts and they can be assigned to various Products & Services for tracking expenses and cash. You can only have one Work In Progress account.
Miscellaneous Vendor Charges & Fees
To be sure that vendor miscellaneous fees such as small order fees, freight charges, fuel surcharges and call before delivery fees (CBD) are recorded correctly, you must define the default income and expanse account to be used for that product. You can use other income and expense accounts for the products that you may define under the Products & Services tab in System Configuration. The defaults selected here will be used for these products unless you use different income or expense accounts in the Products & Services tab product definitions.
MiscVendorFees.JPG
After you make your selections be sure to click on the Save Settings button at the top of the window to save your changes in the database.
- 9. Accounting
9.2. Chart of Accounts - 9.1.3. Business Cycle Settings
« Previous - 9.2.1. Create New Accounts
Next »
9.2. Chart of Accounts
Chart of Accounts
COAMenu.JPG
To access your Chart of Accounts, click on Accounting and then on the Chart of Accounts menu option. There is one submenu item under the Chart of Accounts menu and that is Create New Accounts. You can also create new accounts from the Chart of Accounts window.
COAList.JPG
| Chart of Accounts Window Icons | Description |
|---|---|
| Create a new accounts | This option allows you to create new accounts. |
| Search accounts | This option allows you to search for accounts by name, number or type. |
| Export accounts to a spreadsheet | This option allows you to export your Chart of Accounts to a spreadsheet. |
- 9.2. Chart of Accounts
9.2.1. Create New Accounts - 9.2. Chart of Accounts
« Previous - 9.3. Check Register
Next »
9.2.1. Create New Accounts
Create a new account
COACreate.JPG
After clicking on the icon to create a new account, the Create a New Account window will open as shown above.
| New Account Fields | Description |
|---|---|
| Type of Account * | Select the type pf account that you are creating form the drop down selection list. |
| Active | By default, the Active check box is checked meaning the account is visible and available for use. If the Active check box is unchecked, the account will not appear in selection lists for future use. |
| Account Name * | Enter the name of the account that you are creating. |
| Subaccount of | You can make the account that you are creating a sub-account of an existing account. The sub-account will appear in reports under the parent account. |
| Account Number | Enter the account number that you want to assign to this account. |
| Save Account Button | Click on the Save Account button to save your account. |
Flagging Current Assets Accounts To Print Checks
When creating or editing a current asset account type, you the Create or Edit account window will appear with the 'Will you write checks from this account?' prompt. If checked, you will be prompted for a starting check number to print for the check stock sequence number. Entering the starting check number here is optional. You will always be prompted for the starting check number to be used when printing checks. When a current asset account os flagged as an account that you will write checks from, you will be allowed to select this account when generating checks. If you have multiple cash accounts that you want to be able to write checks from, flag the accounts as accounts that you will be writing checks from.
COACurrentAssets.JPG
Searching Accounts
To search your Chart of Accounts, click on the 'Search for an account' icon to open the Search Accounts window.
COASearch.JPG
| Search Accounts Input Fields | Description |
|---|---|
| Account Number | Enter the account number or the first few digits of the account number that you are looking for and click on the Search button. If your input string matches any account numbers in the Chart of Accounts database, all matches will be displayed. You can click on the specific account that you are looking for in the Search results list to view or edit the account details. |
| Account Name | Enter the first few characters of the account name that you are looking for and click on the Search button. If your input string matches any account names in the Chart of Accounts database, all matches will be displayed. You can click on the specific account that you are looking for in the Search results list to view or edit the account details. |
| Account Types | Select the account type that you are searching for and click on the Search button. All accounts with the selected account type will be displayed. You can select multiple account types to search for by holding down the 'Control'(CTRL) key and clicking on the types. |
| Search Button | Click on the Search button to perform the search. |
Saving Search Criteria
If you use the same search input data regularly, you can save the search information. The 'Save Search?' allows you to name your search so it can be reused without having to enter the search information.
After selecting your search criteria, click on the 'Save Search?' check box and you will be prompted for a name for your search and click on the Search button. Your account list will be filtered by the search data and your search will be saved.
COASaveSearch.JPG
The example above shows a search for all equity accounts. We entered a search name of 'Equity Accnts Only' and clicked on teh Search button. The image below shows the Chart of Accounts filtered by our search criteria results.
COASearchResults.JPG
The next time we want to search for Equity accounts types, we can now use the saved search option. Click on the Search for an account icon again and you will now have the option to select your saved search or to enter new search criteria.
COASaveSearchSelect.JPG
Click on the drop down selection arrow to see a list of saved searches and click on the search name that you want to perform and click on the Go button. The saved search information willbe used to performed the search and your search results will be displayed in the Chart of Accounts window.
Saved searches cannot be edited. To change the saved search criteria, you must delete the saved search first and create a new saved search. You can use the same saved search name if desired. To delete a saved search, select the saved search from the drop down selection list so the name of the search appears in the input box, then click on the X icon to delete the saved search. You will be prompted to confirm your delete. Click on the OK button to delete the saved search.
COASaveSearchDelete.JPG
- 9. Accounting
9.3. Check Register - 9.2.1. Create New Accounts
« Previous - 10. Reports
Next »
9.3. Check Register
To access your Check Register to view the checks that you have generated, click on the Check Register menu option under the Accounting menu.
CheckRegisterMenu.JPG
Click on the Check Register menu option to display your check register.
CheckRegister.JPG
All checks that you have generated from DealerChoice will appear in the Check Register. You can view checks generated for each Current Asset account that has been flagged as an account that you will write checks from by selecting the appropriate account in the drop down selection arrow in the 'Account' field on the upper right of the Check Register window.
| Check Register Icons | Description |
|---|---|
| New Entry | To create a manual check, click on this icon. |
| Search Check Register | To search your check register, click on this icon. |
| Export to spreadsheet | To export your check register to a spreadsheet. |
New Check Entry
To create a manual check, click on the New Entry icon in the Check Register window to open the New Check Entry window.
CheckRegisterNewCheck.JPG
| New Check Register Input Fields | Description |
|---|---|
| Check Number * | Enter the check number to be used for this check. This number must match the number of the check stock form that will be used to print the check on. |
| Payee * | Enter the first few characters of the payee's name and any matches found in the database will be listed below this field. Click on your selection form the list displayed. |
| Remit To | The Remit To data will be populated from the payee address information in the database. This is a test input field so you can change the address if desired. |
| Cash Account * | Select the appropriate current assets account that the check will be written against. To be able to write a check from a current assets type account, the account must be flagged as an account that you will write checks from. |
| Expense Account * | Select the account from your Chart of Accounts that this check is to be expensed against. There is a drop down selection arrow that you can click on to see a list of your accounts. Select the account from this list or enter the account number or account name. Any matches found in the Chart of Accounts will be displayed, select you account from the list displayed. |
| Check Amount * | Enter the amount of the check. |
| Check Date * | Enter the date of the check. |
| Memo | The memo field is optional, but it is strongly recommended that you enter a memo when creating a manual check to help you identify what the check was created for. |
| Save Entry Button | Click on the Save Entry button to save your check date. After saving your check, the new check will appear in the check register for the Cash Account selected. |
After saving your new check entry, it will appear in the check register for the cash account that was selected.
CheckRegisterNewCheckSaved.JPG
The example above shows a new check entry number 1003 created for the vendor Dauphin in the amount of $500.00. The check entry has been saved to the register and it can now be printed on your check stock by clicking on the printer icon to the left on the check number in the register. This will open the Print Checks window and will display a PDF image of your check. You can save the PDF file to your computer or you can select a printer that contains the correctly numbered check stock and print the check on your check stock paper.
- Table of Contents
10. Reports - 9.3. Check Register
« Previous - 10.1. Reports Navigator
Next »
10. Reports
All DealerChoice reports are listed under the Reports menu option in the main menu bar. To access a report, click on Reports in the main menu bar to see a list of available reports. Reports are managed by User and/or Group permission settings. You may limit access to certain report categories or even specific reports through permission settings.
ReportsMenu.JPG
10.1. Reports Navigator
The Reports Navigator option displays a list of all reports (per permission settings) as a list. Only reports that you have permission to access will be displayed.
ReportsNavigator.JPG
The image above is abbreviated because the list of reports is too large to display in a single screen capture.
The Report Navigator lists all available reports by category with a brief description of the report appearing below the report name. Each report name is a link to the report. To run a report, simply click on the report name.
- 10. Reports
10.2. Customers & Receivables Report Category - 10.1. Reports Navigator
« Previous - 10.2.1. Accounts Receivable
Next »
10.2. Customers & Receivables Report Category
Under the Customers & Receivables report category, there will be up to five reports listed. Click on any of the report names listed to run the report.
ReportsCust&Receivables.JPG
The reports available under the Customers & Receivables report category are:
Accounts Receivable
Accounts Receivable Reconciliation
Cash Receipts Report
Customer Balance Summary
Customer Statement
These reports are discussed below.
- 10.2. Customers & Receivables Report Category
10.2.1. Accounts Receivable - 10.2. Customers & Receivables Report Category
« Previous - 10.2.2. Accounts Receivable Reconciliation
Next »
10.2.1. Accounts Receivable
The Accounts Receivable report will display your current and aged accounts receivable. When you click on the report name, the Reports Settings & Preferences window will open to allow to you select report filter criteria.
ReportsARPrintOptions.JPG
| Accounts Receivable Report Options | Description |
|---|---|
| What time frame should the report reflect | Click on the drop down selection arrow in this input field to select the time frame filter. |
| How should the aging schedule be shown | The defaults from the Business Cycle Settings window will be displayed in the aging windows. You can change the aging schedule in the Report Options window to run the report with your new aging schedule. Changing the aging days in the Report Options window will not change your defaults as defined in the Business Cycle Settings window. |
| Should the report be filtered by sales rep | You can filter the AR report by sales rep. When a sales rep or sales reps are selected, the AR report will only show proposals where those sales reps are defined in the Sales Rep field on the Project info tab of the proposal. By default, you do not have to select a sales rep name, all proposals will be evaluated. |
| Should the report be filtered to specific customers or vendors | You can filter the AR report to specific customers or vendors. Enter the first few characters of the customer or vendor name and any matches in your database will be presented. Select the desired names from the list. |
| Should the report reflect paid or unpaid invoices | The default is to show all invoices for the selected time frame. You can filter the report by selecting 'Paid' or 'Unpaid' invoices from the drop down selection arrow. |
| Display Contact Details | The default is to hide the contact details. If you change this filter option to 'Show Contact Details' then the AR report will include the contact information that was selected in the Contact field on the Project Info tab on proposals. If no contact information was selected on the proposals then the 'Show Contact Details' option will have no affect. |
| Show Reports Details | You can choose to display the report is Detail View mode or Simple View mode. Detail mode will display all report details. Simple View mode will display the report in condensed mode. To see report detail run the report again and select Detail View mode. |
| Add this report to your saved reports | If you use the same report filter criteria regularly, you can save the report options with this option. After selecting your report criteria, click on this check box and you will be prompted to enter a report name. Enter a name for your report and then click on the Run Report button. The report will run using the selected filters and Your report name will be saved in the My Saved Reports menu options under Reports. To run your saved AR report, click on My Saved Reports and then click on the name you gave your report and the report will run immediately without displaying the Report Options window. Saved Reports cannot be edited. They must be deleted and re-created. To delete an existing saved report, click on the report name in My Saved Reports. The report results will be displayed. Then click on the [Update Report Settings] link to open the Saved Report report options window. Click on the Delete Report button and the Saved Report name will be removed from the My Saved Reports menu. |
When running the Accounts Receivable report for year end totals, use the Specific Date Range time frame option. After selecting this option, enter December 31, YYYY (the 4 digit year that your are working on closing) in the To field. Do not enter any date in the From field, leave that field blank. By using only the To date, all invoices dates on or before December 31 will be evaluated for inclusion on the report.
The following image displays an Accounts Receivable report run in Simple View mode.
ReportsARSimpleView.JPG
The following image displays an Accounts Receivable report run in Detail View mode. The image below is truncated because the report data is too large to fit into a single screen image.
ReportsARDetailView.JPG
- 10.2. Customers & Receivables Report Category
10.2.2. Accounts Receivable Reconciliation - 10.2.1. Accounts Receivable
« Previous - 10.2.3. Cash Receipts Report
Next »
10.2.2. Accounts Receivable Reconciliation
Accounts Receivable Reconciliation
The Accounts Receivable Reconciliation report identifies invoices with a remaining balance and if after reviewing the report data, you may elect to write the AR balance off to a clearing account, a doubtful allowance account, or another account of your choosing. This report will help you identify invoices with balances that you may not be able to collect and allow you to write the balance off to clear the outstanding Accounts Receivable amount.
Click on the Accounts Receivable Reconciliation menu option and the AR Reconciliation report settings window will open.
ReportsARRecPrintOptions.JPG
| Accounts Receivable Reconciliation Report Settings | Description |
|---|---|
| What is the maximum outstanding A/R amount to reconcile | The default for this report is $250.00. The amount entered here is the maximum balance amount that the report will display results for. Any invoices with a balance over $250.00 will not be displayed. |
| Should the report be filtered to specific customers or vendors | You can filter the report for specific customers or vendors. Enter the first few characters of the customer of vendor name and any matches in your database will be displayed. Select the appropriate name from the list displayed. |
| Require at least 1 payment against invoice to reconcile | With this check box checked, the report will only display invoices where at least one payment has been received, yet a balance remains. If you un-check this option, your report will include all invoices that are below the maximum outstanding amount entered. |
| Add this report to your saved reports | This option allows you to save your report filter criteria so you do not have to enter it every time you run this report. Your report name will be saved in the My Saved Reports menu and can be run from there. |
ReportsARRecDetail.JPG
The report above was generated by entering $30.00 in the maximum outstanding A/R amount filter. As you can see, only invoices with an outstanding amount of $30.00 or less will be displayed.
If any invoices are found that meet the search criteria it will be displayed in the report window. Each invoice listed has a check box to the left on the invoice number and all invoices are selected for reconciliation by default. The invoice number displayed is a link to the actual invoice. You can click on the invoice number in the report to review the invoice Receipt Log details to help you decide if you are going to reconcile the outstanding AR balance.
After reviewing the invoices on the report, make sure to un-check any invoices that you do not want reconciled. Only the invoices that are checked will be reconciled.
You can select the appropriate account to write the balances off to by selecting the desired account in the Reconciliation Account selection box at the top of the report window. Review and verify that the correct Reconciliation Account has been selected in the Reconciliation Account selection box.
You can select the transaction posting date as well by setting the appropriate date in the Date selection box.
After you have made your selections, click on the Perform Reconciliation button to complete the process. Each selected invoice will be balanced to zero.
If you wish to reverse the reconciliation, click on the invoice on the Receivables tab of the proposal it was created on and then click on the Receipt Log tab. You will see the Auto Reconciled record which cleared the balance. You will see an icon to the left of the Auto Reconciliation record that has a red "x" on it. This icon allows you to reverse the reconciliation. Once the Auto Reconciliation has been removed the outstanding balance will be returned to the invoice balance.
ReportsARRecDelete.JPG
- 10.2. Customers & Receivables Report Category
10.2.3. Cash Receipts Report - 10.2.2. Accounts Receivable Reconciliation
« Previous - 10.2.4. Customer Balance Summary
Next »
10.2.3. Cash Receipts Report
Cash Receipts Report
This report shows the receipts received from your customers and itemizes those receipts against their respective invoices. The Cash Receipts report can be printed or exported to a spreadsheet.
Click on the Cash Reports Report menu item to open the Report Settings window which allows you to filter your report results.
ReportsCashReceiptsOptions.JPG
| Cash Receipts Report Filters | Description |
|---|---|
| What time frame should the report reflect | Select the time frame that the report will reflect results for. |
| Show Invoice Detail | Select Simple View or Detail View mode. In Simple View mode, only the check numbers and amounts received will be displayed. In Detail View mode, the invoice number that the payment was received against will also be displayed. The invoice number is a link to the actual invoice. You can click on the invoice number to open the invoice. |
| Should the report be filtered to specific customers or vendors | Enter the first few characters of the customer or vendor name and any matches in your database will be displayed. Select the desired name from the list presented and the report will be filtered to show only cash receipts from that customer or vendor. |
| Add this report to your saved reports | Use this option to give you report filter options a name and the report name will be saved in My Reports. You can then just click on the saved name to run the report with having to enter any filter criteria. |
Click on the Run Report button to display the report, as shown below. This example shows the Cash Receipts report in Detail View mode.
ReportsCashReceiptsReport.JPG
- 10.2. Customers & Receivables Report Category
10.2.4. Customer Balance Summary - 10.2.3. Cash Receipts Report
« Previous - 10.2.5. Customer Statements
Next »
10.2.4. Customer Balance Summary
Customer Balance Summary
Click on the Customer Balance Summary menu item to open the Report Settings window which allows you to filter your report results.
ReportsCustBalSumOptions.JPG
| Customer Balance Summary Filters | Description |
|---|---|
| What time frame should the report reflect | Select the time frame that the report will reflect results for. |
| Should the report be filtered to specific customers | Enter the first few characters of the customer name and any matches in your database will be displayed. Select the desired customer name from the list. |
| Show Report Details | Select either Simple View or Detail View. In Simple view, only the customers name and total balance amount will appear in the report results. In Detail view mode, the customers name, proposal number and invoice number will be displayed as well as the balance amount due for each. |
| Add this report to your saved reports | Use this option to give you report filter options a name and the report name will be saved in My Reports. You can then just click on the saved name to run the report with having to enter any filter criteria. |
After setting your report filters, click on the Run Report button to generate the report. An example of the Customer Balance Summary is shown below.
ReportsCustBalSumReport.JPG
- 10.2. Customers & Receivables Report Category
10.2.5. Customer Statements - 10.2.4. Customer Balance Summary
« Previous - 10.3. Vendors & Payables Category
Next »
10.2.5. Customer Statements
Customer Statements
The Customer Statements report allows you to print a report showing your customers account activity. This report can be sent to your customers so they can see their business activity with your company.
Click on the Customer Statement menu item to open the Report Settings window which allows you to filter your report results.
ReportsCustStatementsOptions.JPG
| Customer Statement Filters | Description |
|---|---|
| What time frame should the report reflect | Select the time frame that you want to report to cover |
| How should the aging be shown | Select the aging schedule that you want the report to be shown in. By default the fields are populated with your aging schedule defined in your Business Cycle Settings. |
| Should the report be filtered by sales rep | You can run the report by sales rep. Any proposals that have the selected sales rep name set on the Project Info tab in the Sales Rep field will be considered in this report. |
| Should the report be filtered to specific customers or vendors | You can select to filter the report by specific customers or vendors. Enter the first few characters of the customer or vendor name and select the entry from the list displayed. |
| Should the report reflect paid or unpaid invoices | You can select to run the report to show paid invoices, unpaid invoices or both. To show both paid and unpaid invoices, leave this field blank. |
| Show Report Details | In Simple View mode, only the proposal number and description will be displayed as well as the invoice number and totals. In Detail View mode, the report will also display any payments (check numbers) and credits that have been applied to invoices. |
| Add this report to your saved reports | You can save your report with the filter options you have selected with this option. The report name you enter will appear in your My Saved Reports menu item under the Reports menu. |
After setting your report filters, click on the Run Report button to generate the report. An example of the Customer Statement report is shown below.
ReportsCustStatementsReport.JPG
Customer Statements reports can be printed or saved to a local disk drive to be mailed or emailed to your customers.
- 10. Reports
10.3. Vendors & Payables Category - 10.2.5. Customer Statements
« Previous - 10.3.1. Accounts Payable
Next »
10.3. Vendors & Payables Category
Use your mouse to highlight the Vendors & Payables report category to display the available report options.
Vendors&PayablesReportMenu.JPG
The available reports in this category are:
Accounts Payable
Cash Disbursements
Vendor Balance Summary
Sales Tax Liability
Purchase Order Report
Vendor Discounting
WIP Reconciliation
WIP Detail Report
Vendor 1099 Report
Click on a menu option to run that report.
- 10.3. Vendors & Payables Category
10.3.1. Accounts Payable - 10.3. Vendors & Payables Category
« Previous - 10.3.2. Cash Requirements
Next »
10.3.1. Accounts Payable
Accounts Payable Report
This report shows the current and aged accounts payables owed to vendors. After clicking on the Accounts Payable menu option, the Accounts Payable Report settings and preferences window will open. The report settings and preferences window allows you to select your report filters.
Vendors&PayablesAccntsPayableOptions.JPG
| Accounts Payable Report Filters | Description |
|---|---|
| What time frame should the report reflect | Select the date range that the report should reflect |
| How should the aging schedule be shown | You default aging as set in Business Cycle Settings is displayed. You can change these values. |
| Should the report be filtered to specific vendors | Enter the first few characters of the vendor names and any matches in your database will be displayed. Select the appropriate entry from the list and the report will be filtered to the selected vendor or vendors. |
| Should the report be filtered to specific proposals | Enter the first few characters of the proposals number and any matches in your database will be displayed. Select the appropriate entry from the list and the report will be filtered to the selected proposal or proposals. |
| Should the report reflect paid or unpaid invoices | Select whether you want the report to show paid or unpaid invoices. Leave this field blank to show both. |
| Which date should the report use to generate its results | You can the options to select either the Invoice Date, Due Date or Receipt Date to be used for evaluating results. The typical date to use here in the Invoice Date. |
| Show Report Details | Select either Detail view or Simple view. In Simple view, only the Customer/Vendor name is displayed with the totals. In Detail view, the customer/vendor name is displayed as well as purchase order number and invoice number details. |
| Add this report to your saved reports | You can save your AP report filter criteria by checking this box and entering a name for your report. The report name you enter will appear under the My Saved Reports menu option in the Reports menu. |
Vendors&PayablesAccntsPayableReport.JPG
- 10.3. Vendors & Payables Category
10.3.2. Cash Requirements - 10.3.1. Accounts Payable
« Previous - 10.3.3. Cash Disbursements
Next »
10.3.2. Cash Requirements
Cash Requirements Report
This report shows the cash requirements needed to pay outstanding bills and refunds. This report allows you to see how much cash you need on hand to pay your entered vendor invoices and customer refunds. The report displays balances due by the number of days you enter in the schedule filter so you can estimate your cash requirements of these periods.
Vendors&PayablesCashReqOptions.JPG
| Cash Requirements Report Filters | Description |
|---|---|
| Should the report be filtered to specific vendors | Enter the first few characters of the vendor name and any matches in your database will be presented. Select the appropriate entry from the list. The report will be filtered to display results for the selected vendor(s). |
| When should the report start tracking cash requirements | Enter the date that you want the report to start with to filter the results. Typically this is today's date. The report will display the cash requirements starting from this date forward per the schedule entered in the filter below. |
| How should the payment schedule be broken down | Select the number of days, going forward that you want to see your cash requirements broken down in. Typically this is 15 days. The schedule will display the cash requirements for the next 3 15 day periods. You can set the schedule to be from 1 to 30 days. |
| Show opportunities to take discounts | Selecting this option will flag invoices that are eligible for vendor early payment discounts |
| Show Report Details | The Simple view only lists the vendor name and the total amount due, per the schedule entered. Detail view mode lists the vendor name, proposal number, invoice number and dates as well as the open invoice balance. |
| Add this report to your saved reports | Selecting this option allows you to enter a name to save your cash requirements report filter information and will save this report in your My Saved Reports menu option under the Reports menu. |
After entering your report filter information, click on the Run Report button to generate the report. A sample of the cash requirements report is shown below. This report was filtered to Herman Miller invoices and a 15 day schedule beginning on May 1, 2010. The cash requirements are displayed for the next 45 days.
Vendors&PayablesCashReqReport.JPG
- 10.3. Vendors & Payables Category
10.3.3. Cash Disbursements - 10.3.2. Cash Requirements
« Previous - 10.3.4. Vendor Balance Summary
Next »
10.3.3. Cash Disbursements
Cash Disbursements Report
This report shows the cash disbursed on a specific date or period of time when invoices are paid or deposits are issued.
After you click on this menu option the Cash Disbursements Report settings window will open allowing you to select your report filters.
Vendors&PayablesCashDispOptions.JPG
| Cash Disbursements Report Filters | Description |
|---|---|
| What time frame should the report reflect | Select the date range that you want the report to reflect. |
| Show Invoice Detail | In Detail view mode you will see the actual check number and invoice number that have been paid during the time frame selected. In Simple view mode you will only see the check number, date and amount. |
| Should the report be filtered to specific customers or vendors | Enter the first few characters of the customer or vendor name and any entries in your database will be displayed. Select the appropriate entry form the list displayed and the report will be filtered to that customer or vendor. |
| Add this report to your saved reports | Clicking on this check box will allow you to enter a name for your report and save your report filter criteria. The report name will appear in your My Saved Reports menu under the Reports menu. |
Below is an example Cash Disbursements report filtered to the vendor Herman Miller and it was run in detail view mode.
Vendors&PayablesCashDispReport.JPG
- 10.3. Vendors & Payables Category
10.3.4. Vendor Balance Summary - 10.3.3. Cash Disbursements
« Previous - 10.3.5. Sales Tax Liability
Next »
10.3.4. Vendor Balance Summary
Vendor Balance Summary
This report shows your current balance with each of your vendors.
Click on this menu option and the Vendor Balance Report setting window will open to allow you to select your report filter criteria.
Vendors&PayablesVenBalSumOptions.JPG
| Vendor Balance Summary Report Filters | Description |
|---|---|
| What time frame should the report reflect | Select the time frame from the drop down selection box or select the 'Specific date range' option to enter your own start and end dates. |
| Should the report be filtered to specific vendors | Enter the first few characters of the vendor name and any matches in your database will be presented. Select the appropriate entry from the list. |
| Show Report Details | In Detail view mode the purchase order numbers, the associated vendor invoice numbers and amounts will be displayed. In Simple view mode, only the total amount due to the vendor will be displayed. |
| Add this report to your saved reports | Checking this box will allow you to enter a name for your report and this name will appear in the My Saved Reports menu under the Reports menu. |
The example below shows a Vendor Balance Summary report that has been filtered to show only Herman Miller invoices and the Detail view mode has been selected.
Vendors&PayablesVenBalSumReport.JPG
- 10.3. Vendors & Payables Category
10.3.5. Sales Tax Liability - 10.3.4. Vendor Balance Summary
« Previous - 10.3.6. Purchase Order Report
Next »
10.3.5. Sales Tax Liability
Sales Tax Liability
This report shows the sales tax liability owed for each of the areas you collect sales tax. This report can be run in Accrual mode or in Cash Basis mode. Accrual Basis will display all invoices that have been created for the time frame selected and Cash Basis will only display invoices where payments or deposits have been received in the time frame.
Click on this menu option and the Sales Tax Liability setting window will open to allow you to select your report filter criteria.
Vendors&PayablesSTLOptions.JPG
| Sales Tax Liability Report Filters | Description |
|---|---|
| What time frame should the report reflect | Select a time frame from the list provided or enter a specific date range. |
| Generate report according to | Select Accrual Basis or Cash Basis. |
| Should the report be filtered to a specific state | Select the State or Provence that the report is to display results for. Each tax location that you have defined in your Tax Rules table is available for selection via this filter. |
| Add this report to your saved reports | Checking this option will allow you to enter a name to save your report criteria. The report name will appear under the My Saved Reports menu option under Reports. |
Below is an example of the Sales Tax Liability report run in Accrual Basis. Accrual Basis will display all invoices created within the time frame selected.
Vendors&PayablesSTLReportAcc.JPG
Below is an example of the Sales Tax Liability report run in Cash Basis. Cash Basis will display only invoices where customer payments or deposits have been received. The Collected column displays the total tax liability and the Liability column displays the tax liability based on the amount of the payment or deposit received.
Vendors&PayablesSTLReportCash.JPG
- 10.3. Vendors & Payables Category
10.3.6. Purchase Order Report - 10.3.5. Sales Tax Liability
« Previous - 10.3.7. Vendor Discounting Report
Next »
10.3.6. Purchase Order Report
Purchase Order Report
This report shows purchase orders that were issued on a specific date or date range. The report can be filtered by Vendor and Sales Rep.
Vendors&PayablesPORepOptions.JPG
| Purchase Order Report Filters | Description |
|---|---|
| What time frame should this report reflect | Select the time frame that the report is to reflect. |
| Should the report be filtered to specific vendors | Type the first few characters vendor name and any matches in your database will be displayed. Select the appropriate entry from the list. |
| Should the report be filtered by sales rep | If desired, select a sales rep name from the list and only purchase orders created on proposals where this sales rep is listed as the Sales Rep on the Project Info tab will be displayed. |
| Add this report to your saved reports | Checking this box will allow you to enter a name to save your report criteria. The report name will appear in your My Saved Reports menu under Reports. |
An example of the purchase order report that has been filtered by vendor KI is shown below.
Vendors&PayablesPOReport.JPG
- 10.3. Vendors & Payables Category
10.3.7. Vendor Discounting Report - 10.3.6. Purchase Order Report
« Previous - 10.3.8. WIP Reconciliation
Next »
10.3.7. Vendor Discounting Report
Vendor Discounting Report
This report shows all vendors and their respective discounts, along with discount ID's, effective and expiration dates, and product discounting tiers. You can use this report to help in managing your discounts.
Vendors&PayablesVenDiscOptions.JPG
| Vendor Discount Report Filters | Description |
|---|---|
| Should report be filtered to specific vendors | Enter the first few characters of the vendor name and any matches in your vendor database will be displayed, select the appropriate entry from the list and the report will display any discounts on file for that vendor. |
| Should the report be filtered to specific customers | Enter the first few characters of the customers name and any entries in your customer database will be displayed, select the appropriate entry from the list and the report will display any discounts on file for that customer. |
| Search Discounts by expiration date | Select an expiration date range to filter the report to show only those discounts that will expire on the date you have selected. |
| Search By Discount ID | Enter the discount ID to search for. |
| Show Discount Details | In detail view mode the full discount detail, simple view will only display the discount type, discount ID, effective date and expiration date. |
| Add this report to your saved reports | CHecking this box will allow you to enter a name to save your search criteria. Your report name will appear under the My Saved Reports menu option under Reports. |
The example below shows the Vendor Discounting report filtered by two vendors and in detail view mode.
Vendors&PayablesVenDiscReport.JPG
- 10.3. Vendors & Payables Category
10.3.8. WIP Reconciliation - 10.3.7. Vendor Discounting Report
« Previous - 10.3.9. WIP Detail
Next »
10.3.8. WIP Reconciliation
WIP Reconciliation Report
This report reconciles outstanding Work In Progress against its payables, allowing you to balance any outstanding WIP entries that may exist against a specific payable. Entries in the WIP (Work In Progress) account are made by entering a vendor invoice, vendor deposit, vendor credit or by creating a customer invoice.
The WIP Reconciliation report allows you to identify outstanding balances in your WIP account and if necessary clear the balance from the WIP account to a clearing account or to an account of your choosing.
WIP credits are created when customer invoices are created and when vendor credits are entered. WIP debits are created when you enter a vendor invoice and when you create a vendor deposit.
When the total WIP credits do not match the total WIP debits per purchase order the WIP account becomes out of balance.
Some entries in your WIP Reconciliation report may appear with zero WIP debits and some may appear with zero WIP credits. In most cases these are normal occurrences.
Consider cases where the vendor invoice has been entered (WIP debit) for a purchase order but the customer invoice has not been created yet, so there are no credits to the WIP account for the product on the particular purchase order.
Likewise, you may create a customer invoice (WIP credit) before the vendor invoices for the product on that invoice have been received and entered. These are cases that do not need to be reconciled because you will either create the customer invoice (WIP credit) or enter the vendor invoice (WIP debit) which will balance the WIP account for that proposal.
In some cases though, there may be a discrepancy between the vendor invoice amount and your purchase order amount. When this occurs, the first thing to do is figure out why there is a discrepancy between the two.
If there are additional costs on the vendor invoice that do not appear on the purchase order, such as freight fees or small orders fees, the purchase order should be edited to include those line items before the invoice is entered. These are legitimate costs that should be reflected on the job. You should then check to see if these charges can be added to the vendors profile (Payment tab in the vendor database), so these charges are not missed during proposal finalization and you have the opportunity to sell these to your customer. At a minimum, your purchase order amount will match the vendor acknowledgement and vendor invoice. If the pricing on your purchase order does not match the vendor acknowledgement and/or vendor invoice, then you should make sure that your electronic catalogs (if applicable) are up to date or that your pricing binders are current.
If differences between the vendor invoice amount and the purchase order amount are not corrected, then you will end up with a balance in your WIP account for this purchase order. These balances can be reconciled (written off) from your WIP account to a clearing account or to another account of your choosing.
Clicking on the WIP Reconciliation menu option will open the WIP Reconciliation setting window will open to allow you to select report filter criteria.
Vendors&PayablesWIPReconOptions.JPG
| WIP Reconciliation Report Filters | Description |
|---|---|
| Filter results by timeframe | Select the desired timeframe from the drop down selection list or enter your own date range by selecting the 'A specific date range' option. This option allows you to enter a 'From' date and a 'To' date. |
| Display WIP entries with an open balance of up to | Enter the highest amount (open balance) that you want the report to display. The report will display proposals that have an open balance up to and less than the amount entered here. |
| Filter WIP entries by vendor | To filter the report to specific vendors, enter the first few characters of the vendor name and any matching entries in your vendor database will be displayed. Select the appropriate entry from the list. |
| Filter WIP entries by proposal | To filter the report to specific proposals, enter the first few characters of the proposal number and any matching entries in your database will be displayed, select the appropriate entry from the list. |
| Add this report to your saved reports | Checking this box will allow you to enter a name to save your report filter criteria. The report name will appear under the My Saved Reports menu option under Reports. |
Below is an example of the WIP Reconciliation report. This report shows you outstanding balances in your WIP account.
Vendors&PayablesWIPReconReport.JPG
The example above shows two cases that have no WIP debits which means that no vendor invoices have been entered against these purchase orders. Of course, these should not be reconciled because you have not entered the vendor invoices.
If there is a difference between the WIP Credits amount and the WIP Debits that you do wish to reconcile, select the purchase order by checking the select box to the left of the purchase order number.
Select the account to reconcile the balances to in the Reconciliation Account input field and select the date that the transactions are to be dated in your journal. Click on the Perform Reconciliation button at the bottom of the window to complete the reconciliation. A journal transaction will be created that adjusts the WIP account balance and the selected reconciliation account for the amounts being reconciled.
- 10.3. Vendors & Payables Category
10.3.9. WIP Detail - 10.3.8. WIP Reconciliation
« Previous - 10.3.10. Vendor 1099 Report
Next »
10.3.9. WIP Detail
WIP Detail Report
This report details WIP transactions and balances by project, purchase order and line item. This report helps you identify what is in the WIP account and why.
Clicking on the WIP Detail menu option will open the WIP Detail settings window will open to allow you to select report filter criteria.
Vendors&PayablesWIPDetailOptions.JPG
| WIP Detail Report Filters | Description |
|---|---|
| What time frame should the report reflect | Select the time frame that the report is to reflect |
| Should the report be filtered to specific proposals | Enter the first few characters of the proposal number and any matches in your database will be presented. Select the appropriate entry from the list. |
| Should the report reflect paid or unpaid invoices | Leaving this filter blank will display transactions with a zero balance and transactions with an open balance. Or you can select to display transactions with a zero balance or transactions with an open balance. |
| Show Report Details | Running the report in Detail View mode will display more information in the report than in Simple View mode. |
| Output Method | You can select which output option you wish to use, You can run the report to the Screen, to a PDF or to a spreadsheet format. |
| Add this report to your saved reports | Checking this box will allow you to enter an name to save your report criteria. The name you enter will appear under the My Saved Reports menu under Reports. |
Vendors&PayablesWIPDetailReport.JPG
The example above displays two proposals in the WIP Detail report, 2010-1189 and 2010-1192. The first proposal listed, proposal 2101-1189 shows that only a single purchase order (2010-265) exists. The costs of the purchase order is $1,501.85. On proposal 2010-1192 there are three purchase orders (2010-266, 2010-267 and 2010-269). The proposal numbers and purchase order numbers displayed in the report are links to the documents. You can click on the proposal number and purchase order number and the document will open. You can then inspect the document to verify the WIP report information.
| WIP Detail Report Columns | Description |
|---|---|
| Proposal | This is the proposal number being presented and it is a link to the actual proposal. |
| PO No. | This is the purchase order number be presented and it is a link to the actual purchase order. |
| last Entry | The date that the last WIP transaction affecting the purchase order data. This could be the date that the customer invoice was created or the date that a vendor invoice was entered. |
| Total Cost | The total cost is the purchase order cost of the product. |
| Total Sell | This is the total sell amount of the product on this purchase order. |
| Profit | This is the difference between the cost and the sell. |
| WIP Debits | WIP debit transactions are created when the vendor invoice for the product on the purchase order are entered into and, of course, the WIP account is used as the expense account. |
| WIP Credits | WIP credit transactions are created when the customer invoice invoice(s) are created. |
| Reconciled | If you used the WIP Reconciliation report to write off any WIP amount on this proposal, the amount reconciled will be displayed here. |
| WIP Balance | This is the balance remaining in WIP for this proposal. |
We will review the data for the proposals displayed in the sample report above.
Proposal 2010-1189 shows one purchase order has been created for which there is WIP account activity. Creating the purchase order does not affect WIP. Entering vendor invoices for product purchased on a purchase order and creating customer invoices create WIP account transactions. The report shows that there are $1,501.85 in WIP debits. That means that the vendor invoice for the product ordered on this purchase order has been entered. Since the Cost column and the WIP Debits column amount are identical, then we know that the purchase order cost and the vendor invoice amount entered matched. If the purchase order amount and the vendor invoice amount do not match and the vendor invoice is entered with the discrepancy, the WIP account will not balance. When differences between the purchase order amount and the vendor invoice amount, the reason for the difference should be determined and corrected. The purchase order should be amended to match the vendor invoice (If the vendor invoice is correct) so there are no WIP discrepancies. Otherwise, you will have to use the WIP Reconciliation report to clear the WIP balance.
The WIP Credits column shows that there are $0.00 WIP Credits towards the product on this purchase order so we know that no customer invoice has been created on this proposal.
The WIP balance amount shows the same amount as the WIP Debits column. Once the customer invoice(s) for this proposal are created, the WIP account will be credited for the product being invoiced and the WIP account will be balanced.
Proposal 2010-1192 shows 3 purchase orders that have been created for which there is WIP activity. If we look at the information for purchase order 2010-267, we see that the purchase order cost (Total Cost) amount is $1,659.68 and that there are no WIP Debits (no vendor invoice has been entered for this purchase order) and the WIP Credits amount is $1,025.20. There is a $634.48 difference. This means that some of the product ($634.48 worth) has not been invoiced to the customer yet. The image below shows the proposal details with the line item that has not yet been invoiced.
Vendors&PayablesWIPDetailTBInvoiced.JPG
The line item above that has not been invoice has a cost of $45.32 and a quantity of 14 which makes the difference in the WIP Credits of $634.48. Once this line item is invoiced the WIP credits will match the Total Cost for this purchase order.
The other key point to note on this proposal is that there are no WIP Debits meaning that no vendor invoices have been entered for the purchase orders on this proposal. Once the vendor invoices are entered for the purchase orders on this proposal, the WIP Debits column will reflect those invoice amounts.
- 10.3. Vendors & Payables Category
10.3.10. Vendor 1099 Report - 10.3.9. WIP Detail
« Previous - 10.4. Proposals & Sales Category
Next »
10.3.10. Vendor 1099 Report
Vendor 1099 Report
This report identifies payments you have made to your 1099 vendors and allows you to generate 1099 reports.
Clicking on the Vendor 1099 report menu option will open the Vendor 1099 report settings window will open to allow you to select report filter criteria.
Vendors&PayablesVendor1099Options.JPG
| Vendor 1099 Report Filters | Description |
|---|---|
| Filtered to specific vendors | Enter the first few characters of the vendor name and any matches in your database will be presented. Select the appropriate entry from the list. This option is for printing a 1099 form for a specific 1099 vendor. |
| What time frame should the report reflect | Select the timeframe that you wish to generate 1099 reports for. |
| Add this report to your saved reports | Checking this box will allow you to enter a name to save your report criteria. The name you enter here will appear un the My Saved Reports menu option under Reports. |
Vendors&PayablesVendor1099Report.JPG
- 10. Reports
10.4. Proposals & Sales Category - 10.3.10. Vendor 1099 Report
« Previous - 10.4.1. Project Status Report
Next »
10.4. Proposals & Sales Category
Proposals & Sales Reports
To run and view reports related to proposals and sales, highlight the Proposal & Sales menu option under Reports.
Props&SalesMenu.JPG
The reports available in this category are:
Project Status Report
Backlog Report
Invoiced Sales Summary
Bookings Report Summary
Product Sales Report
Job Costing Report
Commissions Report
Commissions Paid Report
Click on any of the report names to run that report.
- 10.4. Proposals & Sales Category
10.4.1. Project Status Report - 10.4. Proposals & Sales Category
« Previous - 10.4.2. Backlog Report
Next »
10.4.1. Project Status Report
Project Status Report
This report tracks all proposals once they have been booked. It contains shipping & delivery information and allows you to record acknowledgment information. This report displays all purchase orders that you have created in DealerChoice as well as acknowledgement and proposal notes information.
Props&SalesProjStatusOptions.JPG
| Project Status Report Options | Description |
|---|---|
| Should the report be filtered to specific proposals | To report on a specific proposal or multiple proposals, enter the proposal number here and select it from the list, you may enter multiple proposal numbers (one at a time) and select each from the list presented. The report will be filtered to show results for only the selected proposals. |
| Should the report be filtered to specific customers | You can filter the report to display results by customer, enter the first few characters of the customer name and any matches in your database will be displayed. Select the appropriate entry from the list. You can select multiple customers (one at a time). |
| Should the report be filtered by proposal status | Select a proposal status from the drop down selection list to filter the report by proposal status. |
| Show work order lines as unacknowledged | Check this box if you want to see any work order line items to appear as unacknowledged. The default report will not display work order line items. |
| Should the report be filtered by sales rep | You can filter the report by specific sales reps by selecting those names here. |
| Should the report be filtered by sales coordinator | You can filter the report by specific sales coordinators by selecting those names here. |
| Should the report be filtered by designer | You can filter the report by specific designers by selecting those names here. |
| Should the report be filtered by project manager | You can filter the report by specific project managers by selecting those names here. |
| Show Purchase Order Detail | In Detail View mode, purchase order information will be displayed, in Simple View mode, purchase orders will appear are links in the report and you must click on the link to view the purchase order information. |
| Add this report to your saved reports | Clicking this box will allow you to enter a name to save your report criteria. This name will appear in the My Saved Reports menu option under Reports. |
The Project Status report show below was run in Detail View mode. You can see the purchase order information is displayed with any acknowledgement information that had been entered. As you can see, punch list purchase orders appear highlighted in yellow so they are easily identified.
Props&SalesProjStatusReport.JPG
You can view proposal details from this report. Click on the underlined proposal number to open the View Proposal window. CLick on the [view proposal] link and the proposal will open. You can also enter a target install date or an actual install date from this window. When an Actual Install Date is entered, this proposal will also appear on the Install and Delivery Schedule.
When you no longer wish to see a proposal in the Project Status report, check the 'Mark this proposal complete' check box. This will prevent the report form appearing in the report. You can view proposals that have been marked as complete via the Proposal Status filter.
Props&SalesProjStatusViewProp.JPG
You can also enter and edit purchase order acknowledgement data from this report. To the left of each purchase order, you will see the 'Update acknowledgement data' icon. Click on this icon to enter, update or edit the data.
Props&SalesProjStatusAckInfo.JPG
You can also update the Proposal, Design or Install notes fields on your proposal from this report. Click on the [new note] link and select the type of note you want to add, enter your text and click on the Save Note button and your proposal will be updated.
Props&SalesProjStatusNotes.JPG
- 10.4. Proposals & Sales Category
10.4.2. Backlog Report - 10.4.1. Project Status Report
« Previous - 10.4.3. Invoiced Sales Summary
Next »
10.4.2. Backlog Report
Backlog Report
This report identifies all proposals and line items that are awaiting specific actions. These actions can include those lines remaining to be invoiced, booked, shipped, etc. The Backlog report is typically used to find proposals containing line items that have not been invoiced. At least one purchase order must exist on a proposal for it to appear on the Backlog report.
Props&SalesBacklogOptions.JPG
| Backlog Report Options | Description |
|---|---|
| Should the report be filtered to specific customers | This report can be filtered to display results for a specific customer or customers. Enter the first few characters of the customers name and any matches in your database will be displayed. Select the appropriate entry from the list. |
| Should the report be filtered to specific vendors | This report can be filtered to display results for a specific vendor or vendors. Enter the first few characters of the vendors name and any matches in your database will be displayed. Select the appropriate entry from the list. |
| Should the report be filtered to specific proposals | to run the report for a specific proposal or proposals, enter the first few characters of the proposal number and any matches in your database will be displayed, select the appropriate entry from the list. |
| What do you want to show | Click on the drop down arrow in this field to view the available filter options. Select the desired option and the report will filtered with this option. The default option is 'Line items remaining to be invoiced'. |
| Include zero sell items | By default, line items with a zero sell price are not included in this report. While you don't have to invoice for line items with a zero sell, you can use this option to identify proposals containing zero sell line items. |
| Show work order lines as unacknowledged | Work Order line items are not acknowledged and are not displayed in the Backlog report by default. If you wish to have the Work Order line items displayed, check this box. |
| Should the report be filtered by sales rep | To display proposals for a specific sales rep, select the name here. |
| Should the report be filtered by sales coordinator | To display proposals for a specific coordinator, select the name here. |
| Should the report be filtered by designer | To display proposals for a specific designer, select the name here. |
| Should the report be filtered by project manager | To display proposals for a specific project manager, select the name here. |
| Show Details | Detail View mode will display purchase order information, in Simple View mode, you must click on the [Show Purchase Order Details] link to see the line item details. |
| Add this report to your saved reports | Clicking here will allow you to save your report criteria, the name you enter here will appear under your My Saved Reports menu option under Reports. |
The example Backlog report shown below was run in Detail view mode and the 'Line items remaining to be invoiced' filter was selected.
At the top of the report you will see sales reps names that are underlined. These names are links to that sales reps section of the report. Click on a name and that section of the report will be displayed.
The proposal number is also underlined. Click on a proposal number to open the proposal.
The purchase order number is also underlined. Click on a purchase order number to open the purchase order.
Each line item displayed will highlight when you place your mouse on the line in the report. You can click on the highlighted line to open the line item details as well.
Props&SalesBacklogReport.JPG
- 10.4. Proposals & Sales Category
10.4.3. Invoiced Sales Summary - 10.4.2. Backlog Report
« Previous - 10.4.4. Bookings Report
Next »
10.4.3. Invoiced Sales Summary
Invoiced Sales Summary
This report identifies invoiced sales within a specific date or date range.
Props&SalesInvoicedSalesSummOptions.JPG
| Invoiced Sales Summary Options | Description |
|---|---|
| What time frame should the report reflect | Select a date filter from the list provided or you can enter your own date range by clicking on the 'A specific date range' option. |
| Show Invoiced Sales Details | In Detail View mode each proposal that includes a customer invoice that was created within the selected date range will be displayed. The proposal displayed is a link to the proposal and can be clicked on to open the proposal. |
| Should the report be filtered by sales rep | The report can be filtered to show a single or multiple sales reps information by selecting sales rep name in this field. |
| Should the report be filtered by to specific customers or vendors | If you want to filter the report to specific customers or vendors, enter the first few characters of the customer/vendor name and any entries in your database will be displayed, select the appropriate entry from the list. |
| Add this report to your saved reports | Checking this box will allow you to enter a name to save your report criteria. The name you enter here will appear in the My Saved Reports menu item under Reports. |
The reports shown below was run in Detail View mode and was filtered to show only invoiced sales for sales rep Test User.
Props&SalesInvoicedSalesSummReport.JPG
- 10.4. Proposals & Sales Category
10.4.4. Bookings Report - 10.4.3. Invoiced Sales Summary
« Previous - 10.4.5. Product Sales Report
Next »
10.4.4. Bookings Report
Bookings Summary
This report shows all sales bookings (proposals with purchase orders) and their profitability within a specific date or date range.
Props&SalesBookingsOptions.JPG
| Bookings Summary Options | Description |
|---|---|
| What time frame should the report reflect | Select a time frame from the choices provided or you can select the 'A specific date range' option to enter your own date range. |
| Show Bookings Details | Detail View mode will display all proposals with purchase orders for each sales rep per the time frame selected. Simple View mode will only list the sales reps names and purchase order totals. Details can be viewed by clicking on the sales rep name. |
| Should the report be filtered by sales rep | If you wish to filter the report to a specific sales rep, select the sales rep name from the list provided. |
| Should the report be filtered to specific customers or vendors | To filter the report to specific customer or vendors, enter the first few characters of the customer or vendor name and select the appropriate entry from the list displayed. |
| Should the report be filtered to specific proposals | To filter the list to a specific proposal, enter the first few characters of the proposal number and any matches in your database will be displayed, select the appropriate entry from the list displayed. |
| Add this to your saved reports | Checking this box will allow you to enter a name to save your search criteria. This name will appear in the My Saved Reports menu option under Reports. |
The example below shows the bookings report filtered to sales rep Test User and was run in Detail view mode. The proposals listed in this report are links to the proposal and can be clicked on to open the proposal.
Props&SalesBookingsReport.JPG
- 10.4. Proposals & Sales Category
10.4.5. Product Sales Report - 10.4.4. Bookings Report
« Previous - 10.4.6. Job Costing Report
Next »
10.4.5. Product Sales Report
Product Sales Report
This report shows all customer sales (invoices) by vendor product and service. It allows you to see what products and services you are selling and which customers are buying them. It also displays the quantity of each product sold, extended cost, extended sell and the GP margin.
Props&SalesProductSalesOptions.JPG
| Product Sales Report Options | Description |
|---|---|
| What time frame should the report reflect | Select a time frame from the list provided or you can enter a customer date range by selecting the 'A specific date range' option. |
| Should the report be filtered to show sales for specific customers | To filter the report to a specific customer, enter the first few characters of the customers name and select the appropriate entry from the list. |
| Should the report be filtered to show products/services for specific vendors | To filter the report to show only specific vendors, enter the first few characters of the vendors name and select the appropriate entry from the list. |
| Should the report be filtered to show only specific products and services | Select the desired products and services from the list and teh report will be filtered to show only those selected products or services. |
| Should the report be filtered by sales rep | Select a sales rep name and the report will be filtered to show only invoices on proposals that the selected sales rep is assigned to. |
| Show Report Details | Detail View mode will display the product or service name as well as invoice date, invoice number, customer name, proposal description. Simple View mode only displays the product or service name and the totals for each. |
| Add this report to your saved reports | CHecking this box will allow you to enter a name to save your report criteria. This name will appear under the My Saved Reports menu under Reports. |
The example Product Sales report shown below was run in Detail view mode with no other filters set.
Props&SalesProductSalesReport.JPG
- 10.4. Proposals & Sales Category
10.4.6. Job Costing Report - 10.4.5. Product Sales Report
« Previous - 10.4.7. Commissions Report
Next »
10.4.6. Job Costing Report
Job Costing Report
This report helps you to identify how profitable your orders are, identifying true costs and actual project margins.
Props&SalesJobCostOptions.JPG
| Job Cost Report Options | Description |
|---|---|
| What time frame should the report reflect | Select a date range from the list provided or you can enter a specific date by selecting one of the 'specific date range' options. |
| Should the report be filtered by sales rep | To filter the report by specific sales rep, select the sales rep name(s) in this filter. |
| Should the report be filtered to specific customers | To filter the report to specific customers, enter the first few characters of the customers name and any entries in your database will be presented, select the appropriate entry from the list. |
| Should the report be filtered to specific proposals | To filter the report to specific proposals, enter the first few characters of the proposal number and any matches in your database will be presented, select the appropriate entry from the list. |
| Add this report to your saved reports | Checking this box will allow you to enter a name to save your search criteria. The name you enter will appear under the My Saved Reports menu option under Reports. |
Props&SalesJobCostReport.JPG
The proposal numbers listed in this report are links to the proposal. You can click on the proposal number link to open the actual proposal.
- 10.4. Proposals & Sales Category
10.4.7. Commissions Report - 10.4.6. Job Costing Report
« Previous - 10.4.8. Commissions Paid Report
Next »
10.4.7. Commissions Report
Commissions Report
This report identifies and manages commissions that are calculated on proposals. You can select the criteria that determines which proposals are to be commissioned. The Commissions Report allows you to identify which proposals are to be marked as commissions paid. You can elect to pay only partial commissions on a proposal. Once a proposal is marked as paid in full on this report, it will no longer appear in the Commissions report. DealerChoice does not create commission checks to your sales reps. The Commissions report allows you to adjust commissions per proposal and to select which proposals commissions are to be paid on and saves that information. After the commission information is posted to the proposals, the Commissions Paid report is run that displays the proposals and commission amounts selected in the Commissions report. The Commissions Paid report is used to notify your payroll department or company of how much commission was earned for each sales rep.
After you select the proposals that are to be paid on this report, you then run the Commissions Paid report to review the results.
Props&SalesJobCommReportOptions.JPG
| Commissions Report Options | Description |
|---|---|
| How should the commissions report be tiered for late payments | If you wish to tier the amount of commission calculated for past due invoices you can select one of the supplied options here (90 days and 120 days). Use the "Create a Custom Late Payment Commission Tier" option to enter your own criteria for calculating commission. |
| In order to pay commissions, proposals must be | These options allow you to select which criteria proposals must meet before commission will be calculated for it. See below for more information on these options. |
| Should the report be filtered by sales rep | You can filter the report by sales rep by selecting the names from the list provided in this prompt field. |
| Add this report to your saved reports | Checking this box will allow you to enter a name for your search criteria, the report name will appear in the My Saved Reports option under Reports. |
| Proposal status settings | Description |
|---|---|
| Commissionable line items must be invoiced | Setting this option will only calculate commission on line items that are invoiced. |
| Proposals must be invoiced in full | With this option set, all line items on the proposal must be invoiced to the customer for the proposal to be eligible for commission. |
| Invoices must be paid in full | All customer invoices must be paid in full for the proposal to be eligible for commission. |
| Proposal payables must be received in full | All vendor invoices must be received for the proposal to be eligible for commission. |
Below is an example of the commissions report. This report
Props&SalesJobCommReport.JPG
The Commissions report lists the proposals that are eligible for commission per the criteria options you selected in the Commissions report options window. Each proposal that is eligible is listed with the appropriate proposal details. The proposal number is listed as a link (underlined) so you can click on the proposal number to open the proposal to view proposal details. The customer name is listed under the proposal number then each product and/or service is listed with the total sell price, cost, profit dollars and GP margin per product/service. The Products and services are combined. For example, if you have 20 line items on your proposal and you used the General Furniture Sales product on each proposal line item, the General Furniture Sales product category will appear as a single line item on the Commissions report.
There is a proposal selection check box to the left of each proposal number appearing on the report. If this check box is left checked, the proposal will be updated with the commission paid amount when you click on the Post Commissions button at the bottom of the report. If the check box is un-checked, the proposal will not be updated.
Vendor credits will appear as a negative cost in the Cost column. The proposal 2009-1034 shows a vendor credit of $1,600.00 in the report image above. This credit will reduce the total costs on the project.
You can enter memo costs (charges against the project) from the Commissions via the [new memo cost] link that appears below the products and services listing. Clicking on this link will open the New Memo Cost window and will allow you to enter additional costs against the proposal.
The Net Invoiced amount is listed as well as the amount Received, total Deposits received and the Total Payables received on this proposal.
The Commission Rate field displays the Commission percentage and the Commission rule name used to calculate the commission amount for each proposal.
The Commission Owed field displays the amount of commission that was calculated for this proposal per the totals listed. The Commission Owed field is an input field. You can change the amount of commission to be paid on the proposal by changing the amount displayed here. If you want to undo your changes to this field, click on the [recalculate] link and the Commission Owed field will update to the originally displayed amount.
The Paid In Full check box tells DealerChoice that you are (or are not) paying this commission in full. If this check box is checked, then the proposal will no longer appear in the Commission report. If you adjust the Commission Owed field to pay a partial commission, un-check this box so the proposal will be considered again if changes are made.
If you have manually adjusted commission amounts on any of the proposals, click on the Recalculate Totals button to update the commission total at the bottom of the report before you click on the Post Commissions button.
The Commission Date input field allows you to choose which date the commissions will appeared as paid on the proposals.
After you have made any commission adjustments and selected (or de-selected) the proposals that are to be marked as commissions paid, click on the Post Commissions button. This will make an entry on the proposal under the Payables - Commissions Paid tab. This entry will show the commission details for this proposal.
The example commission report shows only one proposal (2009-1103) selected. The commission amount of 97.31 is to be paid on this proposal. After the other two proposals were de-selected, the Recalculate Totals button was clicked to update the total commissions to be paid for this sales rep.
Props&SalesJobCommReportII.JPG
The Post Commissions button is now pressed to update the proposal with the commission paid amount. When you click on the Post Commissions button you will see a pop up window asking if you are sure you want to post the commissions. Click the OK button to proceed.
After clicking on the OK button to post the commissions, the commission report window will update displaying the posted commission totals as shown below.
Props&SalesJobCommReportIII.JPG
If you run the commissions report again, the proposal 2009-1103 will not appear because it was marked as paid in full.
The final step is to run the Commissions Paid report which lists the proposals and commission amounts selected to be paid on the Commission Report. See the next section for information on the Commissions Paid report.
- 10.4. Proposals & Sales Category
10.4.8. Commissions Paid Report - 10.4.7. Commissions Report
« Previous - 10.5. Financial Category
Next »
10.4.8. Commissions Paid Report
Commissions Paid Report
This report shows all commissions that have been previously paid to your sales reps. This report is run after you have posted commissions via the Commissions Report.
Props&SalesJobCommPaidOptions.JPG
| Commissions Paid Report Options | Description |
|---|---|
| What time frame should the report reflect | Select a date range option or enter your own date range with the 'A Specific date range' option. |
| Should the report be filtered to specific proposals | Enter a proposal number to generate the report for just that proposal. The commissions must have been previously paid on the proposal for it to appear in this report. |
| Should the report be filtered by sales rep | To filter the report to specific sales reps, select the entries here. |
| Add this report to your saved reports | Checking this box will allow you to enter a name for your report criteria. The name will appear under the My Saved reports menu under Reports. |
The report below is the Commissions Paid report that resulted from flagging proposal 2009-1103 to be paid in the Commissions report, see Commissions Report above for the discussion.
Props&SalesJobCommPaidReport.JPG
The proposal number is a link that when clicked on will open the proposal. This report can be printed or saved as a PDF file to be used for notifying your payroll department or payroll vendor of the commission amounts to be paid to each sales rep. DealerChoice does not create the commission checks for your sales reps.
A sample of the printed Commissions Paid report appears below.
Props&SalesJobCommPaidPrinted.JPG
- 10. Reports
10.5. Financial Category - 10.4.8. Commissions Paid Report
« Previous - 10.5.1. Balance Sheet
Next »
10.5. Financial Category
Financial Reports
To run and view reports related to financial report, highlight the Financial menu option under Reports.
FinancialMenu.JPG
The reports available in this category are:
Balance Sheet
Income Statement
Trial Balance
Statement of Cash Flows
Check Reconciliation Report
Check Run Report
Click on any of the report names to run that report.
- 10.5. Financial Category
10.5.1. Balance Sheet - 10.5. Financial Category
« Previous - 10.5.2. Income Statement
Next »
10.5.1. Balance Sheet
Balance Sheet
The Balance Sheet displays the summary of the value of all assets, liabilities and owners' equity on a specific date. The Balance Sheet can be run to show multiple yearly comparisons.
FinancialBalSheetOptions.JPG
| Balance Sheet Options | Description |
|---|---|
| What time frame should the report reflect | Select a date option to run your report or you can enter a specific date range with the 'A specific date range' option. This option allows you to enter a 'through' date only. |
| Comparison | Selecting a previous cycle allows you to see up to 3 past years data compared to your current balance sheet data. |
| Hide accounts with a zero balance | By default this check box is selected. Checking this box prevents accounts with a zero dollar balance from appearing on your Balance sheet report. Un-checking this box will allow zero balance accounts to be displayed. |
| Exclude year-end closing entries | When running the balance sheet for time frames that contain previous years which may be closed, you can exclude the year end closing journal entries so the balances shown are accurate. They year end closing entries are entries that balance the accounts for starting a new fiscal year. If these balances are included, your balance sheet results will be skewed by these entries. |
| Add this to your saved reports | Checking this box will allow you to enter a name to save your report criteria. The names will appear under the My Saved Reports menu option under Reports. |
Below is a sample Balance sheet report.
FinancialBalSheetReport.JPG
- 10.5. Financial Category
10.5.2. Income Statement - 10.5.1. Balance Sheet
« Previous - 10.5.3. Trial Balance
Next »
10.5.2. Income Statement
Income Statement
The Income Statement identifies profits and losses within a specific period of time.
FinancialIncStatementOptions.JPG
| Income Statement Options | Description |
|---|---|
| What time frame should the report reflect | Select a time frame from the supplied options or select the 'A specific date range' to enter other date ranges. |
| Hide accounts with a zero balance | This option is selected by default. When selected, any accounts with a zero balance will not be displayed. To display accounts that do have a zero balance, un-check this box. |
| Exclude year-end closing entries | When running the Income Statement for previous years, you can exclude the year end closing journal entries so the balances shown are accurate. They year end closing entries are entries the balance the accounts for starting a new fiscal year. If these balances are included, your Income Statement results will be skewed by these entries. |
| Add this report to your saved reports | Checking this box will allow you to enter a name to save your report criteria. The names will appear under the My Saved Reports menu option under Reports. |
A sample Income Statement is shown below.
FinancialIncStatementReport.JPG
- 10.5. Financial Category
10.5.3. Trial Balance - 10.5.2. Income Statement
« Previous - 10.5.4. Statement of Cash Flow
Next »
10.5.3. Trial Balance
Trail Balance
The Trial Balance report identifies the balances of your accounts at a specific point in time.
FinancialTrialBalanceOptions.JPG
| Trial Balance Options | Description |
|---|---|
| What time frame should the report reflect | Select a time frame from the options provided or enter a custom date range by selection the 'A Specific Date Range' option. |
| Should the report be filtered to specific accounts | You can filter the Trial Balance report to specific accounts by selection those accounts here. To select multiple accounts, hold the CTRL (Control) key down on your keyboard while clicking on the next account. |
| Hide accounts with no activity | By default this check box is selected. Checking this box prevents accounts with a zero dollar balance from appearing on Trial Balance report report. Un-checking this box will allow zero balance accounts to be displayed. |
| Should the report be filtered to specific proposals | Entering a proposal number here will filter the report to show only the accounts that have been affected by transactions occurring on the selected proposal for the time frame selected. |
| Should the report be filtered to specific customers or vendors | Entering a vendor name here will filter the report to show only the accounts that have been affected by transactions occurring for the selected vendor for the time frame selected. |
| Show Detail | In Simple View mode, only the account names and account balances will be displayed, in Detail View mode, the account names, account balances and each transaction in the accounts will be displayed for the time frame selected. |
| Add this report to your saved reports | Checking this box will allow you to enter a name to save your report criteria. This name will appear under the My Saved Reports menu option under Reports. |
The image below shows the Trial Balance report run in Simple View mode.
FinancialTrialBalanceReportSimple.JPG
The image below shows the Trial Balance report run in Detail View mode. Each transaction within the time frame selected are displayed. The transactions can be clicked on to open the associated document.
FinancialTrialBalanceReportDetail.JPG
- 10.5. Financial Category
10.5.4. Statement of Cash Flow - 10.5.3. Trial Balance
« Previous - 10.5.5. Check Reconciliation Report
Next »
10.5.4. Statement of Cash Flow
Statement of Cash Flow
This report is under construction and will be documented when the report is ready for distribution.
FinancialStatementCashFlowOptions.JPG
| Statement of Cash Flow Report Options | Description |
|---|---|
| This report is under construction | No report options yet. |
FinancialStatementCashFlowReport.JPG
- 10.5. Financial Category
10.5.5. Check Reconciliation Report - 10.5.4. Statement of Cash Flow
« Previous - 10.5.6. Check Run Report
Next »
10.5.5. Check Reconciliation Report
Check Reconciliation Report
Identifies outstanding checks and provides a tool to clear checks. The Check reconciliation report does not have any filter options. All checks that have been created in DealerChoice that have not been marked as cleared will appear in this report. You can use this report to flag checks as cleared after reviewing your bank statement. This tool will be replaced by the Bank Reconciliation report which will allow you to flag cleared checks and balance your accounts per your monthly bank statement. To mark a check as cleared, click on the check box to the right of the check amount.
FinancialCheckReconReport.JPG
| Check Reconciliation Report | Description |
|---|---|
- 10.5. Financial Category
10.5.6. Check Run Report - 10.5.5. Check Reconciliation Report
« Previous - 10.6. My Saved Reports
Next »
10.5.6. Check Run Report
Check Run Report
The check run report allows you to run a report showing the details of the checks you have created in a date range. All vendor credits with the vendors credit reference number used on a check will be displayed as well as discounts and deposits. This report can be printed for a specific check or multiple checks or for all check within a selected time frame.
FinancialCheckRunOptions.JPG
| Check Run Report | Description |
|---|---|
| What checking account should the report reflect | Select the checking account that you want to run the report for. Each account that you have setup as an account that you can write check from will be available for selection. |
| What time frame should the report reflect | Select the desired date range. Checks printed in the selected date range will be included in the report. Select the 'A specific date range' option to enter a specific date range. |
| Should the report be filtered to specific checks | Specific check numbers can be entered here. The report will only reflect information for the check numbers entered. Separate multiple check number with a comma. |
| Should the report be filtered to specific customers or vendors | To filter the report to a specific customer or vendor, enter the first few characters of the customer/vendor name and any matches in your database will be presented. Select the appropriate entry from the list. The report will be filtered to the checks written to that customer or vendor. |
| Show Cleared Checks | Use this filter option to show only checks that have been marked as cleared, or only checks that have not been marked as cleared. No filter selection here will show all checks within the date range selected. |
| Show Voided Checks | Use this filter to show only voided checks or only un-voided checks. No filter selection here will show voided and active checks within the selected date range. |
| Add this report to your saved reports | Checking this box will allow you to enter a name to save your filter criteria. This name will appear under the My Saved Reports menu option under Reports. Saving the report filter criteria saves you from having to select the same filter options each time you run the report. |
An example of the Check Run Report appears below. You can print this report for a check or checks that have used several vendor credits to send to the vendor so the vendor knows which credits you have used on the payment.
FinancialCheckRunReport.JPG
- 10. Reports
10.6. My Saved Reports - 10.5.6. Check Run Report
« Previous - 10.7. Shared Reports
Next »
10.6. My Saved Reports
My Saved Reports
Each report in the system has an option to allow you to add the report to your saved reports. When the check box is checked, you are prompted to enter a name for your report. This option allows you to save your specific report filter criteria so you do not have to select the same filter criteria for each time you run the report. If the report is saved, you can simply select the report name from the My Saved Reports menu option and the report will be run with the filter criteria had previously saved. Once the report runs, you are able to adjust the report filter criteria and if so desired, you can save that criteria as well.
Click on Reports - My Saved Reports to view any saved reports. Click on the saved report name to run that report.
MySavedReportsMenu.JPG
To save a report, click on the 'Add this report to your saved reports' check box. This will allow you to save your report filter criteria.
The example below shows the Accounts Receivable report being saved with the specific date range of January 1, 2010 through March 31, 2010, for the sales rep names Test User. The Save report will be named '1QTR TEST USER'. The report will not be shared. The AR report options window below shows these settings. Click on the Run Report button to execute the report and your report will be saved for you automatically.
MySavedReportsSave.JPG
The report name '1QTR TEST USER' now appears under the My Saved Reports menu option under reports.
MySavedReportsSaved.JPG
Now that the report criteria has been saved, we can simply click on the report name under the My Saved Reports menu to run the report.
Edit and Delete Saved Reports
You can edit or delete the report criteria for a saved report by first running the report, then click on the [Update Report Settings] link. This will open the Report Settings & Preferences window to allow you to change the filter criteria. Click on the 'Add this report to your saved reports' check box again and run the report. The report will be saved with the updated filter criteria.
To delete a saved report, click on the report in the My Saved Reports menu to run the report. Click on the [Update Report Settings] link and then click on the Delete Report button instead of the Run Report button. The report name will be removed from the My Saved Reports menu. You can add as many report names as you like to the My Saved Report menu.
The example below shows the Report Settings window for a saved report. TO delete this report name from the My Saved Reports menu, click on the Delete Report button.
MySavedReportsDelete.JPG
10.7. Shared Reports
Shared Reports
Each report in the system has an option to allow you to add the report to your saved reports. When the check box is checked, you are prompted to enter a name for your report. This option allows allows you to set the report as a shared report so the same report can be used by others. Shared reports appear under the Shared Reports menu option.
Click on Reports - Shared Reports to view any reports that have been shared with you or with any of the groups you are assigned to. Click on the shared report name to run that report.
SharedReportsMenu.JPG
In the menu displayed above, the Shared Reports menu is empty. We will generate a Balance Sheet report to be shared with all members of the Administrators group.
The Balance sheet is under the Financial report menu. We entered our Balance sheet criteria and we clicked on the 'Add this report to your saved reports' check box and entered a name (Bal Sheet 1ST QTR) for our saved report. The window will update displaying the 'Share this report?' check box. Click on the 'Share this report?' check box.
SharedReportsOption.JPG
The window will update displaying the user names of all users defined in your site as well as all group names defined in your site. You can select individual users to share the report with or you can select an entire group (or groups) to share the report with. In this example we are selecting the Administrators group to share this report with.
Only the user that shared the report has the ability to delete the report. The shared report can be deleted from the Settings & Preferences window via the Delete Report button.
Click on the Run Report button to run the report. The report will now appear in the Shared Reports menu of all members of the Administrators group as shown below.
SharedReportsList.JPG
- Table of Contents
11. Help & Communications - 10.7. Shared Reports
« Previous - 11.1. Fax & Email Terminal
Next »
11. Help & Communications
Help & Communications
The Help & Communications menu contains two options, the Fax & Email Terminal menu option and the DealerChoice User Manual menu option, as shown below.
Help&CommMenu.JPG
Fax & Email Terminal
The Fax & Email Terminal allows quick access to the fax and email functions without having to navigate to a particular proposal first. This option allows you to enter your proposal number and takes you directly to the Fax & Email terminal for that proposal. There are two tabs in the Communications window, the Message Terminal tab and the Message Log tab.
The Message Terminal tab allows you to select documents, select the recipient and include any files that may be stored in the File Vault that are to be sent.
The Message Log stores information regarding each message that has been emailed or faxed for the proposal being worked on.
- 11. Help & Communications
11.1. Fax & Email Terminal - 11. Help & Communications
« Previous - 11.2. User Manual
Next »
11.1. Fax & Email Terminal
Fax & Email Terminal
Help&CommInput.JPG
Enter the first few characters of the proposal and any matches in your database will be presented in a selection list, click on the appropriate proposal to select it and the Communications window will open.
Email Message Type
Help&CommInputEmail.JPG
You can send your documents either by email or fax from this window. Select the message type from the drop down selection window.
Select the documents you wish to send by clicking in the check box to the left of the document name. You can select multiple documents if you wish. Any documents that are checked will be included as attachments to the email or fax.
The email option appears above. Enter the email address of the intended recipient. The [search] link allows you to enter the first few characters of the recipient's name and any matches found in your database will be presented and available for selection. The recipients must have an email address in the Contacts database to be available for email.
Enter the Subject text in the Subject input box and you may also include text regarding the attachments in the Message Body section.
If any files had been uploaded into the File Vault for this proposal, those document names will appear in the "'Attachments From File Vault' selection box. Any of the File Vault files can also be included as attachments to the email or fax as well.
After preparing your message, click on the Send button and the message will be placed in the Communications Queue. This is a database storage area that holds email and fax messages waiting to be processed. Approximately every 10 minutes, the Communications Queue is processed and any messages in the queue will be processed and sent. If a rejection or failure message is returned by the receiving email server or fax machine, DealerChoice will send an internal message to the user the submitted the message notifying them of the failure.
Fax Message Type
Help&CommInputFax.JPG
The Fax option allows to you select the documents that are to be faxed by placing clicking in the check box to the left of the document name.
Enter the name of the recipient in the To input field, or click on the [search] link and enter the first few characters of the recipients name. Any matches in your database will be presented an available for selection. The recipients must have a fax number entered in the Contacts database to be available for faxing.
If any files had been uploaded into the File Vault for this proposal, those document names will appear in the "'Attachments From File Vault' selection box. Any of the File Vault files can also be included as attachments to the email or fax as well.
After preparing your message, click on the Send button and the message will be placed in the Communications Queue. This is a database storage area that holds email and fax messages waiting to be processed. Approximately every 10 minutes, the Communications Queue is processed and any messages in the queue will be processed and sent. If a rejection or failure message is returned by the receiving email server or fax machine, DealerChoice will send an internal message to the user the submitted the message notifying them of the failure.
Message Log tab
The Message Log stores information regarding each message that has been emailed or faxed for the proposal being worked on. To see messages that have been sent and their status, click on the Message Log tab. Any previously sent messages and any pending messages will be displayed as shown below.
Help&CommInputMSGLog.JPG
Message Log Status
While the message status is still in the 'Pending' state, which means that it is waiting to be processed for sending, the 'Remove from queue' icon appears. This icon, if clicked will allow you to remove the pending message from the message queue and it will not be sent. Once the message queue has started processing the message, you cannot remove it from the queue. Check the message queue after you have sent your message to see the updated status progress. If an emailed or faxed message fails to be sent and if the receiving email server or fax machine sends a failure notice, the message log will reflect the failure message. If the message fails to be received, you should verify the email address/fax number of the recipient and then try to send your message again.
The status field can be one of the following:
Pending
Processing
Sent
Failed
- 11. Help & Communications
11.2. User Manual - 11.1. Fax & Email Terminal
« Previous - 12. Electronic Order Interfaces
Next »
11.2. User Manual
User Manual
This user manual includes the latest features in this version. This is an online version of the manual and it is not intended to be printed. This manual will be updated with new features as they become available. If you find any errors in this manual please report them to Support@dc-sysllc.com.
The User Manual is available for viewing from the Help & Communications menu by clicking on the DealerChoice User Manual option as shown below.
Help&CommUserManualMenu.JPG
If you have suggestions for information that should be included in this manual, please forward them to Support@dc-sysllc.com.
- Table of Contents
12. Electronic Order Interfaces - 11.2. User Manual
« Previous - 12.1. Allsteel Electronic Order Interface
Next »
12. Electronic Order Interfaces
Electronic Order Interfaces
DealerChoice has created several electronic order interfaces that help expedite the placement of orders with particular vendors. The electronic order interface template is a file that maps the order data fields per the vendors electronic order specifications. This file is what determines how the data will be formatted and in some cases, how the purchase order data is transmitted to the vendor. The template files are managed by DealerChoice. If you work with a vendor that supports electronic order submissions, please email Dealer Choice support at support@dc-sysllc.com with the vendor name and if possible a vendor contact. They will contact the vendor to discuss the electronic order process on your behalf.
Once an electronic order template has been added to a vendors profile in the Vendors database, you will have the ability to generate purchase orders that can be sent (emailed or via web services) to the vendor as an electronic order.
DealerChoice has created electronic order interfaces for the following vendors:
Allsteel
Geiger
Haworth
Herman Miller
Kimball
Knoll
National
OFUSA
Teknion
The electronic order interface process begins with purchase order creation. If an electronic order interface is in place for a vendor, the "Submit Via" field in the Create Purchase Orders window will include an option named "Generate electronic order". This option will allow you to create the electronic order file for the vendor.
- 12. Electronic Order Interfaces
12.1. Allsteel Electronic Order Interface - 12. Electronic Order Interfaces
« Previous - 12.2. Geiger Electronic Order Interface
Next »
12.1. Allsteel Electronic Order Interface
Allsteel Electronic Order Interface
EOI_Allsteel.JPG
- 12. Electronic Order Interfaces
12.2. Geiger Electronic Order Interface - 12.1. Allsteel Electronic Order Interface
« Previous - 12.3. Haworth Electronic Order Interface
Next »
12.2. Geiger Electronic Order Interface
Geiger Electronic Order Interface
EOI_Geiger.JPG
- 12. Electronic Order Interfaces
12.3. Haworth Electronic Order Interface - 12.2. Geiger Electronic Order Interface
« Previous - 12.4. Herman Miller Electronic Order Interface
Next »
12.3. Haworth Electronic Order Interface
Haworth Electronic Order Interface
EOI_Haworth.JPG
- 12. Electronic Order Interfaces
12.4. Herman Miller Electronic Order Interface - 12.3. Haworth Electronic Order Interface
« Previous
12.4. Herman Miller Electronic Order Interface
Herman Miller Electronic Order Interface
EOI_Haworth_Send_It.JPG
EOI_Haworth_Save_It.JPG